
Oh, friends, do I have a treat for you today! There’s something truly magical about a rich, chocolatey dessert that feels incredibly decadent, yet is surprisingly simple to make. For years, I thought a truly luxurious chocolate cake had to be complicated, but then I discovered this gem. This is the dessert I bring to potlucks, the one I whip up when I need a serious chocolate fix, and the one that always, always gets rave reviews: my Ridiculously Easy Vegan Chocolate Mousse Cake- No Nuts, No Tofu!
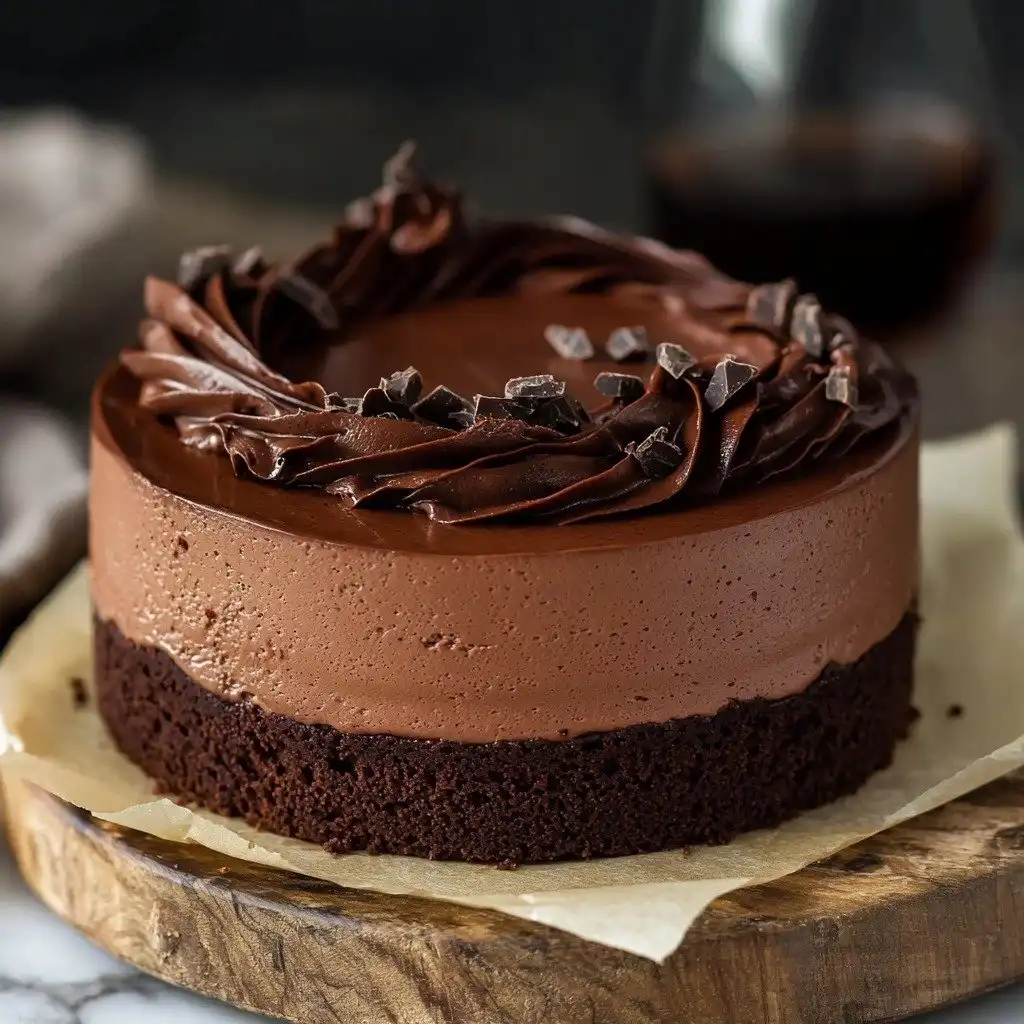
Why You’ll Love This Ridiculously Easy Vegan Chocolate Mousse Cake- No Nuts, No Tofu!
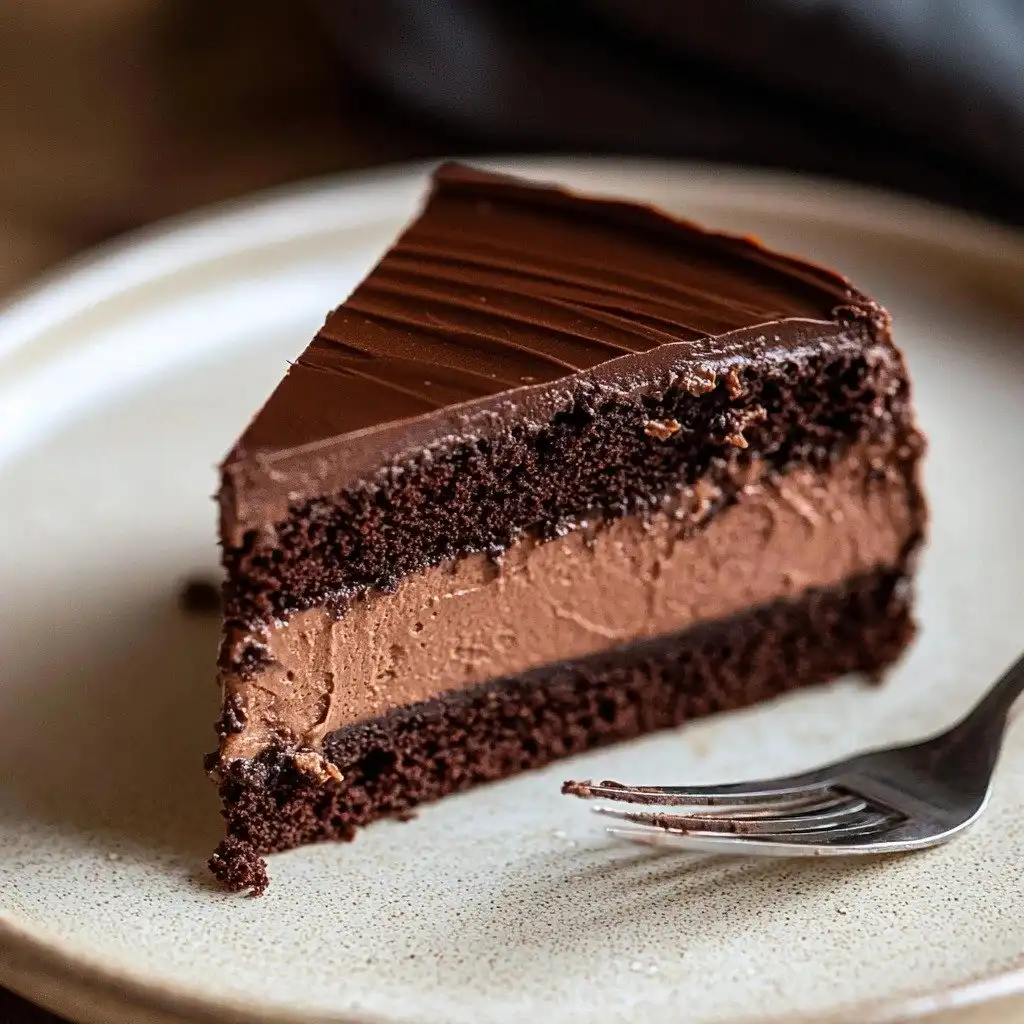
- It’s incredibly fudgy and rich, with a melt-in-your-mouth mousse layer that’s pure bliss.
- No fancy equipment needed, and the steps are super straightforward, even for beginner bakers.
- You won’t believe it’s vegan! Seriously, no nuts or tofu, just pure chocolatey goodness.
- It’s the perfect dessert for any occasion, from a casual weeknight treat to an impressive dinner party finale.
Ingredients You’ll Need
- All-purpose flour or gluten-free 1:1 baking flour: Sifting is key here for a light, airy cake texture! It removes any lumps and helps everything combine smoothly.
- Dutch-process cocoa powder: This is what gives our cake that deep, rich chocolate color and flavor. Don’t skip sifting it to avoid lumps!
- Vegan butter: Make sure it’s melted and then cooled to room temperature. This helps it incorporate beautifully without scrambling anything.
- Dairy-free yogurt: This adds moisture and a lovely tang to the cake without using eggs or dairy.
- Hot coffee: Trust me on this one! It really enhances the chocolate flavor without making the cake taste like coffee.
- Vegan dairy-free chocolate: Use good quality chocolate chips or a chopped bar for the best flavor in your mousse and ganache.
- Heavy vegan cream: This is the secret to our incredibly fluffy mousse and silky ganache. Make sure it’s nice and cold for the mousse!
How to Make Ridiculously Easy Vegan Chocolate Mousse Cake- No Nuts, No Tofu! Step by Step
First things first, preheat your oven to 350°F (175°C) and get your springform pan ready. Line the bottom with parchment paper and grease the sides well. This makes releasing your beautiful cake so much easier later on!
Now, let’s make the cake batter. In one bowl, whisk together all your dry ingredients – flour, cocoa powder, baking powder, baking soda, and salt. In a separate, larger bowl, you’ll combine the yogurt, cooled melted vegan butter, both sugars, and vanilla. Then, you’ll gently fold in your dry mixture, followed by the dairy-free milk. Don’t worry if it looks a little thick! The magic happens when you pour in the hot coffee and whisk it in. It will transform into a smooth, pourable batter.
Pour your batter into the prepared springform pan and bake for about 33-35 minutes. You’ll know it’s done when a toothpick inserted into the center comes out clean. Let it cool in the pan for 30 minutes, then carefully remove it, level the top with a knife, and place it back in the pan to cool completely. This is super important before adding the mousse!
My Top Tips for Success
- I always sift my flour and cocoa powder. It makes such a difference in the cake’s texture!
- Trust me on this one: allow the cake layer to cool completely before adding the mousse. A warm cake will melt your beautiful mousse!
- When making the mousse, make sure your heavy vegan cream is super cold, and chill your bowl and whisk attachment in the freezer. This helps it whip up beautifully to stiff peaks.
- Don’t rush the chilling process for the mousse cake. Those 3 hours (or even better, overnight!) are crucial for it to set perfectly.
- For the ganache, let it cool for about 30 minutes at room temperature before pouring it over the mousse. This ensures it sets nicely and doesn’t melt the mousse.
Common Mistakes to Avoid
- Not sifting dry ingredients: This can lead to lumpy batter and a dense cake. Always sift your flour and cocoa powder for a smooth result.
- Adding hot butter to the wet ingredients: This can cook your yogurt or other ingredients. Always ensure your melted vegan butter is cooled to room temperature.
- Not fully cooling the cake layer: If your cake is warm when you add the mousse, the mousse will melt and won’t set properly. Patience is a virtue here!
- Overwhipping the heavy vegan cream: While you want stiff peaks, overwhipping can lead to a grainy texture. Stop as soon as it’s firm and holds its shape.
- Pouring hot ganache over cold mousse: This will melt the mousse. Make sure the ganache has cooled to room temperature and is slightly thickened before pouring.
How to Store Ridiculously Easy Vegan Chocolate Mousse Cake- No Nuts, No Tofu!
- Refrigeration: Store in an airtight container in the fridge for up to 3-4 days.
- Freezing: For longer storage, place the cake in an airtight container in the freezer for up to 2 months.
Frequently Asked Questions
Can I make this cake gluten-free?
Yes, absolutely! Just use a 1:1 gluten-free baking flour blend in place of the all-purpose flour. The results are still delicious!
What kind of vegan heavy cream should I use?
Look for a full-fat, unsweetened vegan heavy cream alternative, often found in the refrigerated dairy-free section of your grocery store. Brands like Silk or Country Crock make great options.
Can I make this cake ahead of time?
Yes, this cake is perfect for making ahead! It needs a good 3 hours (or even better, overnight) to chill, so it’s a great dessert to prepare the day before you plan to serve it.
What if I don’t have a springform pan?
While a springform pan is ideal for easy release, you could try baking the cake in a regular 9-inch round cake pan lined with parchment paper that hangs over the sides, creating “handles” to lift it out. However, releasing the mousse layer might be trickier.
Can I skip the coffee?
You can, but I don’t recommend it! The hot coffee doesn’t make the cake taste like coffee; instead, it really deepens and enhances the chocolate flavor. It’s a secret ingredient for rich chocolate desserts!
I hope you give this Ridiculously Easy Vegan Chocolate Mousse Cake- No Nuts, No Tofu! a try! It’s truly a showstopper that’s surprisingly simple. If you make it, please let me know how it turns out in the comments below – I love hearing from you!
PrintRidiculously Easy Vegan Chocolate Mousse Cake- No Nuts, No Tofu!
A rich, decadent, and surprisingly simple vegan chocolate mousse cake with a fudgy cake base and silky chocolate ganache topping.
- Prep Time: 30
- Cook Time: 35
- Total Time: 285
- Yield: 12 servings
- Category: Dessert
- Method: Baking, No-Bake
- Cuisine: American
- Diet: Vegan
Ingredients
- 2/3 cup (150 mL) dairy free milk, room temperature
- 1 1/2 cups (188 g) all purpose flour or gluten free 1:1 baking flour, sifted
- 1/2 cup (48 g) Dutch-process cocoa powder, sifted
- 1 tsp baking powder
- 3/4 tsp baking soda
- 1/4 tsp sea salt
- 1 cup (200 g) granulated sugar
- 1/4 cup (55 g) light brown sugar
- 1/4 cup (57 g) unsalted vegan butter, melted and cooled to room temperature
- 1/2 cup (110 g) dairy free yogurt, room temperature
- 1/2 tsp vanilla extract
- 1/2 cup ( mL) HOT coffee (can be brewed or instant)
- 1 cup (240 g) vegan dairy free chocolate
- 3 cups (720 mL) heavy vegan cream, divided and cold
- 1 batch vegan chocolate ganache
Instructions
- Preheat the oven to 350°F (175°C).
- Line the bottom of a 9-inch springform pan with parchment paper.
- Grease the edges of the springform pan with olive or cooking oil.
- Set the prepared pan aside.
- In a medium bowl, whisk together the sifted flour, sifted cocoa powder, baking powder, baking soda, and sea salt.
- Set the dry mixture aside.
- In a large bowl, whisk together the dairy free yogurt, cooled melted vegan butter, light brown sugar, granulated sugar, and vanilla extract.
- Add the flour mixture to the wet mixture.
- Continue to whisk while pouring in the dairy free milk.
- Once nearly combined, pour in the hot coffee.
- Whisk just until the coffee is incorporated into the cake batter.
- Pour the batter into the prepared springform pan.
- Bake for 33-35 minutes, or until a toothpick inserted into the center comes out clean.
- Remove the cake from the oven.
- Allow the cake to cool in the springform pan for 30 minutes.
- Transfer the cake out of the pan.
- Use a large kitchen knife to level off the top of the cake.
- Carefully place the cake back into the springform pan.
- Allow the cake to fully cool before starting the mousse, about 1-2 hours.
- While the cake is cooling, place a large bowl or stand mixer bowl into the freezer.
- Place the whisk attachment into the freezer as well.
- In a microwave-safe bowl or a saucepan over medium-low heat, heat 1 cup (240 mL) of the heavy vegan cream until hot, about 100°F (38°C).
- Once hot, pour the heated cream over the vegan dairy free chocolate in a separate heat-safe bowl.
- Allow the mixture to sit for a few minutes to melt the chocolate, ensuring the chips are fully submerged.
- Whisk the mixture until the chocolate is completely melted into the heavy cream, forming a ganache-like consistency.
- Set this chocolate mixture aside to cool at room temperature.
- In the chilled bowl, add the remaining heavy vegan cream.
- Begin to whip the heavy cream until stiff peaks form.
- Pour the cooled chocolate mixture into the whipped cream.
- Mix again on medium-high speed, scraping the bowl as needed, until fully combined and fluffy.
- Pour the mousse onto the cooled chocolate cake layer in the springform pan.
- Use an offset spatula to smooth the top of the mousse.
- Place the mousse cake into the fridge to chill for 3 hours, preferably overnight.
- Cover the cake with plastic wrap to prevent drying out while chilling.
- One hour before serving, prepare the chocolate ganache.
- Heat the vegan heavy cream again until hot.
- Pour the hot heavy cream over the chocolate chips in a heat-safe bowl.
- Let the chocolate sit for 2-3 minutes to melt, fully submerged in the cream.
- Whisk until smooth.
- Set the ganache aside to cool for 30 minutes at room temperature.
- Once the ganache reaches room temperature, pour or spoon it over the top of the set chocolate mousse.
- Place the chocolate mousse cake back into the fridge to set for 20-30 minutes before serving.
- Once the mousse cake is entirely set, use a butter knife to carefully run along the edges of the mousse cake walls and sides of the springform pan to easily release the cake.
- Carefully release the springform cake walls.
- Plate the mousse cake.
- Decorate with berries.
- Serve immediately.
- When not slicing, keep the mousse cake in the fridge or freezer.
Notes
Ensure all room temperature ingredients are truly at room temperature for best mixing.
Sifting dry ingredients and chilling the bowl/whisk for the mousse are crucial steps for texture.
Do not rush the cooling time for the cake or the chilling time for the mousse.
Use a good quality vegan chocolate for the best flavor in your mousse and ganache.


