
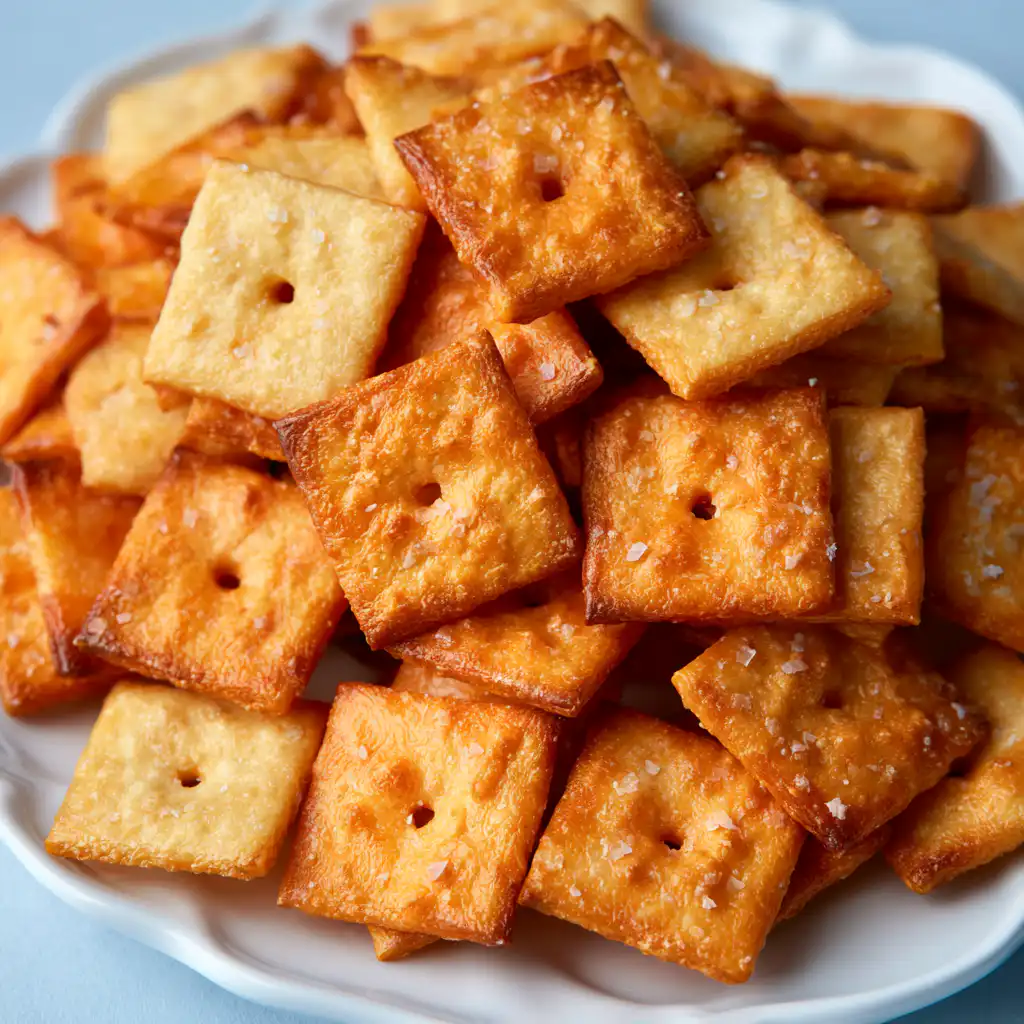
Oh, friends, do I have a treat for you today! There’s something so wonderfully satisfying about recreating a beloved snack right in your own kitchen. For me, it started with a craving for those cheesy, crispy crackers we all grew up with, but with that special, tangy twist only sourdough can provide. That’s how this Sourdough Cheez Its Recipe came to be, and honestly, it’s become a new favorite in our house. It’s warm, it’s cheesy, and it fills the kitchen with the most incredible aroma. Trust me, you’re going to love making these!
Why You’ll Love This Sourdough Cheez Its Recipe
- They are incredibly cheesy and perfectly crispy, just like the classic, but better!
- Using sourdough discard adds an amazing depth of flavor and a slight tanginess.
- It’s a super fun and rewarding baking project, even for beginners.
- Perfect for snacking, lunchboxes, or impressing friends at your next gathering.
Ingredients You’ll Need
- Cheddar Cheese: Freshly shredded is key here! Pre-shredded cheeses often have anti-caking agents that can affect the texture and melt of your crackers.
- Sourdough Discard: This is the inactive sourdough starter you typically “discard” before feeding your active starter. It adds a wonderful tangy flavor without needing to be active.
- Unsalted Butter: Make sure it’s cold and cubed! This helps create those flaky layers in the cracker dough.
- All-Purpose Flour: The backbone of our crackers. No special flour needed here, just your everyday all-purpose.
- Garlic Powder & Onion Powder: These two bring that signature savory, umami flavor that makes these crackers so addictive.
- Salt: Essential for flavor balance.
- Flaky Salt: This is optional, but I highly recommend it for that extra pop of salty crunch on top!
How to Make Sourdough Cheez Its Recipe Step by Step
First things first, grab your food processor. This makes the dough come together so easily! You’ll toss in all your ingredients, except for the flaky salt, and pulse until it looks like wet sand. Don’t worry if it seems crumbly at first; it will start to come together. You want it to stick when you press a little bit between your fingers.
Once your dough is ready, turn it out onto a clean surface and gently shape it into a flat disc. Wrap it up in plastic and pop it into the fridge for at least 30 minutes. This chilling time is super important; it helps the butter firm up and makes the dough much easier to roll. If you’re feeling adventurous, you can even leave it in the fridge for up to two days for a longer ferment, which deepens the flavor!
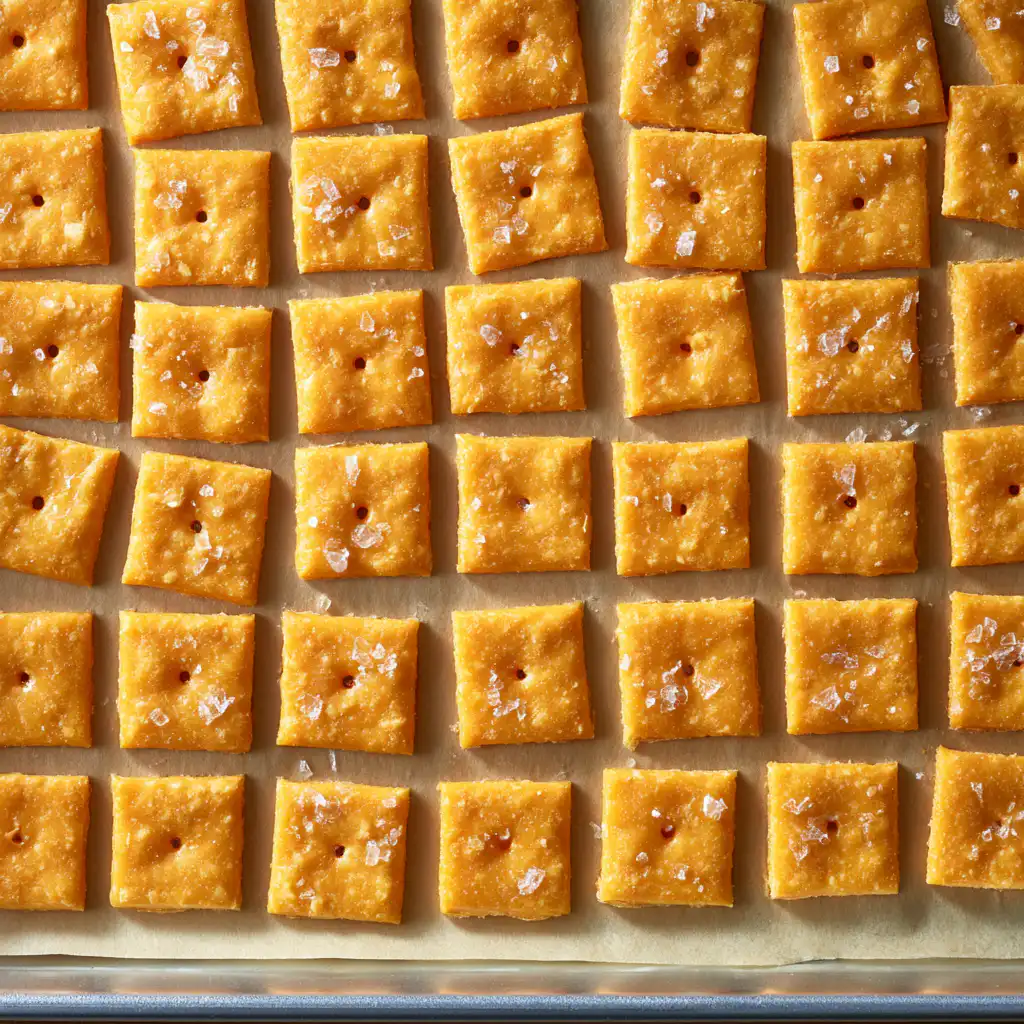
When you’re ready to bake, preheat your oven to 350°F and line a baking sheet with parchment paper. If your dough was long-fermented, let it sit at room temperature for 15-20 minutes first; it will be much more cooperative. Now for the fun part: rolling! On a lightly floured surface or parchment, roll your dough into a 9-inch rectangular shape that’s 1/16th of an inch thick. The more even you roll it, the more consistently your crackers will bake. Use a pizza cutter or a sharp knife to trim it into an 8-inch square, then slice it into eight, 1-inch vertical strips, and then make 8 perpendicular slices, also 1-inch wide. You should be left with 64, 1-inch square-shaped pieces of cracker dough. Place them on your prepared baking sheet, give each one a little poke with a toothpick (this stops them from puffing up too much), and sprinkle with flaky salt. Bake for 18-22 minutes, until they’re beautifully golden brown. While one batch bakes, you can re-roll and cut the remaining dough until all of the crackers are cut. You will need to bake in a few batches. Let them cool completely on a wire rack – they get extra crispy as they cool!
My Top Tips for Success
- I always recommend shredding your own cheese. It truly makes a difference in texture and flavor.
- Don’t skip the chilling step! It’s crucial for a manageable dough and crispy crackers.
- For the crispiest crackers, roll your dough as evenly and thinly as possible, aiming for that 1/16th inch.
- Trust me on this one: dock those crackers with a toothpick! It prevents them from turning into puffy pillows.
- Keep an eye on them while baking; ovens can vary, and you want them golden, not burnt.
- If you have extra sourdough discard, this is a fantastic way to use it up. I also love using it in Sourdough Discard Lemon Blueberry Sweet Rolls!
Common Mistakes to Avoid
- Not chilling the dough enough: If your dough is too warm, it will be sticky and hard to roll thinly. Always chill for at least 30 minutes.
- Overworking the dough: Mixing the dough too much can lead to tough crackers. Mix just until it comes together.
- Rolling the dough unevenly: This can result in some crackers burning while others are still soft. Take your time to roll it to an even thickness.
- Forgetting to dock the crackers: Undocked crackers will puff up like little balloons instead of staying flat and crispy.
- Baking at too high a temperature: This can cause the crackers to brown too quickly on the outside before they’re fully crispy in the center. Stick to 350°F.
How to Store Sourdough Cheez Its Recipe
- Room Temperature: Store in an airtight container for up to 5-7 days.
- Freezer: You can freeze the unbaked dough, tightly wrapped, for up to 1 month. Thaw in the fridge before rolling and baking.
Frequently Asked Questions
Can I use active sourdough starter instead of discard?
While you can, discard is preferred for its milder flavor and consistency in this recipe. Active starter might make the crackers puffier or alter the texture slightly.
What if I don’t have a food processor?
You can make the dough by hand! Cut the cold butter into the flour, then mix in the cheese, sourdough discard, and seasonings until a shaggy dough forms. Knead briefly until it comes together.
Can I use a different type of cheese?
Absolutely! While cheddar gives that classic flavor, feel free to experiment with other hard or semi-hard cheeses like Gruyere, Parmesan, or a spicy Monterey Jack for a different twist.
My crackers aren’t crispy enough, what went wrong?
This usually means they needed a bit more time in the oven or were rolled too thick. Try baking them for a few extra minutes until they are a deeper golden brown, and ensure your dough is rolled very thin.
Can I make these gluten-free?
I haven’t tested a gluten-free version of this recipe myself. Substituting gluten-free flour blends can change the dough’s texture significantly, so adjustments would likely be needed.
I hope you have the best time making this Sourdough Cheez Its Recipe! It’s such a fun and rewarding bake, and honestly, homemade is just so much better. Give them a try, and let me know how they turn out – I just know you’ll love them as much as I do!
PrintSourdough Cheez Its Recipe

Crispy, cheesy, and perfectly tangy, these homemade Sourdough Cheez Its are a delicious upgrade to a classic snack. Made with sourdough discard, they’re incredibly flavorful and fun to bake.
- Prep Time: 20
- Cook Time: 20
- Total Time: 40
- Yield: 64 crackers
- Category: Snack
- Method: Baking
- Cuisine: American
- Diet: Vegetarian
Ingredients
- 226 grams cheddar cheese, freshly shredded
- 100 grams sourdough discard
- 42 grams unsalted butter, cold + cubed
- 140 grams all-purpose flour
- 1 gram garlic powder
- 1 gram onion powder
- 3 grams salt
- flaky salt if desired
Instructions
- Add cheddar cheese, sourdough discard, unsalted butter, all-purpose flour, garlic powder, onion powder, and salt to a food processor.
- Mix until a wet sand texture is formed.
- Test the dough by pressing a piece together; it should stick to itself and not be dry.
- Remove the dough from the food processor onto a clean work surface.
- Shape the dough into a flat disc.
- Cover the dough with plastic wrap.
- Chill the dough for at least 30 minutes in the fridge (or up to 2 days for long-ferment).
- Preheat the oven to 350 degrees F.
- Line a baking sheet with parchment paper.
- If long-fermented, leave the dough at room temperature for 15-20 minutes to soften slightly.
- On a lightly floured surface or parchment paper, roll the dough into a 9-inch rectangular shape.
- Roll the dough to 1/16th of an inch thick, ensuring evenness.
- Using a pizza cutter or sharp knife, trim the dough to create an 8-inch square.
- Slice the dough into eight, 1-inch vertical strips.
- Make 8 perpendicular slices, also 1-inch wide, to create 64 square pieces.
- Place the shaped cracker dough on the prepared baking sheet with spaces in between.
- Use a toothpick to dock a hole in the center of each cracker.
- Sprinkle the dough with flaky sea salt, if desired.
- Bake the crackers for 18-22 minutes, or until they are golden brown.
- While the first batch bakes, re-roll and cut the remaining dough.
- Bake remaining crackers in batches.
- Remove baked crackers from the oven.
- Cool completely on a wire rack before serving.
Notes
Freshly shredded cheese makes a big difference in flavor and texture.
Don’t skip the chilling step; it helps the butter firm up and makes the dough easier to roll.
Roll the dough as evenly and thinly as possible for consistently crispy crackers.
Docking the crackers with a toothpick prevents them from puffing up too much.


