
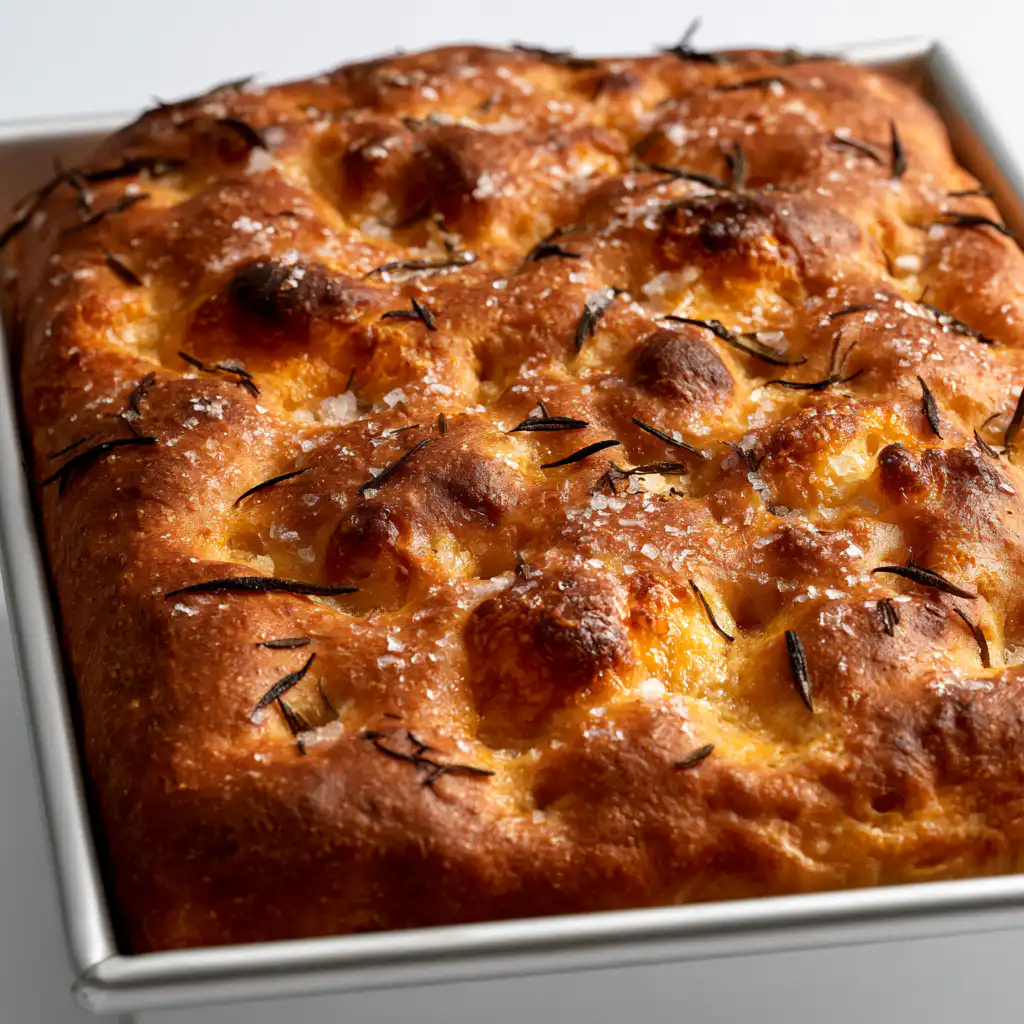
There’s just something magical about fresh bread baking in your kitchen, isn’t there? For me, the aroma of a warm loaf instantly brings a sense of comfort and home. This past weekend, I finally perfected my recipe for Sourdough Focaccia in a Loaf Pan, and let me tell you, it was a game-changer. The crust was perfectly crisp, the inside impossibly soft, and the little pockets of olive oil and flaky salt were just divine. It’s quickly become a new favorite around here!
Why You’ll Love This Sourdough Focaccia in a Loaf Pan
- It’s incredibly soft and airy on the inside, with a wonderfully crisp, golden-brown crust.
- The loaf pan makes it super easy to achieve that perfect focaccia shape without a huge baking sheet.
- You get all that incredible sourdough flavor with minimal fuss – seriously delicious!
- It’s perfect for sharing, dipping in olive oil, or making the best sandwiches you’ve ever had.
Ingredients You’ll Need
- Active Sourdough Starter: This is the heart of our focaccia! Make sure it’s active and bubbly, meaning it’s been fed recently and is at its peak.
- Filtered Water: Using filtered water can make a difference in your sourdough, as chlorine in tap water can sometimes inhibit yeast activity.
- Bread Flour: This flour has a higher protein content, which gives our focaccia that lovely chewy texture we’re after.
- Salt: Essential for flavor! Don’t skimp on it, as it balances the richness of the bread.
- Oil for Pan & Drizzling: Olive oil is key here. It prevents sticking, adds incredible flavor, and helps create that beautiful crispy crust.
- Flaky Salt: This is for finishing! It adds a wonderful pop of texture and salinity to each bite.
How to Make Sourdough Focaccia in a Loaf Pan Step by Step
First things first, we’ll get our dough started. In a good-sized bowl, you’ll mix your active sourdough starter and filtered water until it looks like a milky liquid. A Danish dough whisk is great for this, or just use your hand! Then, you’ll add your bread flour and salt, mixing until all the flour is totally incorporated. Don’t worry if it seems super sticky and wet – that’s exactly how it should be! Cover it up and let it rest for at least 30 minutes.
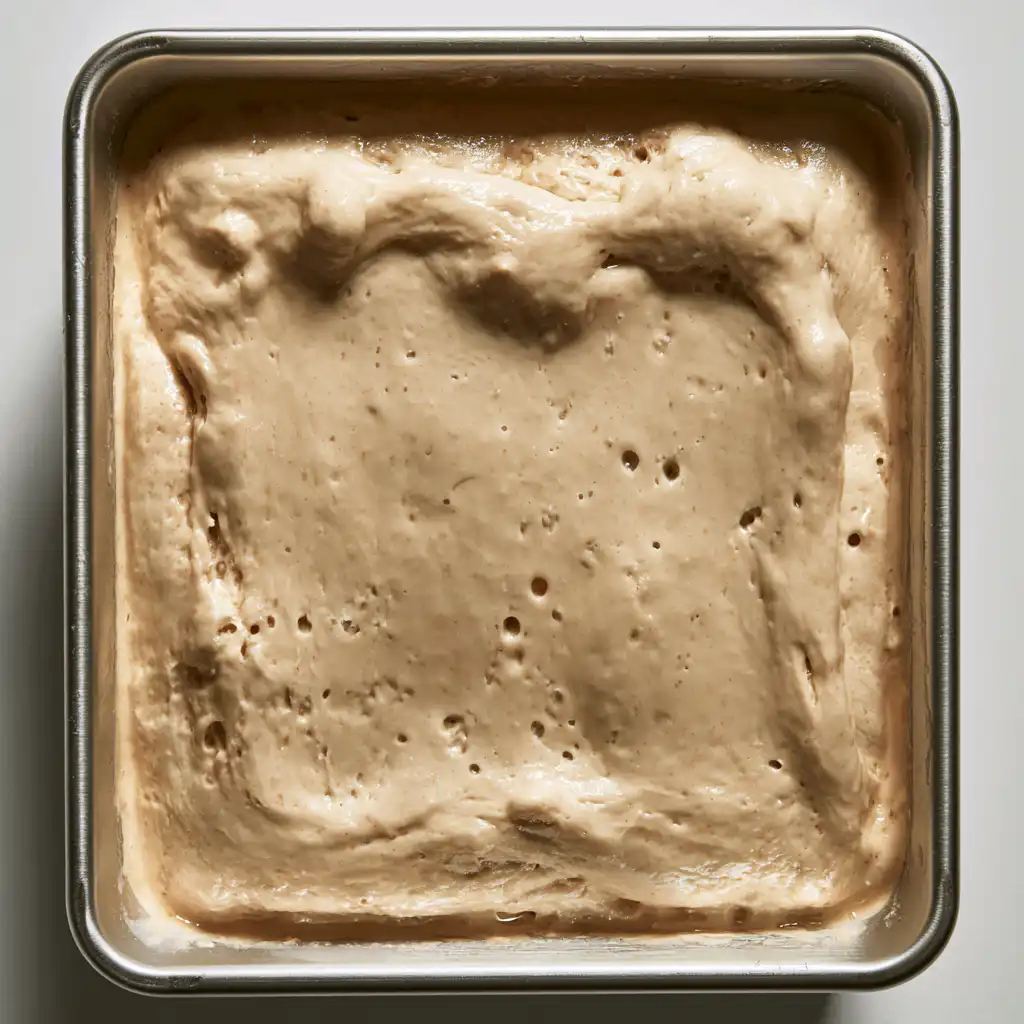
Next comes the stretch and folds, which are so satisfying. You’ll gently scrape the dough away from the sides of the bowl. With slightly wet hands, grab a section of the dough, stretch it up, and fold it over itself. Rotate your bowl and repeat this a few times until you’ve gone all the way around. You’ll notice the dough becoming much smoother and more elastic. Then, you’ll flip the dough, tucking the sides underneath to create a smooth ball. This is where the magic happens and the gluten starts to develop! Cover your bowl again and let it rise in a warm spot for bulk fermentation. This can take 8-10 hours in a 70°F kitchen, but remember to look for the signs: doubled in size, light, airy, and jiggly with visible bubbles!
Once your dough has doubled, it’s time to shape it for baking. Drizzle about 28 grams of olive oil generously into your loaf pan, making sure to coat the bottom and sides. Gently release the dough from its bowl and carefully tilt it into the prepared pan. Now, fold the top of the dough towards the middle, gently pressing it down, and repeat with the bottom to create a “tri-fold.” Flip the dough seam-side down, cover it, and let it rise again until it’s just under the rim of the pan. This second rise might take another 3-4 hours. When it’s puffy and jiggly, preheat your oven to 425°F. Grease your fingers with olive oil and gently press them into the dough to create those signature dimples, drizzling a little more oil as you go. Don’t over-dimple! Sprinkle with flaky salt and any toppings you like, then bake until golden brown. You’re almost there!
My Top Tips for Success
- I always use a straight-edge bowl for mixing; it really helps me see how much the dough has risen.
- In my experience, the bulk ferment time is more about the dough’s appearance than the clock. Look for those bubbles and the doubled size!
- Trust me on this one: wet hands are your best friend during the stretch and folds. It prevents the super sticky dough from clinging to you.
- When dimpling, don’t press too hard. You want to create those lovely air pockets, not squish them out!
- I like to put a small baking sheet on the lower rack in the oven, just in case any olive oil spills over. It saves a messy cleanup!
Common Mistakes to Avoid
- Not letting the dough rest enough: If you try to work with the dough too soon after mixing, it will be very resistant. The rest allows the gluten to relax, making it easier to handle.
- Over-dimpling the dough: Pressing too hard or too many times can deflate the air bubbles you worked so hard to create, leading to a denser focaccia. Gently press until you feel the bottom of the pan.
- Not checking for doneness by sight: Relying solely on the clock for bulk fermentation can lead to under- or over-proofed dough. Always look for the visual cues like doubled size and jiggly texture.
- Baking without sufficient oil in the pan: This can cause your focaccia to stick, making it difficult to remove and potentially tearing the bottom. Be generous with the olive oil!
How to Store Sourdough Focaccia in a Loaf Pan
- Room Temperature: Store in an airtight container or a sealed plastic bag for 1-2 days.
- Refrigerator: Not recommended as it can dry out the focaccia.
- Freezer: Wrap cooled focaccia tightly in plastic wrap, then in foil, and freeze for up to 1 month. Thaw at room temperature and reheat in a warm oven.
Frequently Asked Questions
Can I use all-purpose flour instead of bread flour?
While bread flour is recommended for its higher protein content, you can use all-purpose flour. Your focaccia might be slightly less chewy, but it will still be delicious.
What if my sourdough starter isn’t very active?
If your starter isn’t active, your focaccia won’t rise properly. Make sure your starter has been fed and is bubbly and active before you begin this recipe.
How do I know when the bulk fermentation is complete?
The dough should have doubled in size, look light and airy, and jiggle when you shake the bowl. You should also see visible bubbles in and on top of the dough.
Can I add different toppings to my focaccia?
Absolutely! Fresh herbs (coated in oil), sliced cherry tomatoes, caramelized onions, olives, shredded cheese, or even pesto are all fantastic additions. Get creative!
Why is my focaccia dense?
A dense focaccia can be a sign of under-proofing or over-dimpling. Ensure your dough has properly risen and that you dimple gently to preserve those air pockets.
I hope you give this Sourdough Focaccia in a Loaf Pan a try! It’s such a rewarding bake and truly delicious. If you whip up a loaf, I’d love to hear how it turned out for you!
PrintSourdough Focaccia in a Loaf Pan
A wonderfully soft and airy sourdough focaccia baked in a loaf pan, perfect for dipping or sandwiches.
- Prep Time: 30
- Cook Time: 50
- Total Time: 770
- Yield: 1 loaf
- Category: Baking
- Method: Baking
- Cuisine: Italian
- Diet: Vegetarian
Ingredients
- 50 grams active sourdough starter
- 400 grams filtered water
- 500 grams bread flour
- 10 grams salt
- Oil for pan & drizzling
- Flaky salt to taste
Instructions
- In a straight-edge bowl, mix the active starter and filtered water with a Danish dough whisk or your hand until it looks like a milky liquid.
- Add the bread flour and salt to the wet ingredients.
- Mix until all of the flour is incorporated.
- Cover the bowl with a plastic cover or plastic wrap.
- Let the dough rest for at least 30 minutes.
- With a bowl scraper, scrape the dough away from the sides of the bowl.
- With slightly wet hands, grab a section of the focaccia dough and stretch it above the bowl.
- Fold the stretched dough over on top of the dough.
- Rotate your bowl clockwise a quarter of the way.
- Repeat the stretch and fold process until you come full circle.
- Flip the dough ball with the seam side down.
- Continue to cup the sides of the dough by scooping and tucking the dough underneath itself to create a smooth looking dough ball.
- Do this about 10-20 times while turning the dough in a circle.
- Stop if you start to see the top of the focaccia dough begin to rip.
- Cover the bowl again.
- Place the dough in a warm place to rise for 8-10 hours at 70°F, or until it has doubled in size, looks light and airy, and jiggles when shaken with visible bubbles (bulk fermentation).
- Once the dough has doubled in size, pour about 28 grams of olive oil on the bottom of a 9×5 metal loaf pan.
- Spread the olive oil evenly all over the bottom and the sides of the pan.
- Release the dough gently from the sides of the bowl with a dough scraper.
- Tilt the dough into the prepared loaf pan.
- Take the top of the dough and fold it towards the middle.
- Lightly press the folded dough with your fingers so that it sticks.
- Repeat the same motion with the bottom of the dough to create a tri-fold.
- Turn the dough so that it is vertical.
- Flip the dough with the seam side down.
- Cover the dough.
- Allow it to rise again until the dough is just under the rim of the loaf pan (about 3-4 hours at 70°F).
- Once the dough has doubled in size, preheat the oven to 425 degrees F.
- Place the oven rack in the lower third of the oven.
- Grease your fingers with olive oil to prevent the dough from sticking.
- Gently press your fingers into the sourdough focaccia until you lightly touch the bottom of the loaf pan to dimple the dough.
- Drizzle olive oil on top after the first few dimples.
- Continue to dimple the dough until the entire dough has been dimpled, being careful not to over-dimple.
- Sprinkle the sourdough with flaky sea salt and any desired toppings.
- Gently press the toppings into the dimpled focaccia.
- Bake for 20-25 minutes or until the top is perfectly golden brown.
- Cover the top with a piece of aluminum foil.
- Continue to bake for 20-25 minutes more or until the internal temperature is 205 degrees F.
- Remove the Sourdough Focaccia from the oven.
- Allow it to cool in the loaf pan for a few minutes.
- Remove the bread from the pan and place it on a wire rack to cool.
- Cool slightly before slicing and enjoying.
Notes
Ensure your sourdough starter is active and bubbly before beginning.
Look for visual cues of fermentation rather than strictly following the clock.
Use slightly wet hands during stretch and folds to prevent sticking.
Do not over-dimple the dough; gentle presses preserve air pockets.


