
Oh, friends, do I have a treat for you today! There’s just something magical about a warm, fudgy brownie, isn’t there? For me, it takes me right back to cozy evenings at home, a perfect end to a busy day. But these aren’t just any brownies; we’re talking about the ultimate comfort food upgrade: chewy, rich, fudgy Marshmallow Brownies. They’re an absolute dream, and I can’t wait for you to try them!
Why You’ll Love These Marshmallow Brownies
- They’re incredibly fudgy! We’re talking melt-in-your-mouth goodness.
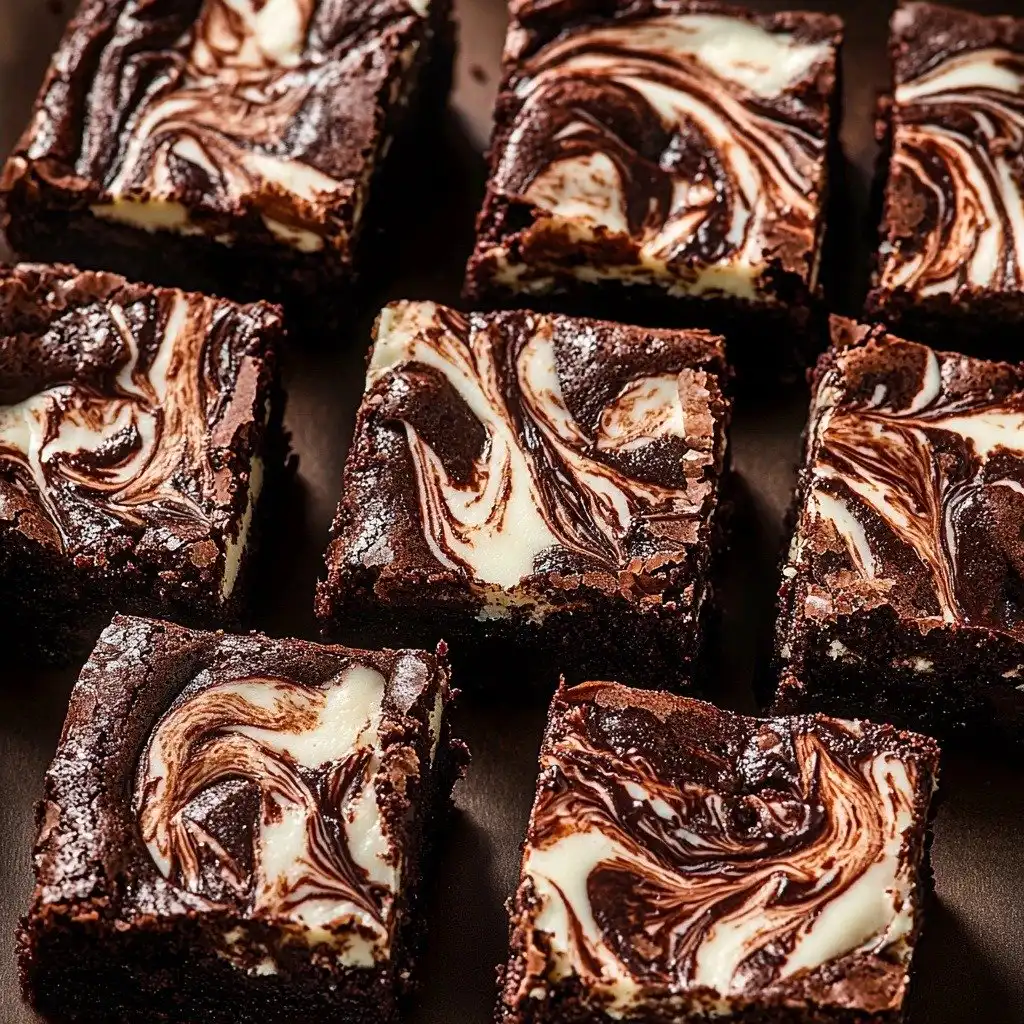
- That marshmallow swirl adds a gorgeous touch and a lovely, gooey texture.
- Super easy to make with simple ingredients you probably already have.
- Perfect for a cozy night in, a potluck, or just because you deserve a treat!
Ingredients You’ll Need
- Unsalted butter: Using unsalted butter lets you control the overall saltiness of your brownies. If you only have salted, just reduce the added salt in the recipe by a tiny bit.
- Canola or vegetable oil: This is our secret weapon for extra fudginess! It contributes to a wonderfully moist texture.
- Dutch process cocoa powder: While any unsweetened cocoa works, Dutch process gives these brownies a deep, dark, almost black color and a richer, less acidic chocolate flavor. It’s worth seeking out!
- Cornstarch: This might seem unusual in brownies, but trust me, it helps create that amazing chewy texture we all love.
- Marshmallow creme: This is the star of our swirl! It melts beautifully and gets wonderfully gooey. Don’t confuse it with marshmallow fluff, which is a bit thicker.
How to Make Marshmallow Brownies Step by Step
First things first, let’s get our oven ready. You’ll want to preheat it to 325°F. Then, grab your 9×9-inch baking pan. Give it a good spray with nonstick baking spray, and then line the bottom and two sides with parchment paper, leaving a little overhang to act as “handles.” Spray the parchment paper too!
Next, in a medium bowl, we’re going to sift together our dry ingredients: the flour, cocoa powder, and cornstarch. Sifting helps prevent lumps and makes for a smoother batter. Add in your salt, give it a quick whisk, and then set that bowl aside for a moment.
Now, for the wet ingredients! In a large bowl with your mixer, beat the sugar, eggs, and egg yolk on high speed. This is where the magic starts to happen! You’ll beat it for about 5 minutes until the mixture becomes pale and thick. While that’s mixing, pop your butter into the microwave to melt, and then let it cool down a bit so it’s not super hot when you add it. Once the egg mixture is pale, add in the oil, cooled melted butter, and vanilla extract. Mix it on low speed just until everything is combined. Then, gently add your dry ingredients and mix on low again, just until they’re incorporated. Don’t overmix! Finally, pour in your chocolate chips and use a rubber spatula to fold them in.
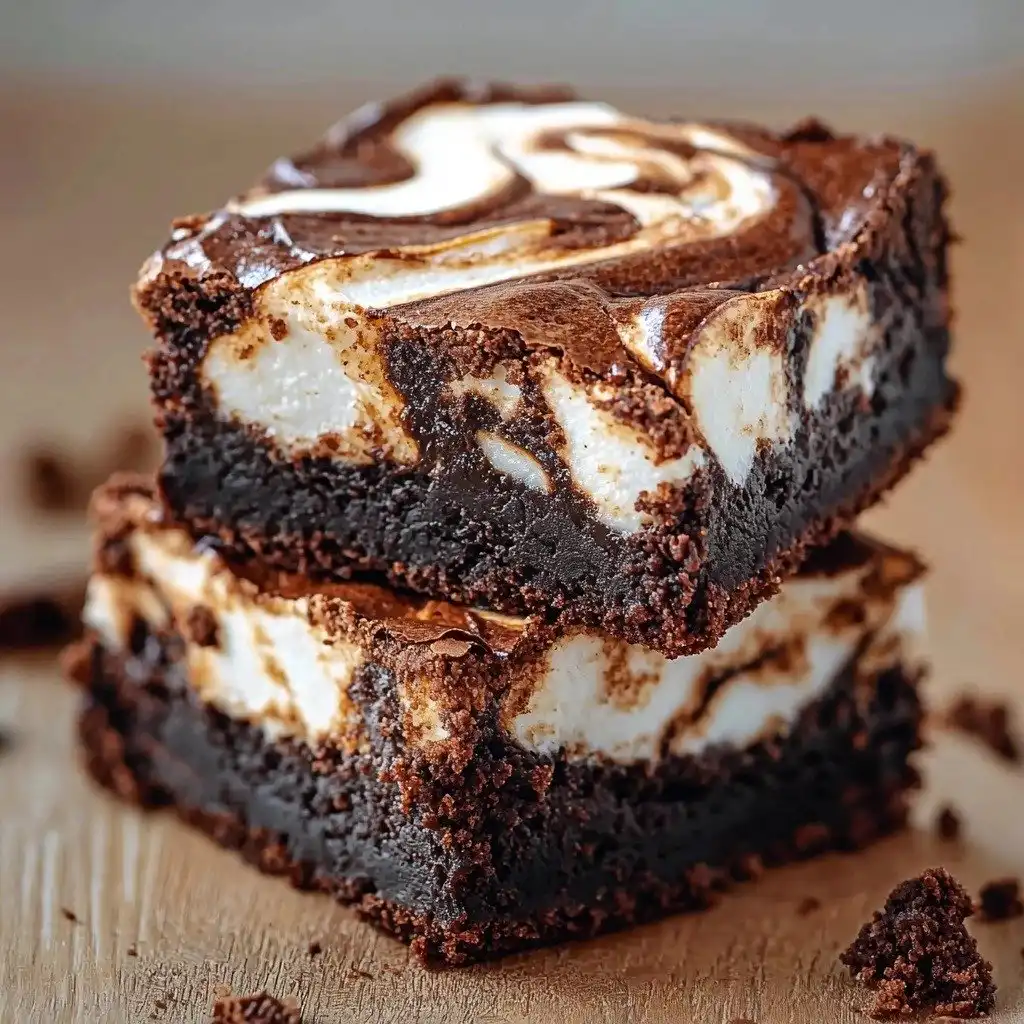
Pour this gorgeous brownie batter into your prepared pan. Now for the fun part: the marshmallow swirl! Pop your marshmallow creme into the microwave for just 20-30 seconds to make it a little easier to work with, then give it a quick stir. Take a teaspoon and dollop spoonfuls of the melted marshmallow creme all over the top of the brownie batter. Grab a butter knife and gently swirl the marshmallow into the brownie batter. You’re not trying to mix it in completely, just create pretty ribbons. Then, bake for 45-55 minutes. You’ll know it’s done when a toothpick inserted comes out slightly wet, not with wet batter, but with moist crumbs. If it’s too wet, give it another 5 minutes. The hardest part? Letting them cool completely on a cooling rack before slicing!
My Top Tips for Success
- Don’t overmix the batter: In my experience, overmixing develops the gluten in the flour, leading to tougher brownies. Mix just until combined!
- Use good quality cocoa: Trust me on this one, a good Dutch process cocoa powder makes a huge difference in the depth of chocolate flavor and color.
- Cool completely: I know it’s tempting, but cutting into warm brownies will result in a messy, crumbly experience. Let them cool down completely for clean slices.
- Parchment paper is your friend: Always use parchment paper slings. It makes lifting the whole slab of brownies out of the pan so much easier for cutting!
- Slightly wet toothpick: When testing for doneness, you want the toothpick to come out with moist crumbs, not liquid batter. This ensures fudgy brownies, not dry ones.
Common Mistakes to Avoid
- Overbaking: This is the number one culprit for dry, cakey brownies. Brownies are done when a toothpick comes out with moist crumbs, not completely clean.
- Not cooling completely: Trying to cut warm brownies leads to a gooey, crumbly mess. Patience is key for neat slices!
- Overmixing the batter: Once you add the dry ingredients, mix just until no streaks of flour remain. Overmixing can make your brownies tough.
- Skipping the parchment paper: Without parchment paper, getting the brownies out of the pan cleanly can be a real struggle.
- Not using the right marshmallow: Marshmallow creme is specifically designed for this swirl. Marshmallow fluff is thicker and might not swirl as easily.
How to Store Marshmallow Brownies
- Countertop: Store in an airtight container at room temperature for up to 3-4 days.
- Refrigerator: To extend freshness, store in an airtight container in the fridge for up to 1 week. Bring to room temperature before serving for the best texture.
- Freezer: Wrap individual brownies tightly in plastic wrap, then place in a freezer-safe bag or container for up to 3 months. Thaw at room temperature.
Frequently Asked Questions
What’s the difference between marshmallow creme and marshmallow fluff?
Marshmallow creme is generally a bit softer and more pourable, making it ideal for swirling. Marshmallow fluff is thicker and stickier, often used for sandwiches or toppings.
Can I use milk chocolate chips instead of semi-sweet?
Absolutely! You can use milk chocolate chips, dark chocolate chips, or a mix of your favorites. Just note that milk chocolate will make the brownies sweeter.
My brownies look too dark, are they burnt?
No, likely not! Using Dutch process cocoa powder gives these brownies a very dark, rich color, which is exactly what we’re aiming for. Trust the toothpick test for doneness.
Can I make these in a different sized pan?
You can, but baking times will vary. A larger pan will result in thinner brownies that bake faster, while a smaller pan will make thicker brownies that take longer. A 9×13 pan would likely need a doubled recipe.
Why do my brownies crack on top?
A slightly cracked top is totally normal for fudgy brownies! It’s often a sign of a perfectly baked, dense, and moist brownie. Don’t worry about it!
I genuinely hope these Marshmallow Brownies bring a little extra sweetness and joy to your day. They’re such a comforting treat, and that gooey marshmallow swirl really takes them over the top! If you give them a try, please let me know how they turn out!
PrintMarshmallow Brownies
Indulge in these rich, fudgy brownies topped with a sweet, gooey marshmallow swirl for an irresistible treat.
- Prep Time: 20
- Cook Time: 50
- Total Time: 70
- Yield: 16 servings
- Category: Dessert
- Method: Baking
- Cuisine: American
- Diet: Vegetarian
Ingredients
- 2 cups White granulated sugar
- 3 Large eggs
- 1 Egg yolk
- 1/2 cup Unsalted butter, melted
- 2 tsp Pure vanilla extract
- 1/2 cup Oil, canola or vegetable
- 3/4 cup All-purpose flour
- 1 cup Unsweetened cocoa powder (Dutch process)
- 1 1/2 TBSP Cornstarch
- 1/2 tsp Salt
- 1 cup Semi-sweet chocolate chips
- 1 cup Marshmallow creme
Instructions
- Preheat your oven to 325°F.
- Spray a 9×9-inch baking pan with nonstick spray.
- Line the bottom and two sides of the pan with parchment paper, leaving an overhang.
- Spray the parchment paper again with nonstick spray.
- In a medium bowl, sift together the all-purpose flour, unsweetened cocoa powder, and cornstarch.
- Add the salt to the dry ingredients and set aside.
- In a large bowl, using a mixer with a whisk attachment, beat the white granulated sugar, large eggs, and egg yolk on high speed for 5 minutes.
- The mixture should become pale in color.
- While the eggs and sugar are mixing, melt the unsalted butter in the microwave.
- Allow the melted butter to cool slightly.
- Add the canola or vegetable oil, cooled melted butter, and pure vanilla extract to the egg mixture.
- Mix on low speed until just combined.
- Add the sifted dry ingredients to the wet mixture.
- Mix on low speed until just combined, being careful not to overmix.
- Pour in the semi-sweet chocolate chips.
- Use a rubber spatula to gently fold the chocolate chips into the batter.
- Pour the brownie batter evenly into the prepared 9×9-inch pan.
- Melt the marshmallow creme in the microwave for 20-30 seconds.
- Stir the melted marshmallow creme until smooth.
- Using a 1 teaspoon measure, dollop spoonfuls of the melted marshmallow creme on top of the brownie batter.
- Take a butter knife and gently swirl the marshmallow creme into the brownie batter.
- Bake for 45-55 minutes.
- The brownies are done when a toothpick inserted into the center comes out slightly wet with moist crumbs, not raw batter.
- If a lot of batter comes out, bake for another 5 minutes.
- Cool the brownies completely on a cooling rack before cutting and serving.


