
Oh, these lemon bars! They bring me right back to warm spring afternoons, the kind where the sun is shining, and you just want something bright and cheerful. I first made these Homemade Greek Yogurt Lemon Bars for a family picnic, and they vanished faster than anything else on the dessert table. Everyone raved about the perfect balance of tangy and sweet, and honestly, they’ve been a staple ever since. They just have that special something that makes you smile with every bite!
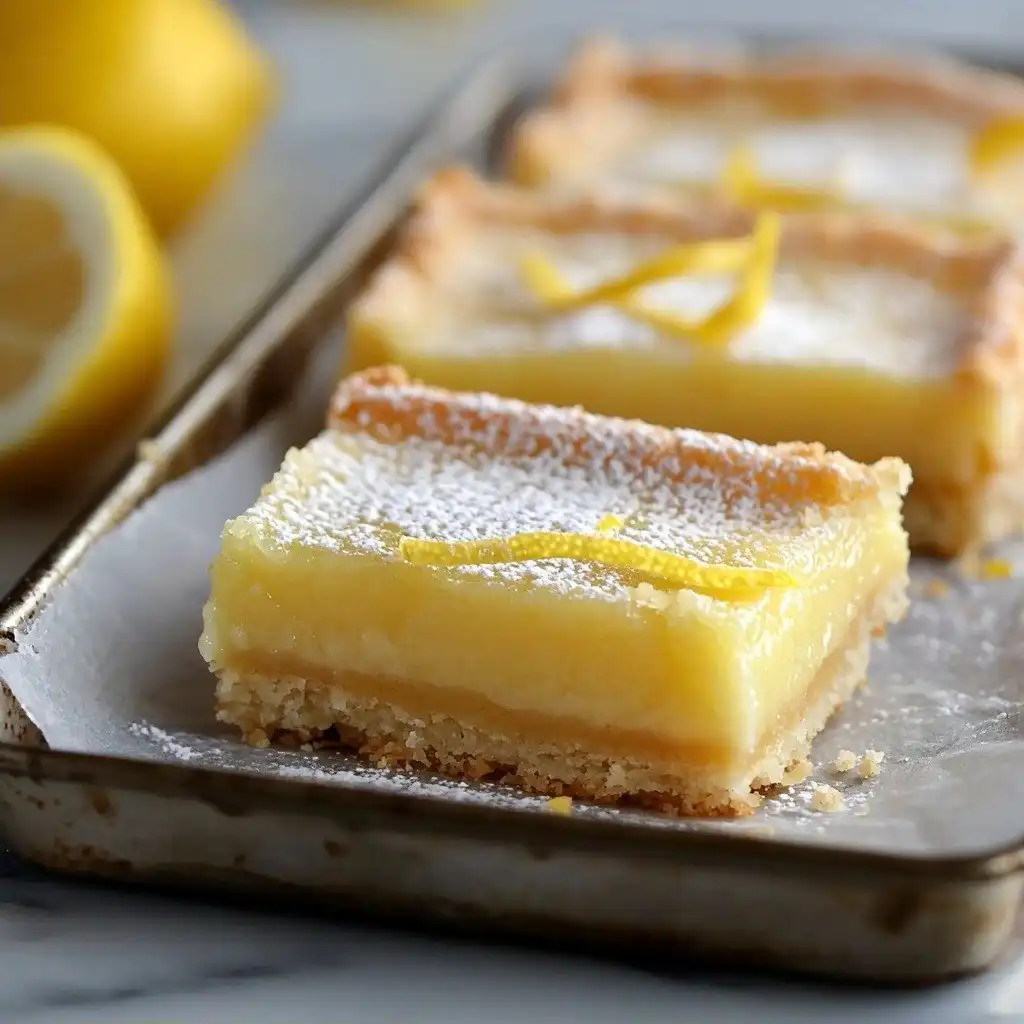
Why You’ll Love This Homemade Greek Yogurt Lemon Bars
- They have the most incredible creamy, tangy lemon filling that just melts in your mouth.
- The graham cracker crust is perfectly buttery and provides a lovely contrast in texture.
- They’re surprisingly easy to make, even for beginner bakers!
- Perfect for potlucks, picnics, or just a sunny afternoon treat.
Ingredients You’ll Need
- Graham Cracker Crumbs: I always reach for Honey Maid for that classic, delicious flavor.
- Butter: Make sure it’s melted and then cooled slightly. This helps it combine perfectly with the crumbs without making them greasy.
- Cream Cheese: Softened to room temperature is key here! It helps prevent lumps and ensures a super smooth filling.
- Greek Yogurt: Fage 5% is my go-to. Its thick texture really makes a difference in preventing a runny filling and those dreaded cracks!
- Eggs & Egg Yolk: These act as binders and help create that custardy texture.
- Lemon Juice: Freshly squeezed, please! It makes all the difference for that bright, vibrant lemon flavor.
- Lemon Zest: Don’t skip this! It adds an extra layer of intense lemon aroma and flavor.
How to Make Homemade Greek Yogurt Lemon Bars Step by Step
First things first, you’ll want to get your oven preheated to 300°F. While it’s warming up, line your 9×13 inch baking dish with parchment paper, leaving a little overhang on the sides. This is a lifesaver for easy removal later. Now, let’s tackle that crust! In a bowl, combine your graham cracker crumbs, a tablespoon of sugar, and that slightly cooled melted butter. Stir it all together until it looks like wet sand. Then, press this mixture firmly into the bottom of your prepared pan. Bake it for just 8 minutes; this little step prevents a soggy bottom and really boosts the flavor!
While your crust is baking, it’s time for the creamy lemon filling. Grab a large bowl and add your softened cream cheese. Beat it on medium speed for about a minute until it’s super smooth and creamy – no lumps allowed! Then, add the Greek yogurt and beat for another 30 seconds until everything is beautifully combined. Next, gently add the eggs and egg yolk to this mixture and beat for about a minute until just smooth. Don’t overmix here; we don’t want to incorporate too much air.
In a separate small bowl, whisk together your sugar, fresh lemon juice, lemon zest, vanilla, and salt. This is where all that bright lemon flavor comes from! Add this lemon mixture to your cream cheese and egg mixture, and beat on medium speed until it’s smooth and well-combined, about 30 seconds. Now, pull that pre-baked crust out of the oven and carefully pour the lemon filling evenly over it. Spread it gently with a spatula to ensure a nice, even layer. Pop it back into the oven and bake for 34 to 38 minutes. You’ll know it’s done when the center is mostly set but still has a very slight jiggle. The top should look smooth and creamy, not cracked!
My Top Tips for Success
- Room Temperature Ingredients: Trust me on this one, especially for the cream cheese. It makes a huge difference in getting a smooth, lump-free filling.
- Fresh Lemon Juice and Zest: I always say, there’s no substitute for fresh! It gives the brightest, most authentic lemon flavor.
- Don’t Overbake: Keep a close eye on your bars. Overbaking can lead to a dry, cracked filling. That slight jiggle is exactly what you’re looking for.
- Cooling is Crucial: The cooling process in stages—first at room temperature, then in the fridge—is vital for the bars to set properly and prevent cracking.
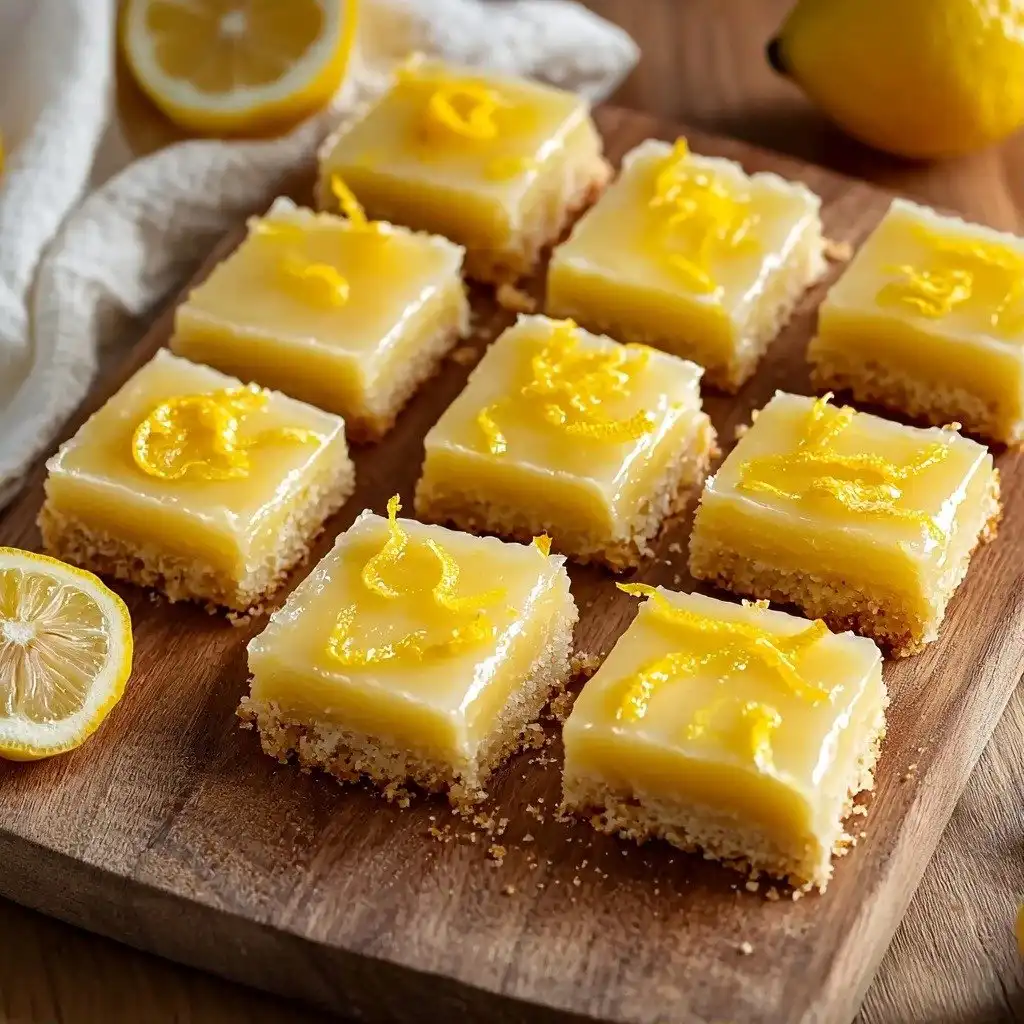
- Sharp Knife for Cutting: Dipping your knife in hot water and wiping it clean between cuts will give you those perfectly neat, professional-looking bars.
Common Mistakes to Avoid
- Using Cold Cream Cheese: This results in a lumpy filling that won’t be smooth. Always let your cream cheese soften to room temperature for at least an hour before starting.
- Overmixing the Filling: Incorporating too much air can cause the bars to puff up too much and then fall, sometimes leading to cracks. Mix just until combined.
- Not Pre-baking the Crust: Skipping this step can lead to a soggy bottom crust, which no one wants! A quick bake ensures a firm, delicious base.
- Not Chilling Long Enough: If you cut the bars before they’re fully chilled, they’ll be too soft and won’t hold their shape. Patience is key for perfectly set bars.
How to Store Homemade Greek Yogurt Lemon Bars
- Countertop: Not recommended for extended periods due to the dairy in the filling.
- Refrigerator: Store in an airtight container for up to 3-4 days. They taste amazing cold!
- Freezer: Wrap individual bars tightly in plastic wrap, then place in a freezer-safe bag or container. Freeze for up to 2-3 months. Thaw in the refrigerator before serving.
Frequently Asked Questions
Can I use bottled lemon juice?
While you can, I highly recommend using freshly squeezed lemon juice. It provides a much brighter, more vibrant flavor that really makes these bars shine. Bottled juice can sometimes taste a bit dull in comparison.
Why did my lemon bars crack on top?
Cracking is often a sign of overbaking or cooling too quickly. Make sure to remove the bars when they still have a slight jiggle in the center, and allow them to cool gradually at room temperature for an hour before chilling in the fridge.
Can I make these ahead of time?
Absolutely! These Homemade Greek Yogurt Lemon Bars are perfect for making ahead. In fact, they taste even better the next day after the flavors have had a chance to meld and the filling is perfectly set.
What kind of Greek yogurt is best?
I prefer Fage 5% Greek yogurt for its thick, creamy texture. This density helps prevent the filling from becoming too runny and contributes to that perfect, custardy consistency.
I really hope you give these Homemade Greek Yogurt Lemon Bars a try! They’re such a delightful treat, and I promise they’ll bring a little sunshine to your day. If you make them, please let me know how they turn out!
PrintHomemade Greek Yogurt Lemon Bars

These lemon bars feature a buttery graham cracker crust topped with a bright, creamy, and tangy Greek yogurt lemon filling.
- Prep Time: 20
- Cook Time: 46
- Total Time: 306
- Yield: 12-16 bars
- Category: Dessert
- Method: Baking
- Cuisine: American
- Diet: Vegetarian
Ingredients
- 1.25 cups graham cracker crumbs
- 1 tbsp sugar
- 3.5 tbsp butter (melted and cooled slightly)
- 6 oz cream cheese (softened to room temperature, about 70°F)
- 3/4 cup greek yogurt (Fage 5% recommended)
- 2 eggs
- 1 egg yolk
- 0.4 cup sugar
- 1/3 cup lemon juice (freshly squeezed)
- 1 tbsp lemon zest
- 1 tsp vanilla
- 1/8 tsp salt
Instructions
- Preheat your oven to 300°F (150°C).
- Line a 9×13 inch baking dish with parchment paper, allowing it to overhang on two sides.
- In a bowl, combine the graham cracker crumbs, 1 tablespoon sugar, and melted butter.
- Stir until the mixture resembles wet sand.
- Press this mixture firmly and evenly into the bottom of the prepared pan.
- Bake the crust for 8 minutes until lightly set and fragrant.
- While the crust bakes, add the softened cream cheese to a large bowl.
- Beat the cream cheese on medium speed for about 1 minute until completely smooth and creamy.
- Add the Greek yogurt to the cream cheese mixture.
- Beat for another 30 seconds until fully incorporated.
- Add the eggs and egg yolk to the cream cheese mixture.
- Beat on medium speed for about 1 minute until smooth and fully incorporated, avoiding overmixing.
- In a separate small bowl, whisk together 0.4 cup sugar, fresh lemon juice, lemon zest, vanilla, and salt.
- Add this lemon mixture to the egg mixture.
- Beat on medium speed until smooth and well-combined, about 30 seconds.
- Remove the pre-baked crust from the oven.
- Pour the lemon filling mixture evenly over the crust.
- Spread the filling gently with a spatula to ensure even distribution.
- Place the pan in the oven.
- Bake for 34 to 38 minutes.
- The bars are done when the center is mostly set but still jiggles very gently when shaken.
- Remove the pan from the oven.
- Let the bars cool at room temperature for exactly 1 hour.
- Transfer the pan to the refrigerator.
- Chill for at least 3 to 4 hours, or preferably overnight.
- Remove the chilled pan from the refrigerator.
- Use the parchment paper overhang to lift the entire block out of the pan onto a cutting board.
- Using a sharp knife dipped in hot water and wiped clean between cuts, slice into 12 to 16 bars.
- Wipe your knife frequently for clean edges.
Notes
Ensure cream cheese is at room temperature for a smooth filling.
Always use freshly squeezed lemon juice and zest for the best flavor.
Do not overbake the bars; a slight jiggle in the center is perfect.
Chill the bars thoroughly for at least 3-4 hours, or overnight, for best results and clean cuts.


