
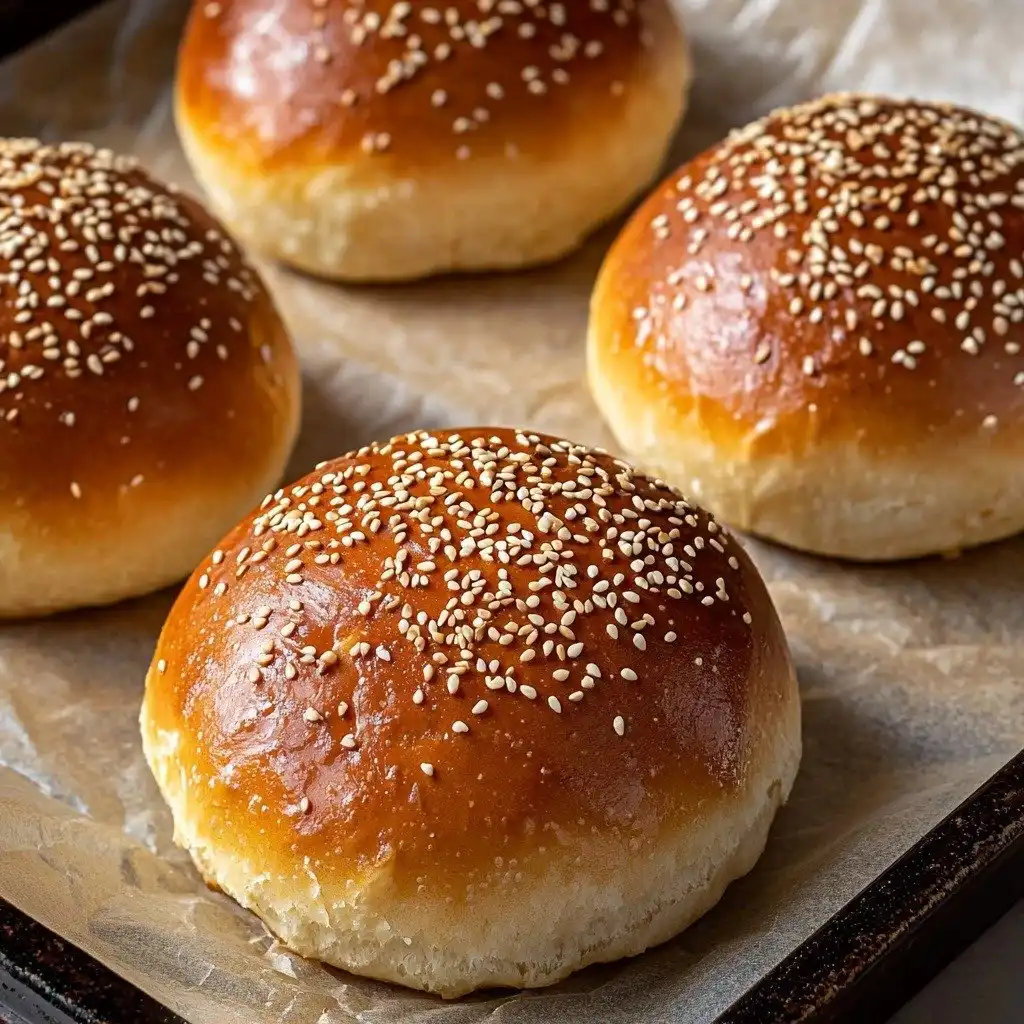
Oh, burger season! There’s just something magical about firing up the grill, isn’t there? For years, I struggled to find a gluten-free bun that actually tasted good and held up to a juicy burger. So many were dense, crumbly, or just… sad. That’s why I poured my heart into perfecting these Gluten Free Burger Buns – they’re soft, fluffy, and have that perfect brioche-like richness. Now, burger nights are truly epic for everyone in our family!
Why You’ll Love These Gluten Free Burger Buns
- They’re incredibly soft and fluffy, not dense or dry at all!
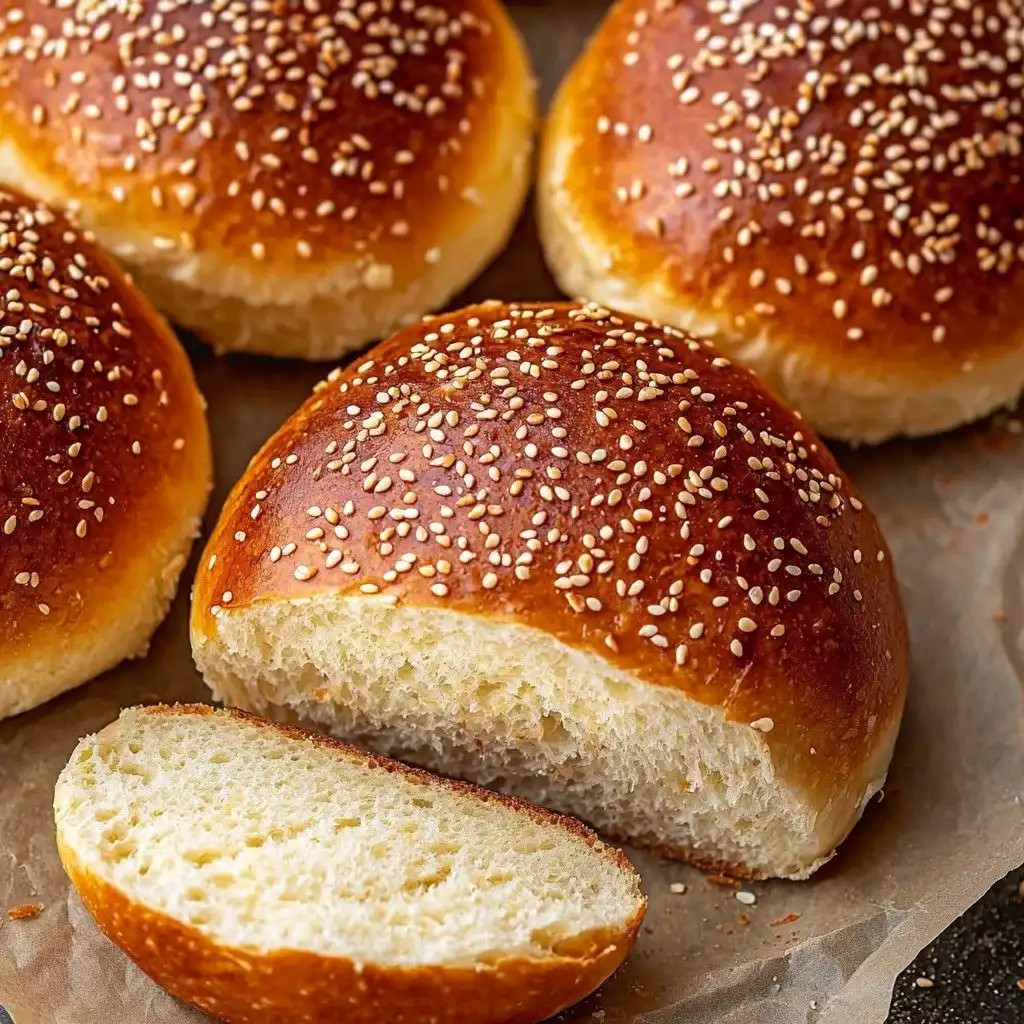
- The texture is just like a traditional brioche bun, perfect for soaking up burger juices.
- You’ll get that satisfying golden-brown crust and a lovely, airy crumb inside.
- They make every burger night feel like a special occasion, whether it’s a weeknight or a backyard BBQ!
Ingredients You’ll Need
- Whole Psyllium Husk: This is our secret weapon for structure and elasticity in gluten-free baking! If you only have psyllium husk powder, use a little less, about 17g.
- Tapioca Starch: Gives these buns a lovely chewiness and a light texture. Cornstarch, potato starch, or arrowroot starch work as equal-weight substitutes.
- Millet Flour: A wonderful, mild-flavored whole grain flour that adds to the soft texture. You can swap this for finely milled brown rice flour if you prefer.
- Sorghum Flour: Another fantastic gluten-free flour that contributes to the tenderness. Light buckwheat flour, white teff flour, or oat flour (if oats are safe for you) are good alternatives.
- Caster/Superfine or Granulated Sugar: Not just for sweetness, it also feeds the yeast and helps with browning.
- Instant Yeast: This is a quick worker! If you’re using active dry yeast, you’ll need to activate it first with warm milk and a touch of sugar.
- Baking Powder: Adds an extra lift to our buns for that airy texture.
- Xanthan Gum: Essential for gluten-free baking, it mimics the elasticity of gluten. Don’t skip it!
- Whole Milk: Adds richness and helps activate the yeast. Make sure it’s lukewarm.
- Eggs: Provide structure, richness, and moisture. Room temperature eggs mix in best.
- Sunflower Oil: Keeps our buns moist and tender. Any neutral-tasting oil will work here.
How to Make Gluten Free Burger Buns Step by Step
First things first, we’re going to get our psyllium gel ready. In a bowl, just mix your psyllium husk with lukewarm water. Give it about 30-45 seconds, and you’ll see it transform into a gel – this is where the magic starts for that amazing texture!
While that’s gelling, grab a big bowl, or the bowl of your stand mixer if you’re using one (which I highly recommend for this dough!). Whisk together all your dry ingredients: the tapioca starch, millet flour, sorghum flour, sugar, instant yeast, baking powder, xanthan gum, and salt. If you’re using active dry yeast, remember to activate it with the milk and some sugar first, then add it with the wet ingredients later.
Now, combine the wet ingredients. Add the lukewarm milk, eggs, and oil to your psyllium gel and mix everything really well. Make a little “well” in the middle of your dry ingredients and pour in the psyllium-egg mixture. Knead, knead, knead! If you’re using a stand mixer, about 4-5 minutes should do it. By hand, it’s more like 6-8 minutes. Don’t worry if the dough is super soft and sticky – that’s totally normal and what we’re going for! Just scrape down the sides occasionally to make sure everything gets mixed in. This extra kneading makes the dough beautifully smooth.
My Top Tips for Success
- I always use a stand mixer for this dough; it’s quite sticky, and the mixer makes it so much easier.
- Trust me on this one: don’t add extra flour to the dough itself, even if it feels sticky. It will make your buns dry.
- If the dough is really hard to handle, I sometimes chill it in the fridge for about an hour. It firms it up just enough.
- Always work on a generously floured surface and with floured hands when shaping. This is key!
- For the best rise, proof your buns in a warm spot. My trick is to put a cup of boiling water in a turned-off oven – perfect environment!
- Don’t overcrowd your baking sheet! Give those buns plenty of space to grow.
Common Mistakes to Avoid
- Adding too much flour: This is the most common mistake with gluten-free bread. The dough is meant to be soft and sticky. Adding more flour will make the buns dense and dry. Stick to flouring your hands and surface generously instead.
- Not proofing long enough: If your buns don’t double in size, they won’t be as light and airy. Ensure your proofing spot is warm and give them the full 1 hour 15 minutes to 1 hour 30 minutes.
- Overcrowding the baking sheet: If buns are too close, they can stick together and lose their round shape. Use two sheets if needed and bake in batches.
- Skipping the psyllium gel step: The psyllium husk gel is crucial for the structure and elasticity of these gluten-free buns. Don’t just toss it in dry!
How to Store Gluten Free Burger Buns
- Room Temperature: 2-3 days in an airtight container.
- Freezer: Up to 3 months. Wrap individual buns tightly in plastic wrap, then place in a freezer-safe bag. Thaw at room temperature or warm gently in a toaster oven.
Frequently Asked Questions
What makes these buns gluten-free?
These buns use a blend of gluten-free flours like tapioca starch, millet flour, and sorghum flour, along with psyllium husk and xanthan gum to provide structure and elasticity without any wheat.
Can I make these dairy-free?
Yes, you can substitute the whole milk with a dairy-free milk alternative like almond milk or soy milk, ensuring it’s lukewarm.
Why is the dough so sticky?
Gluten-free doughs often have a softer, stickier consistency than traditional wheat doughs because they lack the gluten network. This is normal and helps achieve a moist, tender bun, so resist adding extra flour to the dough itself.
Can I use a different type of oil?
Absolutely! Any neutral-tasting oil like canola, grapeseed, or light olive oil will work perfectly in place of sunflower oil.
How do I know when the buns are fully baked?
The buns should be deep golden brown on top and sound hollow when lightly tapped on the bottom. An internal temperature of around 200-210°F (93-99°C) is also a good indicator.
I really hope these Gluten Free Burger Buns become a new favorite in your kitchen! They’ve certainly transformed our burger nights. Give them a try, and let me know how they turn out – I just love hearing about your baking adventures!
PrintGluten Free Burger Buns
Soft, fluffy, and perfectly golden, these brioche-style gluten-free burger buns are a game-changer for any burger night.
- Prep Time: 30
- Cook Time: 15
- Total Time: 105
- Yield: 8 buns
- Category: Baking
- Method: Baking
- Cuisine: American
- Diet: Vegetarian
Ingredients
- 20 g (4 tbsp) whole psyllium husk
- 280 g (1 cup + 2½ tbsp) lukewarm water
- 230 g (2 cups) tapioca starch
- 135 g (1 cup) millet flour
- 60 g (⅓ cup + 2 tbsp) sorghum flour
- 50 g (¼ cup) caster/superfine or granulated sugar
- 8 g (2½ tsp) instant yeast
- 8 g (2 tsp) baking powder
- 7 g (2¾ tsp) xanthan gum
- 12 g (2 tsp) salt
- 120 g (½ cup) whole milk, lukewarm
- 2 US large/UK medium eggs, room temperature
- 50 g (3½ tbsp) sunflower oil
- 1 US large/UK medium egg, whisked, for brushing the buns
- 1-2 tbsp sesame seeds, for sprinkling the buns
Instructions
- Prepare the psyllium gel: In a bowl, mix the psyllium husk and 280g lukewarm water. Set aside for 30-45 seconds until a gel forms.
- Combine dry ingredients: In a large bowl or stand mixer bowl, whisk together the tapioca starch, millet flour, sorghum flour, sugar, instant yeast, baking powder, xanthan gum, and salt.
- Combine wet ingredients: Add the 120g lukewarm milk, 2 eggs, and sunflower oil to the psyllium gel and mix well to combine.
- Add wet to dry: Make a well in the center of the dry ingredients. Pour the psyllium gel-egg mixture into the well.
- Knead the dough: Knead the dough until smooth and all ingredients are evenly incorporated. Continue kneading for 4-5 minutes with a stand mixer or 6-8 minutes by hand. Scrape the sides and bottom of the bowl occasionally to prevent dry patches.
- Divide the dough: Divide the dough into 8 equal portions, each weighing about 130g.
- Shape the buns: On a floured surface, shape each portion into a smooth ball.
- Arrange for proofing: Place the shaped buns on a large lined baking sheet, ensuring they are spaced far apart.
- Proof the buns: Lightly cover the buns with plastic wrap to prevent drying. Proof in a warm spot until doubled in size, about 1 hour 15 minutes to 1 hour 30 minutes.
- Preheat oven: Adjust the oven rack to the middle position. Preheat the oven to 375ºF (190ºC).
- Prepare for baking: Once proofed, gently brush the buns with the whisked egg and sprinkle with sesame seeds.
- Bake the buns: Bake at 375ºF (190ºC) for about 14-15 minutes, or until deep golden brown on top.
- Cool: Immediately transfer the baked buns onto a wire rack to cool completely.
Notes
For best results, use a stand mixer as the dough is quite soft and sticky.
If the dough is too sticky to handle, chill it in the fridge for about 1 hour before shaping.
Ensure your proofing spot is warm; a turned-off oven with a cup of boiling water works perfectly.
Do not add extra flour to the dough itself, only to your hands and work surface for shaping.


