
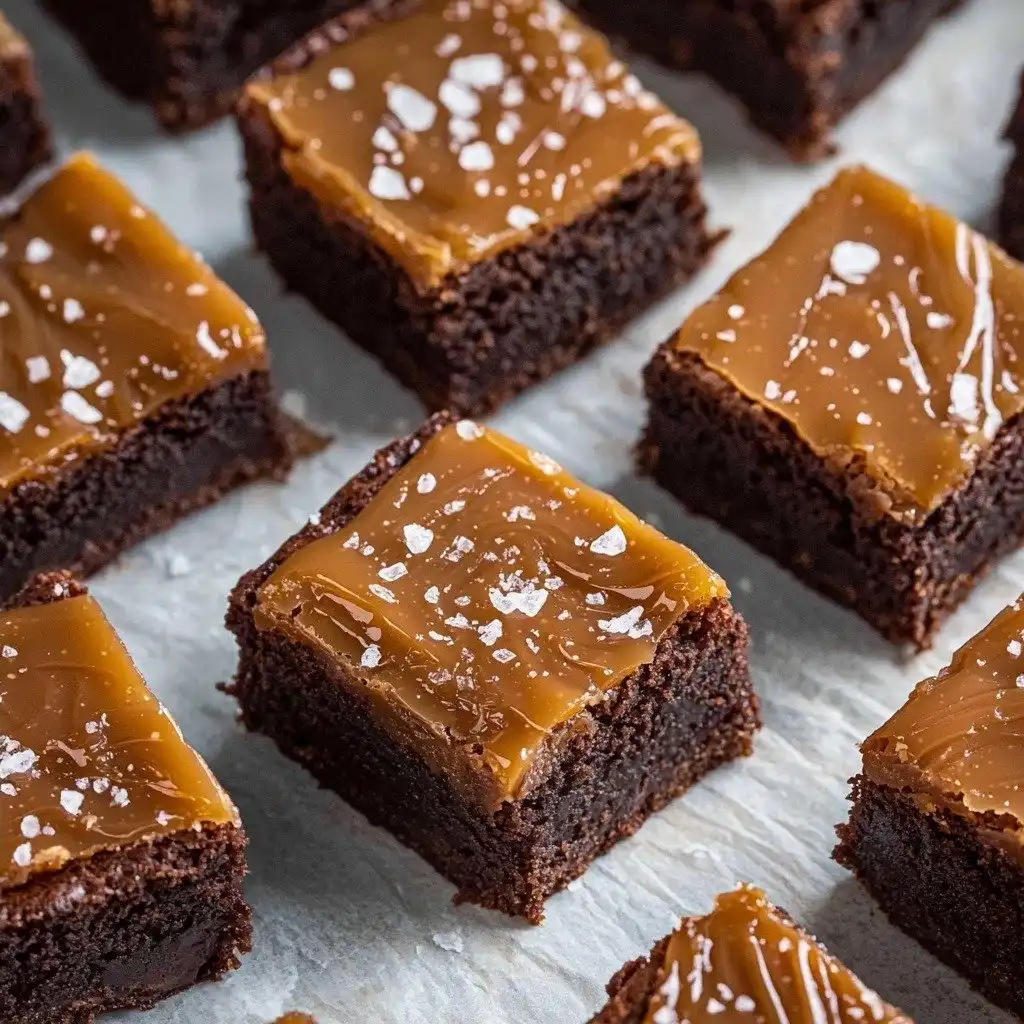
Oh, these Chocolate Salted Butterscotch Brownies! They hold a special place in my heart. I first whipped these up for a potluck a few years ago, and they were such a hit that my friends still ask me to bring them to every gathering. There’s something truly magical about the rich chocolate fudge brownie base paired with that dreamy, salty-sweet butterscotch swirl. It’s a combination that just sings, and I can’t wait for you to try them!
Why You’ll Love This Chocolate Salted Butterscotch Brownies
- They’re incredibly fudgy and rich, with that perfect dense brownie texture we all crave.
- The salted butterscotch sauce is absolutely to die for – it balances the chocolate beautifully.
- You don’t need any fancy equipment; just basic kitchen tools will get you these amazing brownies.
- They’re a showstopper for any occasion, but easy enough for a cozy weekend treat.
Ingredients You’ll Need
- Dutch Processed Cocoa: This gives your brownies a deep, rich chocolate flavor and a beautiful dark color. It’s different from natural cocoa, so stick with Dutch for the best results!
- Dark (70% cocoa) Chocolate: Using good quality dark chocolate here makes a huge difference in the fudginess and intensity of your brownies. Don’t skimp!
- Dark Brown Sugar: This isn’t just for sweetness; it adds moisture and a lovely caramel note to both the brownies and the butterscotch. Pack it tightly when measuring!
- Liquid Glucose or Light Corn Syrup: In the butterscotch, this helps prevent crystallization, ensuring your sauce stays smooth and silky.
- Thickened Cream: This is essential for achieving that luscious, creamy texture in your butterscotch sauce.
- Sea Salt Flakes: A sprinkle of these at the end really makes the butterscotch pop and cuts through the sweetness. It’s what makes them “salted butterscotch”!
How to Make Chocolate Salted Butterscotch Brownies Step by Step
First things first, let’s get our oven ready and our pan lined. Preheat your oven to 180°C / 350°F (or 160°C fan forced) and make sure your 8×8 inch square baking tin is greased and lined with baking paper. This makes it super easy to lift your brownies out later. Then, in a large bowl, whisk together your flour, baking powder, cocoa, salt, and both white and dark brown sugars until there are no clumps. This ensures everything is evenly distributed for a perfect brownie texture.
Next, we’ll get our wet ingredients ready. In a separate bowl, lightly beat your eggs and vanilla extract. Set that aside. Now, for the chocolatey goodness! In a small saucepan, melt your butter and dark chocolate over the lowest heat, stirring constantly. You want it just melted and smooth, not bubbling or burned. This is where the magic happens for that rich, fudgy base!
Once your chocolate and butter are melted, pour that beautiful mixture into your dry ingredients. Add the egg mixture too, and stir everything together until it’s just combined. Don’t overmix – we want fudgy brownies, not tough ones! Pour this batter into your prepared tin and spread it evenly to the edges. Bake for about 25-27 minutes. The top should look dry, and there should be no wobble when you gently shake the pan. A toothpick inserted should come out a little sticky, which means they’re perfectly fudgy! While still warm, gently press another 8×8 inch pan on top to flatten the brownie, then remove it. Let your brownie cool completely in the tin.
Now, onto that incredible salted butterscotch sauce! In a large, heavy-bottomed saucepan, combine both sugars, water, and liquid glucose (or corn syrup) over low heat. Stir gently until all the sugar dissolves. Then, bring it to a low simmer and pop a lid on for 2 minutes. This helps wash down any sugar crystals from the sides of the pan. Remove the lid, let it come to a low rolling boil, and swirl the pan occasionally for another 2-3 minutes. Add your cubed butter and stir until it melts completely. Then, stir in the thickened cream until everything is fully combined.
Bring the butterscotch back to a low rolling boil and let it cook, stirring every so often, for another 7-8 minutes. You’ll notice the bubbles getting bigger and slower, and when you stir, the mixture will start to pull away from the sides of the pan. To test if it’s ready, drop a tiny bit into ice-cold water – it should firm up quickly to a chewy texture. Turn off the heat, stir in the sea salt flakes and vanilla extract, and pour it generously over your cooled brownie. Let it cool at room temperature for about 30 minutes before transferring it to the fridge to set for at least 2 hours. Don’t forget to sprinkle a few extra sea salt flakes on top for that extra sparkle!
My Top Tips for Success
- Weigh Your Ingredients: Trust me on this one, especially for baking! Using a kitchen scale for flour, sugars, and butter gives you the most accurate results and consistently perfect brownies.
- Don’t Overmix the Brownie Batter: Once you add the wet ingredients to the dry, stir just until combined. Overmixing develops gluten, which can lead to tough, cakey brownies instead of fudgy ones.
- Low and Slow for Butterscotch: When making the butterscotch, patience is key. Keep the heat low, especially when dissolving the sugar, to prevent it from crystallizing.
- Use a Heavy-Bottomed Pan for Butterscotch: This helps distribute heat evenly and prevents the butterscotch from burning on the bottom.
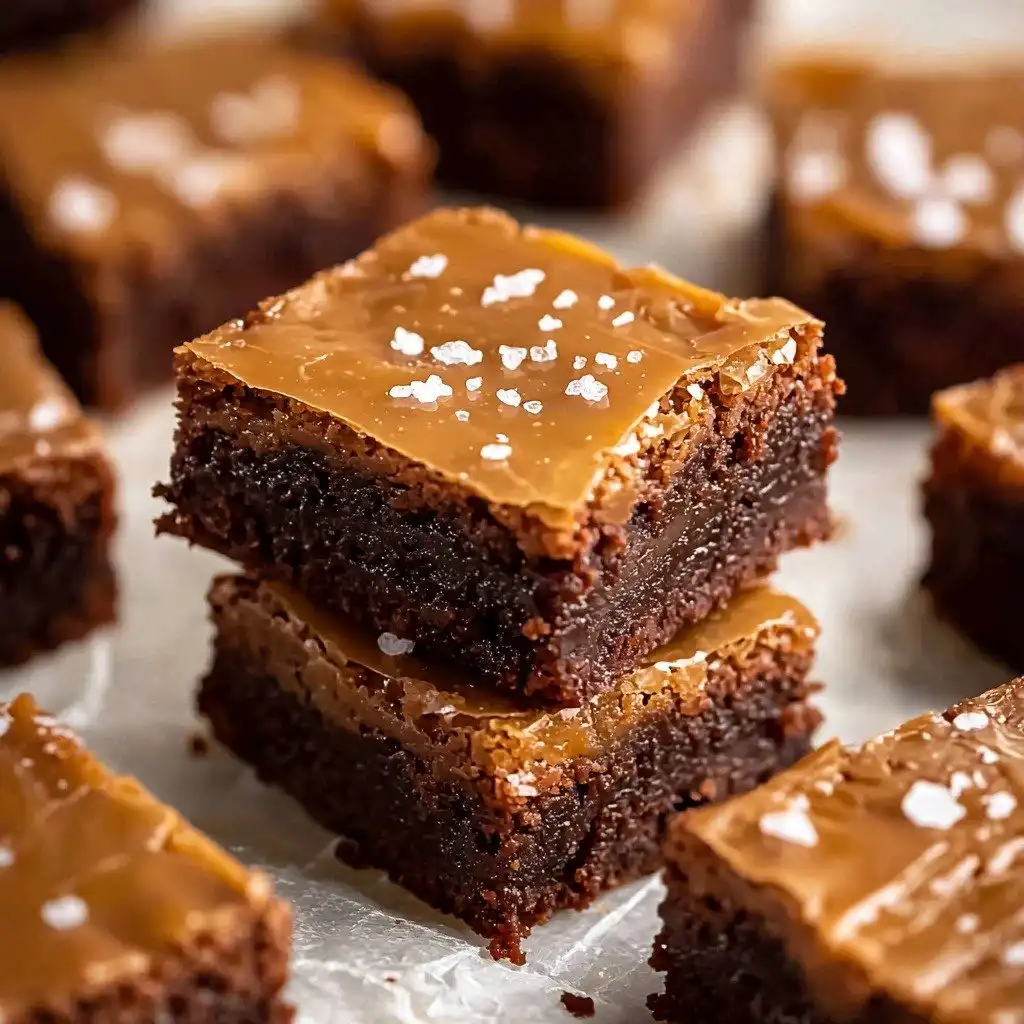
- Don’t Rush the Cooling: I know it’s tempting to dive in, but allowing the brownies and butterscotch to cool and set completely in the fridge makes for clean slices and the best texture.
- Quality Ingredients Matter: Good quality dark chocolate and Dutch-processed cocoa really elevate the flavor of these brownies.
Common Mistakes to Avoid
- Overbaking the Brownies: This is the most common mistake! Why it happens: Baking too long dries out the brownies. How to fix it: Watch for a dry top and a slightly sticky toothpick, not a clean one.
- Overmixing the Brownie Batter: Why it happens: Excessive mixing develops gluten, making the brownies dense and cake-like. How to fix it: Mix only until no streaks of flour remain.
- Burning the Butterscotch: Why it happens: High heat or not stirring enough can cause the sugar to burn. How to fix it: Use low heat and stir gently but consistently, especially at the beginning.
- Crystallized Butterscotch: Why it happens: Sugar crystals can form if not dissolved properly or if stirred too vigorously at the wrong time. How to fix it: Ensure sugar is fully dissolved before boiling, and don’t stir once it’s boiling until adding butter. The glucose/corn syrup also helps!
How to Store Chocolate Salted Butterscotch Brownies
- Countertop (short term): Keep covered at room temperature for up to 2 days.
- Refrigerator: Store in an airtight container for up to 5-7 days. The butterscotch will firm up nicely.
- Freezer: Wrap individual brownies tightly in plastic wrap, then place in a freezer-safe bag or container for up to 3 months. Thaw at room temperature.
Frequently Asked Questions
Can I use natural cocoa powder instead of Dutch-processed?
While you can, Dutch-processed cocoa gives a deeper, darker chocolate flavor and color. It’s recommended for this recipe for the best results, as natural cocoa has a different acidity.
What if I don’t have liquid glucose or corn syrup?
The glucose/corn syrup helps prevent crystallization in the butterscotch. If you don’t have it, you can omit it, but be extra careful not to stir the butterscotch once it starts boiling to avoid crystals forming.
How do I know when the butterscotch is ready?
Look for big, slow bubbles and when stirring, the mixture should pull away from the sides of the pan. The cold water test (dropping a bit into ice water for a chewy texture) is the most reliable method.
Can I make these brownies ahead of time?
Absolutely! These brownies are actually fantastic when made a day in advance, as it gives the butterscotch time to set and the flavors to meld beautifully. Store them in the fridge.
Why do you press the brownies with another pan?
Pressing the warm brownies with another pan helps to compact them, creating an even fudgier, denser texture and a perfectly flat top for your butterscotch layer.
I genuinely hope these Chocolate Salted Butterscotch Brownies bring as much joy to your kitchen and taste buds as they do to mine. They’re truly a special treat, and I can’t wait for you to experience that fudgy, salty-sweet perfection. If you make them, please let me know how they turn out!
PrintChocolate Salted Butterscotch Brownies
Indulge in rich, fudgy chocolate brownies topped with a luxurious homemade salted butterscotch sauce. A perfect balance of sweet and salty.
- Prep Time: 30
- Cook Time: 35
- Total Time: 205
- Yield: 16 servings
- Category: Dessert
- Method: Baking
- Cuisine: American
- Diet: Vegetarian
Ingredients
- 95 g plain (all purp) flour
- ¼ teaspoon baking powder
- 35 g dutch processed cocoa
- ¼ teaspoon salt
- 100 g white granulated sugar
- 100 g dark brown sugar
- 2 large eggs, beaten
- 1 teaspoon vanilla
- 113 g unsalted butter
- 50 g dark (70% cocoa) chocolate
- 100 g white granulated sugar
- 100 g dark brown sugar
- 2 tablespoons water
- 1 tablespoon liquid glucose or light corn syrup
- 85 g unsalted butter, chopped into cubes
- ⅓ cup thickened cream
- 1 teaspoon sea salt flakes
- 1 tablespoon vanilla extract
- Extra sea salt flakes for decoration
Instructions
- Preheat your oven to 180C / 350F / 160C fan forced.
- Grease and line an 8×8 inch slice pan with baking paper.
- Combine the flour, baking powder, cocoa, salt, and both white and dark brown sugars in a large bowl.
- Whisk the dry ingredients well until there are no lumps left.
- In a separate bowl, gently beat together the eggs and vanilla.
- Set the egg mixture aside.
- In a small saucepan, melt the 113g unsalted butter and 50g dark chocolate over the lowest heat.
- Stir constantly until the butter and chocolate are just melted and smooth.
- Pour the melted chocolate and butter mixture into the dry ingredients.
- Add the beaten egg mixture to the bowl.
- Stir everything until it is just combined; do not overmix.
- Pour the brownie mixture into the prepared 8×8 inch tin.
- Spread the mixture evenly to the edges of the pan.
- Bake for around 25-27 minutes.
- Check that the top is dry and there is no wobble left when gently shaken.
- Insert a toothpick into the center; it should come out a little sticky.
- Sit another 8×8 inch pan on top of the warm brownie.
- Press down gently to flatten the brownie.
- Remove the top pan.
- Allow the brownie to cool completely in the tin.
- Combine the 100g white granulated sugar, 100g dark brown sugar, water, and liquid glucose in a large, heavy-based saucepan over low heat.
- Stir gently until all the sugar dissolves completely.
- Bring the mixture to a low simmer.
- Cover the saucepan with a lid for 2 minutes.
- Remove the lid and let the mixture come to a low rolling boil.
- Swirl the pan every so often for another 2-3 minutes.
- Add the 85g unsalted butter to the saucepan.
- Stir until the butter melts and combines completely.
- Add the thickened cream and stir until fully combined.
- Bring the butterscotch to a low rolling boil again.
- Let it boil, stirring every so often, for another 7-8 minutes.
- Observe the bubbles; they should become big and slow.
- Stir the mixture; it should start coming away from the sides of the pan.
- Test the butterscotch by dropping a little into some ice-cold water.
- It should firm up quite quickly to a chewy texture.
- Turn off the heat.
- Add the 1 teaspoon sea salt flakes and 1 tablespoon vanilla extract.
- Stir through well until fully incorporated.
- Pour the warm butterscotch sauce evenly over the top of the cooled brownie.
- Allow the brownie to cool at room temperature for 30 minutes.
- Transfer the brownie to the fridge to set and cool for at least another 2 hours.
- Sprinkle with extra sea salt flakes for decoration before serving.
Notes
Always weigh ingredients where a weight is provided for best accuracy.
Do not overmix the brownie batter; mix just until combined for a fudgier texture.
For the butterscotch, use a heavy-bottomed saucepan to prevent burning.
Allow the brownies to cool completely and set in the fridge for clean slices and optimal texture.


