
There’s just something magical about a warm, flaky pastry, especially when it’s filled with sweet, juicy cherries. For me, these Cherry Hand Pies bring back memories of cozy afternoons in my grandmother’s kitchen. She always had a knack for turning simple ingredients into something truly special, and these little pies are no exception.
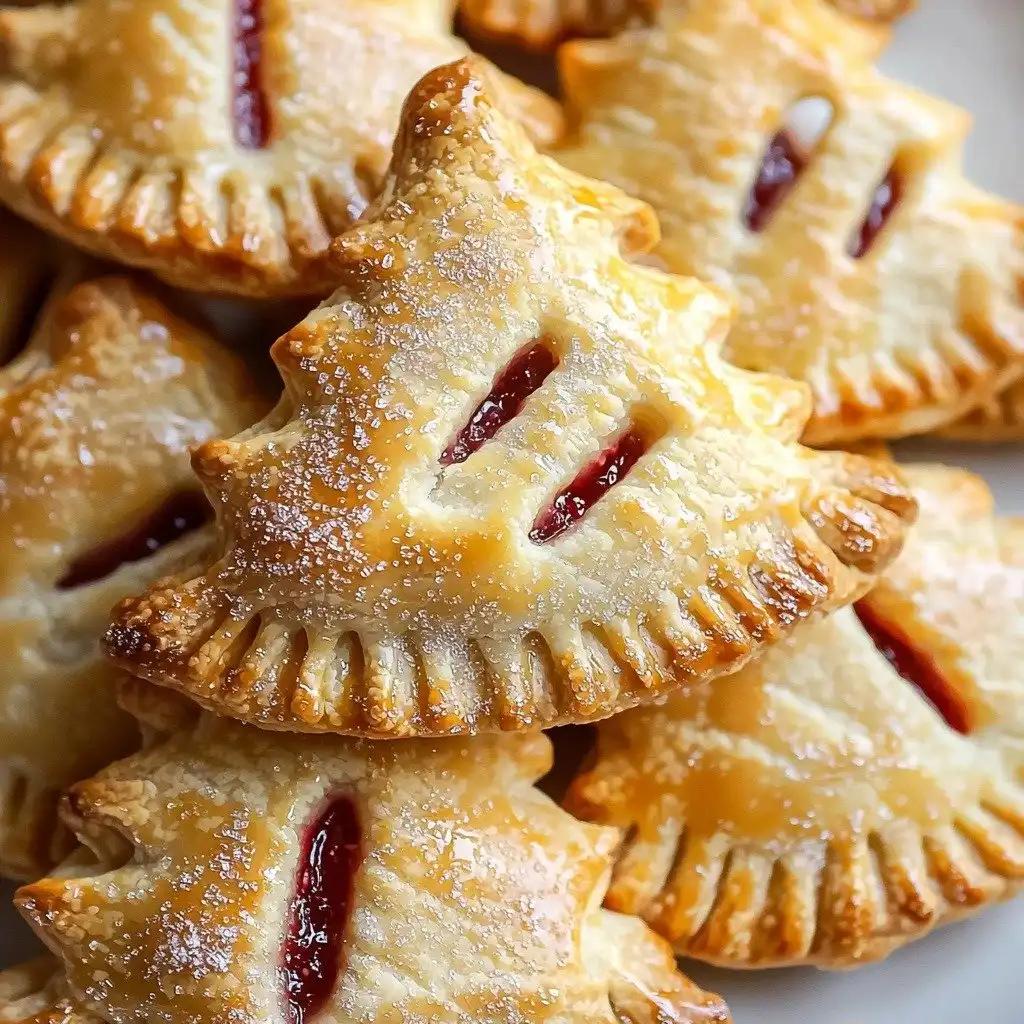
They’re like a hug in pastry form, perfect for any time you need a little pick-me-up. Plus, they’re so much fun to make, especially with their cute tree shape!
Why You’ll Love This Cherry Hand Pies
- They’re incredibly easy to make, thanks to ready-made pie crusts.
- Each bite is a perfect balance of flaky crust and sweet cherry filling.
- These hand pies are adorable and perfect for special occasions or just a fun treat.
- They’re portable and delicious, great for sharing or a quick snack.
Ingredients You’ll Need
- Refrigerated Pie Crust: This is our secret weapon for speed and convenience! Don’t try to substitute with puff pastry; pie crust gives you that classic flaky texture.
- Cherry Pie Filling: The star of the show! Use a good quality canned filling for the best results.
- Large Eggs: We’ll whisk these with water to create an egg wash, which gives our pies that beautiful golden-brown color and helps the sanding sugar stick.
- Coarse Sanding Sugar: Totally optional, but it adds a lovely sparkle and a little extra crunch to the top of your pies.
How to Make Cherry Hand Pies Step by Step
First things first, get your oven preheating to 350 degrees F. While that’s heating up, grab your refrigerated pie crusts and let them thaw according to the package directions. This is super important so they don’t crack when you roll them out.
Line a big cookie sheet with parchment paper – this makes cleanup a breeze! In a small bowl, whisk together your eggs and water to make your egg wash, then set it aside. Now, gently roll out one of your thawed pie crusts. You want it to be nice and smooth, without any cracks, about 1/4 to 1/8 inch thick. Don’t worry if it’s not perfectly round!
This is where the fun begins! Use your favorite 3-4 inch holiday tree cookie cutter to cut out about 7 trees from that crust. Don’t throw away the excess crust – we’ll use it later! Repeat this process with all your remaining pie crusts, saving all those excess bits. Once you’ve used up all the ready-made crusts, gather all your excess pieces, gently combine them, and roll them out again to the same thickness. This ensures you get every last hand pie possible!
Now, place your cute little tree cut-outs on the parchment-lined baking sheet. Spoon about 1 to 1 1/2 tablespoons of cherry pie filling right into the center of each tree. Brush a little of that egg wash around the edges of the filling – this acts like glue. Gently place another tree cut-out on top, lining it up nicely. Starting at the “trunk” of your tree, lightly press the edges together, being careful not to push down on the filling itself.
Once you’ve pressed them together, grab a fork and press the tines along the seams, all around the outline of the tree. This not only seals them securely but also creates a pretty pattern! Use a sharp knife to make a few small slits in the top crust – this lets the steam escape while baking. Brush the tops of your pies with the remaining egg wash, and if you’re feeling fancy, sprinkle some coarse sanding sugar on top. Into the oven they go for 20-25 minutes, or until they’re beautifully golden brown. Let them cool on a wire rack, then enjoy warm or at room temperature!

My Top Tips for Success
- I always make sure my pie crusts are fully thawed but still cold. This helps prevent them from sticking and tearing.
- In my experience, a light dusting of flour on your rolling surface can prevent the crust from sticking.
- Don’t overfill your hand pies! Too much filling can cause them to burst open during baking.
- Trust me on this one: chilling the shaped hand pies for 10-15 minutes before baking can help them hold their shape better.
- For the prettiest pies, brush the egg wash evenly and don’t let it pool around the edges.
Common Mistakes to Avoid
- Overworking the dough: If you roll the crust too much or re-roll the scraps too many times, your pies can become tough. Handle the dough gently!
- Not sealing the edges properly: If the edges aren’t pressed firmly, the filling can leak out. Use that fork to create a good seal.
- Baking too hot or too long: This can lead to burnt crusts and raw filling. Keep an eye on them after 20 minutes to ensure they’re just golden.
- Not venting the pies: Without those little slits, steam builds up and can cause the pies to puff up unevenly or burst.
How to Store Cherry Hand Pies
- Room Temperature: Up to 2 days in an airtight container.
- Refrigerator: Up to 5 days in an airtight container.
- Freezer (unbaked): Place shaped, unbaked hand pies on a baking sheet and freeze until solid, then transfer to a freezer-safe bag for up to 1 month. Bake from frozen, adding a few extra minutes to the baking time.
- Freezer (baked): Freeze cooled, baked hand pies individually on a baking sheet, then transfer to a freezer-safe bag for up to 1 month. Reheat in a 350°F oven until warmed through.
How do I know if my pie crust is thawed enough?
Your pie crust is thawed enough when it’s pliable and easy to unroll without cracking. It should still feel cool to the touch, not warm or sticky.
Can I use homemade pie crust instead?
Absolutely! If you have a favorite homemade pie crust recipe, feel free to use it. Just ensure it’s rolled to the same thickness.
What if I don’t have a tree-shaped cookie cutter?
No problem at all! You can use any 3-4 inch cookie cutter you have, like a circle, square, or even a heart. The shape doesn’t change the deliciousness!
Can I use a different fruit filling?
Yes, you can! Apple, blueberry, or even peach pie filling would be delicious in these hand pies. Just make sure the filling isn’t too runny.
How do I prevent the filling from leaking?
Make sure you don’t overfill the pies, and press those edges together firmly with a fork all the way around. The egg wash helps seal them too.
I genuinely hope these Cherry Hand Pies bring a little burst of joy to your kitchen and your taste buds! They’re such a simple pleasure, and I just know you’ll love them. If you make them, please come back and tell me how they turned out!
PrintCherry Hand Pies

Flaky, sweet, and perfectly portable, these Cherry Hand Pies are a delightful treat made easy with refrigerated pie crust and canned cherry filling.
- Prep Time: 25
- Cook Time: 25
- Total Time: 50
- Yield: 18-20 hand pies
- Category: Dessert, Baking
- Method: Baking
- Cuisine: American
- Diet: Vegetarian
Ingredients
- 3 boxes refrigerated pie crust (2 crusts each box)
- 1 can cherry pie filling (21 ounce)
- 2 large eggs
- 2 Tablespoons water
- Coarse sanding sugar (optional)
Instructions
- Preheat your oven to 350 degrees F.
- Thaw the refrigerated pie crusts according to package directions.
- Line a large cookie sheet with parchment paper.
- In a small bowl, whisk together the 2 large eggs with 2 Tablespoons of water to create an egg wash.
- Set the egg wash aside.
- Using a rolling pin, roll out one thawed pie crust.
- Ensure the crust has no cracks or holes.
- Roll the crust to a thickness between ¼” and ⅛”.
- Use a 3-4 inch holiday tree cookie cutter to cut out about 7 trees from the rolled crust.
- Save the excess crust scraps.
- Repeat this process with all the remaining pie crusts, saving all excess crusts.
- Gather all the saved excess crust scraps together.
- Gently combine and roll out the excess crust to the same thickness (between ¼” and ⅛”).
- Cut out any remaining tree shapes from the re-rolled excess crust.
- Place the tree cut-outs evenly on the parchment-lined baking sheet.
- Spoon about 1 to 1 ½ Tablespoons of cherry pie filling into the center of each tree cut-out.
- Brush the border around the cherry filling with the prepared egg wash.
- Gently place a second tree cut-out over the top of the filling, aligning the edges.
- Starting at the trunk, lightly press the edges of the two crusts together.
- Be careful not to press down on the filling itself.
- Using the tines of a fork, firmly press the seams together all around the outline of each tree.
- Use a sharp knife to make a few small slits in the top crust of each hand pie for venting.
- Brush the top crusts of all the hand pies with the remaining egg wash.
- Sprinkle coarse sanding sugar on top of the hand pies, if desired.
- Bake for 20-25 minutes, or until the crusts are golden brown.
- Carefully transfer the baked hand pies to a cooling rack.
- Serve the Cherry Hand Pies warm or at room temperature.
Notes
Ensure pie crusts are fully thawed but still cool for best handling.
Do not overfill the hand pies to prevent leakage during baking.
Chill shaped hand pies for 10-15 minutes before baking to help them hold their shape.
Brush egg wash evenly for a beautiful golden finish and even sugar distribution.


