
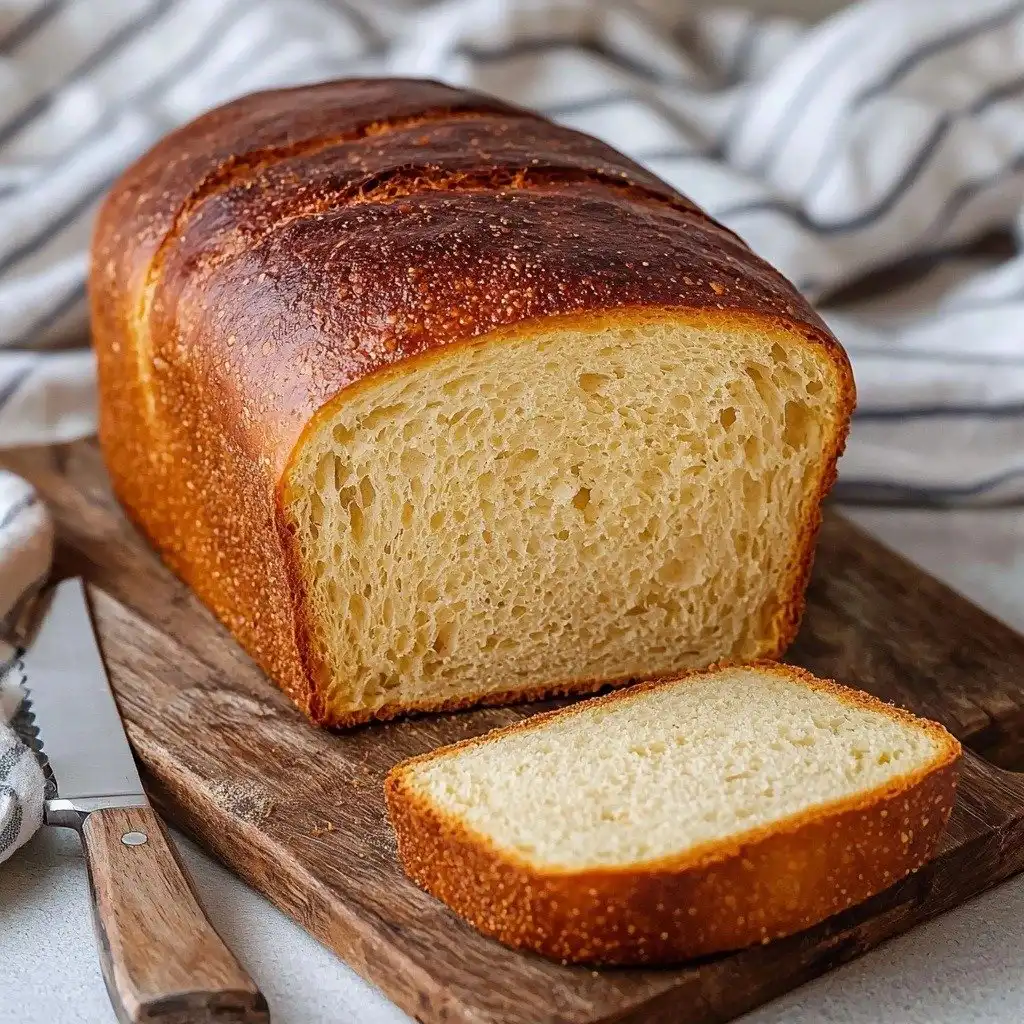
There’s something so comforting about a fresh loaf of bread, still warm from the oven. For years, I thought that joy was off-limits because of gluten. But let me tell you, finding the perfect gluten-free sandwich bread recipe has been a game-changer! This Easy Gluten Free Sandwich Bread isn’t just “good for gluten-free,” it’s just plain good bread. It’s light, fluffy, and holds up beautifully for sandwiches, toast, or just slathered with butter. Seriously, it tastes like real bread, and that’s a huge win in my book!
Why You’ll Love This Easy Gluten Free Sandwich Bread
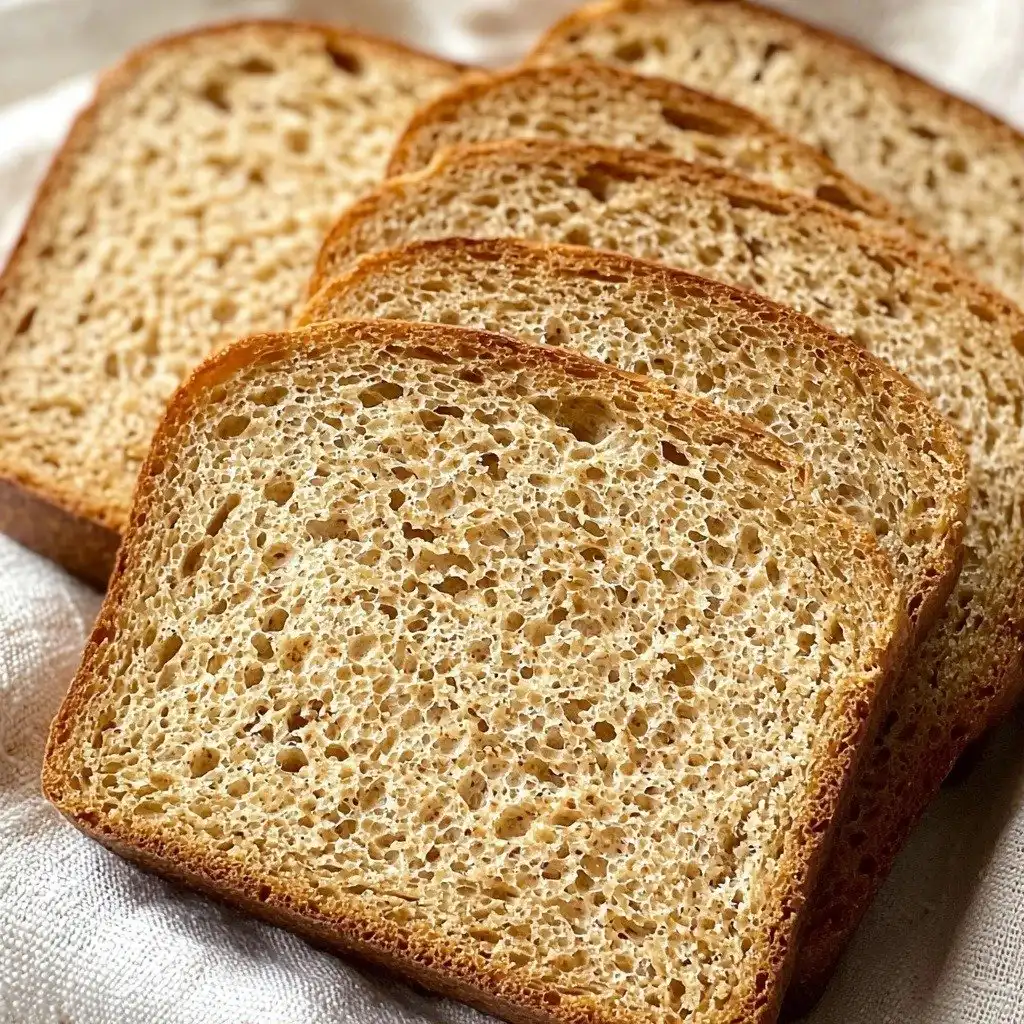
- It has an amazing texture – soft, airy, and not at all crumbly like some gluten-free breads can be.
- The flavor is wonderfully neutral, making it perfect for both sweet and savory toppings.
- It’s surprisingly easy to make, especially with a stand mixer, even if you’re new to gluten-free baking.
- You can finally enjoy proper sandwiches again without compromise!
Ingredients You’ll Need
- Whole Psyllium Husk: This is your secret weapon for structure and elasticity in gluten-free baking! It creates a gel that mimics gluten. If you only have psyllium husk powder, use a little less, about 17g.
- Tapioca Starch: This helps create a light and chewy texture. You can swap it for cornstarch, potato starch, or arrowroot starch if needed.
- Millet Flour: A great all-around gluten-free flour that adds a subtle sweetness and tenderness. Finely milled brown rice flour works well as a substitute.
- Sorghum Flour: This contributes to a softer crumb and a mild flavor. Light buckwheat flour, white teff flour, or even oat flour (if you tolerate oats) can be used instead.
- Caster/Superfine or Granulated Sugar: Not just for sweetness, sugar feeds the yeast and helps with browning.
- Instant Yeast: This is my go-to because it mixes right in! If you have active dry yeast, you’ll just need to activate it first with some warm milk and a bit of sugar.
- Baking Powder: Provides an extra lift, working alongside the yeast for a lovely rise.
- Xanthan Gum: Another essential binder in gluten-free baking, it helps prevent the bread from falling apart.
- Whole Milk: Adds richness and helps create a tender crumb. Make sure it’s lukewarm for the yeast!
- US Large/UK Medium Eggs: Eggs contribute to structure, moisture, and flavor. Room temperature eggs mix in best.
- Sunflower Oil: Keeps the bread moist and soft. Any neutral-tasting oil will work here.
- Egg White: Brushing with whisked egg white before baking gives the crust a beautiful golden sheen.
How to Make Easy Gluten Free Sandwich Bread Step by Step
First things first, you’ll want to get your psyllium gel going. In a bowl, just whisk together the psyllium husk and lukewarm water. It’ll thicken up pretty quickly, forming a gel in about 30-45 seconds. This gel is super important for giving our gluten-free dough that stretchy, pliable quality we usually get from gluten!
While your psyllium is gelling, grab a big bowl (or your stand mixer bowl). Whisk together all your dry ingredients: the tapioca starch, millet flour, sorghum flour, sugar, instant yeast, baking powder, xanthan gum, and salt. Make sure everything is nicely combined. Then, add the lukewarm milk, room temperature eggs, and oil to your psyllium gel mixture and mix that well. Now, make a little well in the center of your dry ingredients and pour in the wet mixture. This is where the magic starts!
Now it’s time to knead! If you have a stand mixer with a dough hook, this is the perfect time to use it because the dough will be quite soft and sticky. Knead until everything is smooth and evenly mixed, then keep going for another 4-5 minutes in the stand mixer, or 6-8 minutes if you’re kneading by hand. Don’t be afraid to use a rubber spatula to scrape down the sides of the bowl often – we want to make sure there are no dry spots of flour hiding! The dough will be very soft and sticky, and that’s exactly how it should be. Resist the urge to add more flour to the dough itself, as that can make your bread dry and dense. You’ll be working on a generously floured surface and with floured hands later, so don’t worry about the stickiness for now.
My Top Tips for Success
- I always recommend using a stand mixer if you have one; it makes handling this soft dough so much easier.
- In my experience, properly gelling the psyllium husk is crucial for the best texture, so don’t skip that step!
- Trust me on this one: knead the dough for the full recommended time. It helps develop that wonderfully smooth texture.
- If the dough is too sticky to handle even with flour, popping it in the fridge for an hour can make it much more manageable.
- Scoring the bread before proofing isn’t just for looks; it helps the bread rise evenly and prevents cracks.
- For a super crisp crust, don’t shy away from that optional extra baking step at the end.
Common Mistakes to Avoid
- Adding too much flour: This is a common temptation with sticky doughs. Adding extra flour to the dough can make your bread dense and dry. Instead, use a generously floured surface and floured hands when shaping.
- Not kneading long enough: Insufficient kneading means the ingredients won’t be fully incorporated and the texture won’t be as smooth. Make sure to knead for the full 4-8 minutes.
- Not letting it proof in a warm spot: Yeast needs warmth to activate and help the bread rise. If your kitchen is cool, create a warm environment in your oven with boiling water.
- Slicing too early: It’s hard to resist, but slicing into warm bread can make it gummy and dense. Always let it cool completely, or at least until lukewarm, before slicing.
- Not scoring the dough: Skipping the scoring step can lead to uneven rising and cracks on the top of your loaf. Scoring helps control where the bread expands.
How to Store Easy Gluten Free Sandwich Bread
- Room Temperature: Store in an airtight container or bread bag for up to 2-3 days.
- Freezer: Slice the cooled bread and freeze in a freezer-safe bag for up to 2-3 months. Toast slices directly from frozen.
Frequently Asked Questions
Can I use active dry yeast instead of instant yeast?
Yes, you absolutely can! You’ll need 10g of active dry yeast. Just activate it first by mixing it with the lukewarm milk and a tablespoon of sugar, letting it sit for 5-10 minutes until frothy, then add it with the rest of the wet ingredients.
Why is my dough so sticky?
This gluten-free brioche dough is naturally very soft and sticky, and that’s perfectly normal! It helps create a moist and tender bread. Use a generously floured surface and floured hands when shaping, or chill the dough for an hour if it’s too difficult to handle.
Do I need a stand mixer for this recipe?
While a stand mixer makes the process much easier, especially with sticky dough, you can definitely knead this bread by hand. Just be prepared for a slightly longer kneading time (6-8 minutes) and some sticky hands!
How do I know when the bread is fully baked?
The bread is done when it’s deep golden brown on top, has a crisp bottom and side crust, and weighs around 960-970g. This weight indicates it has lost enough moisture during baking. An internal temperature of 200-210°F (93-99°C) is also a good indicator.
Can I make this bread ahead of time?
Yes! You can bake the bread, let it cool completely, and then store it at room temperature for a couple of days or slice and freeze it for longer storage. It thaws beautifully.
I genuinely hope this Easy Gluten Free Sandwich Bread brings a little bit of extra joy and deliciousness to your kitchen, just like it has to mine. There’s nothing quite like baking your own bread, and this recipe makes it so achievable. If you give it a try, please let me know how it turns out!
PrintEasy Gluten Free Sandwich Bread
A soft, fluffy, and perfectly structured gluten-free sandwich bread that’s simple to make and tastes just like traditional bread.
- Prep Time: 25
- Cook Time: 70
- Total Time: 205
- Yield: 1 loaf (approx. 960-970g)
- Category: Baking
- Method: Baking
- Cuisine: American
- Diet: Gluten-Free
Ingredients
- 20 g (4 tbsp) whole psyllium husk
- 280 g (1 cup + 2½ tbsp) lukewarm water
- 230 g (2 cups) tapioca starch
- 135 g (1 cup) millet flour
- 60 g (⅓ cup + 2 tbsp) sorghum flour
- 50 g (¼ cup) caster/superfine or granulated sugar
- 8 g (2½ tsp) instant yeast
- 8 g (2 tsp) baking powder
- 7 g (2¾ tsp) xanthan gum
- 12 g (2 tsp) salt
- 120 g (½ cup) whole milk, lukewarm
- 2 US large/UK medium eggs, room temperature
- 25 g (2 tbsp) sunflower oil
- 1 US large/UK medium egg white, whisked
Instructions
- In a bowl, mix together the psyllium husk and lukewarm water.
- Allow the mixture to sit for 30-45 seconds until a gel forms.
- In a large bowl or the bowl of a stand mixer, whisk together the tapioca starch, millet flour, sorghum flour, sugar, instant yeast, baking powder, xanthan gum and salt.
- Add the lukewarm milk, room temperature eggs, and sunflower oil to the psyllium gel.
- Make a well in the middle of the dry ingredients.
- Pour the psyllium gel-egg mixture into the well of the dry ingredients.
- Knead the dough until smooth and all ingredients are evenly incorporated.
- Continue kneading for an additional 4-5 minutes (stand mixer) or 6-8 minutes (by hand).
- Use a rubber spatula to occasionally scrape along the sides and bottom of the bowl to prevent dry patches.
- Turn out the dough onto a generously floured surface.
- Dust the top of the dough with flour.
- Give the dough a gentle knead with floured hands.
- Shape the dough into a smooth ball.
- Use the palms of your hands to gently press the dough into a log shape that fits snugly into a 9×5-inch (23x13cm) loaf pan.
- Carefully transfer the shaped dough into the loaf pan (do not grease).
- Use a bread lame or sharp knife to score the top of the bread with 3 diagonal slashes.
- Lightly cover the loaf pan with plastic wrap/cling film to prevent drying.
- Proof the bread in a warm spot until doubled in size, about 1 hour 15 minutes to 1 hour 30 minutes.
- After 45 minutes of proofing, preheat your oven to 400ºF (200ºC).
- Place a baking steel, baking stone, or heavy-duty baking sheet on the bottom oven rack.
- Once the sandwich bread has doubled in size, gently brush the top with the whisked egg white.
- Place the loaf pan directly onto the preheated baking steel (or stone/sheet).
- Bake at 400ºF (200ºC) for 1 hour to 1 hour 10 minutes.
- Bake until the bread is deep golden brown on top, the crust is crisp, and it weighs about 960-970g.
- If the top browns too quickly, cover it loosely with aluminum foil (shiny side up) and continue baking.
- For an extra crisp crust, remove the bread from the loaf pan after baking.
- Place the bread directly onto a baking sheet and return it to the oven for a further 5-10 minutes.
- Immediately transfer the baked sandwich bread onto a wire rack to cool completely to room temperature (or at least lukewarm) before slicing.
Notes
If using active dry yeast, activate 10g with lukewarm milk and 1 tbsp sugar for 5-10 minutes before adding.
If dough is too sticky to handle, chill it in the fridge for about 1 hour before shaping.
Scoring the dough before proofing helps it rise evenly and prevents cracking.
Ensure the bread cools completely before slicing for the best texture.


