
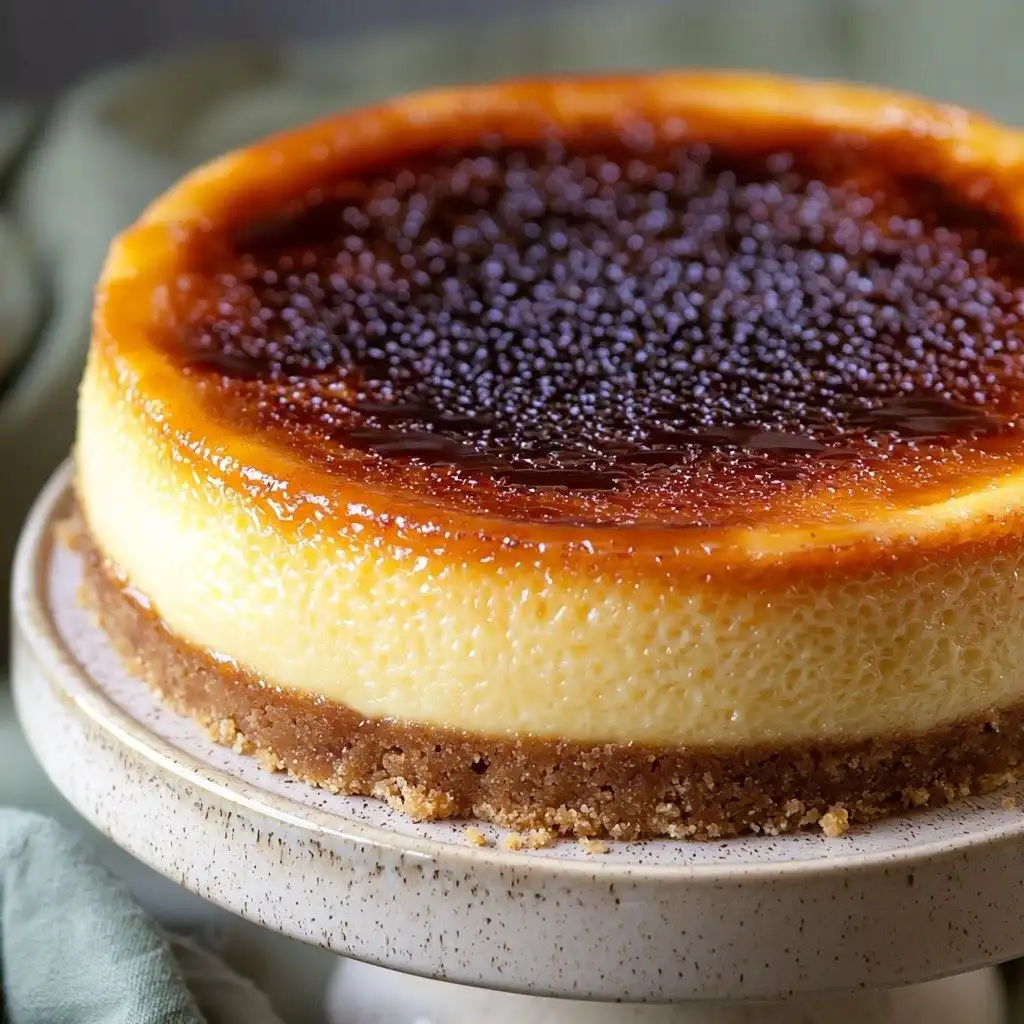
Oh, friends, let me tell you about a dessert that completely stole my heart the first time I made it. There’s something so utterly delightful about a classic cheesecake, but when you add that crackly, caramelized sugar crust of a crème brûlée? Pure magic! This Crème Brûlée Cheesecake isn’t just a dessert; it’s an experience. It’s the kind of treat that makes everyone at the table ooh and aah, and honestly, it’s not nearly as complicated as it looks. You’re going to love bringing this showstopper to your next gathering!
Why You’ll Love This Crème Brûlée Cheesecake
- It’s got that perfect creamy, tangy cheesecake filling we all adore.
- The crisp, caramelized sugar topping adds an incredible texture and flavor contrast.
- It’s surprisingly easy to make, even for beginner bakers!
- It’s a showstopper dessert that’s perfect for any special occasion or just a cozy night in.
Ingredients You’ll Need
- Digestive Biscuits: These make the best, buttery crust. If you can’t find digestives, graham crackers are a good substitute.
- Cream Cheese: Make sure it’s full-fat and softened to room temperature. This is key for a smooth, lump-free batter.
- Superfine Sugar (Caster Sugar): This dissolves easily, giving you a wonderfully smooth cheesecake texture. Granulated sugar works too, but superfine is ideal.
- Sour Cream: This adds a lovely tang and helps create that signature creamy texture. Don’t skip it!
- Vanilla Extract: Use good quality vanilla for the best flavor.
- Large Eggs: Bring these to room temperature and beat them lightly before adding to the batter. This helps them incorporate smoothly without overmixing.
- Granulated Sugar (for topping): This is what you’ll caramelize with a torch for that iconic brûlée crust.
How to Make Crème Brûlée Cheesecake Step by Step
First things first, let’s get that crust ready! You’ll want to preheat your oven to 160°C (325°F). Take your digestive biscuits and either pulse them in a food processor until they’re fine crumbs, or get out some kitchen aggression and bash them in a Ziploc bag with a rolling pin – super satisfying! Then, mix those crumbs with your melted butter and press the mixture firmly into the bottom and up the sides of a 9-inch springform pan. This creates a sturdy base for your creamy cheesecake.
Now for the star of the show: the cheesecake filling! In a stand mixer, or with an electric whisk and a big bowl, gently whisk your softened cream cheese until it’s lovely and smooth. Remember, we don’t want to overbeat it here, just get it creamy. Next, add your superfine sugar and mix again until just combined. Then, stir in the sour cream, vanilla extract, and a pinch of salt, making sure to scrape down the sides of the bowl so everything gets incorporated. This is where the magic happens and your batter starts looking silky smooth!
Finally, with the mixer on low, slowly drizzle in your lightly beaten eggs, mixing just until they’re combined. Don’t worry if it looks a little jiggly at this point; that’s totally normal. Pour this beautiful mixture into your prepared crust. Place the springform pan on a baking sheet lined with tin foil – this helps catch any drips and makes cleanup a breeze. Bake for about 50-60 minutes at 160°C (325°F). You’re looking for edges that are slightly puffed and golden, and a center that springs back but still has a little jiggle. Trust me, a little jiggle means it’s perfectly baked and won’t crack!
My Top Tips for Success
- I always make sure my cream cheese and eggs are at room temperature. This is crucial for a smooth, lump-free batter.
- Trust me on this one: don’t overmix the batter, especially after adding the eggs. Overmixing can incorporate too much air, leading to cracks.
- In my experience, a water bath isn’t strictly necessary for this recipe, but placing the springform pan on a foil-lined baking sheet is a good idea for easy cleanup.
- Loosening the edges with a knife after 10 minutes of cooling prevents cracks as the cheesecake settles.
- Chilling overnight is truly best. It allows the cheesecake to firm up perfectly and develop its full flavor.
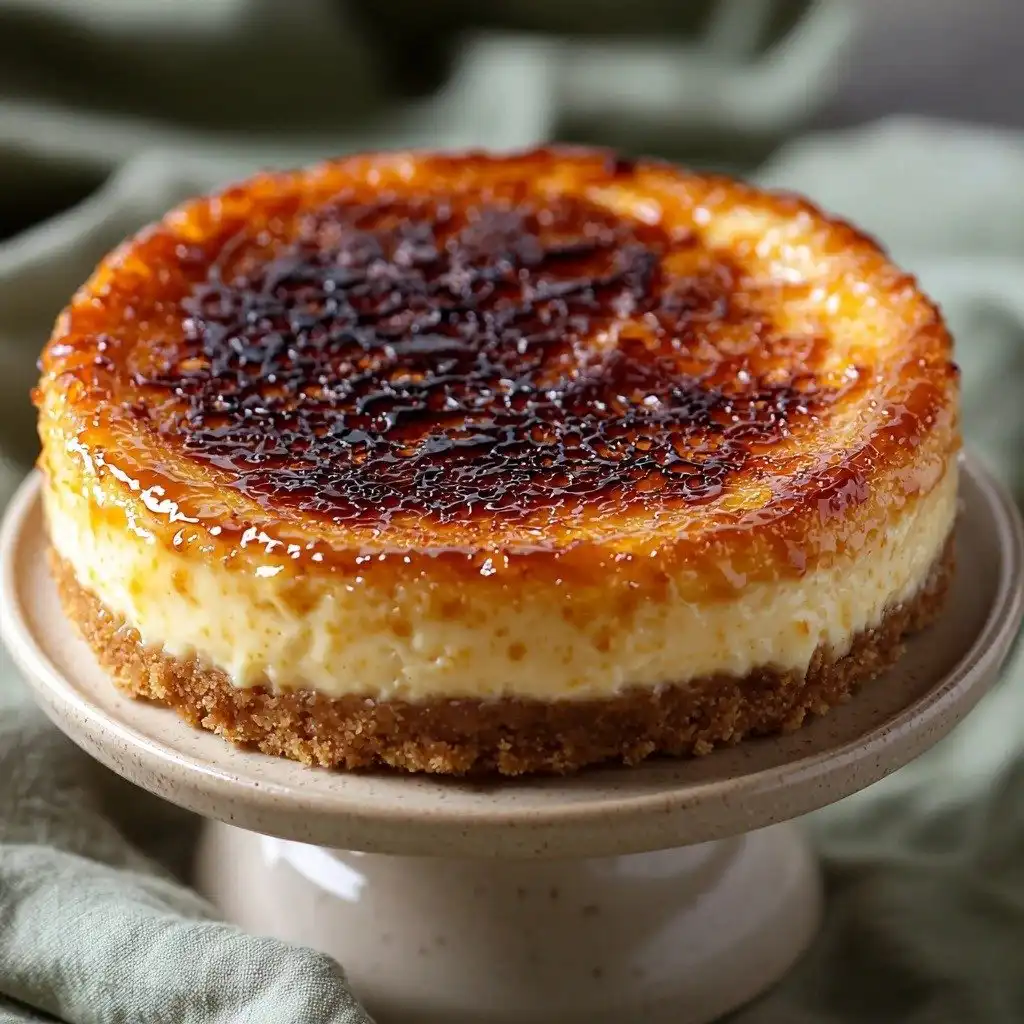
- For the brûlée topping, a kitchen torch is your best friend! It gives you that perfect, even caramelization.
Common Mistakes to Avoid
- Overbeating the cream cheese: This can incorporate too much air, leading to a cracked cheesecake and a less dense texture. Beat just until smooth.
- Adding cold eggs: Cold eggs don’t emulsify properly with the cream cheese, which can result in a lumpy batter. Always use room temperature eggs.
- Overbaking: An overbaked cheesecake will be dry and prone to cracking. Remove it from the oven when the edges are set but the center still has a slight jiggle.
- Not chilling long enough: Rushing the chilling process means your cheesecake won’t be fully set, making it hard to slice and less enjoyable. Give it at least 4 hours, but overnight is ideal.
- Burning the sugar topping: Keep the torch moving! If you hold it in one spot for too long, the sugar will burn instead of caramelize, giving a bitter taste.
How to Store Crème Brûlée Cheesecake
- Refrigerator: Keep any leftover Crème Brûlée Cheesecake covered tightly in the fridge for up to 3-4 days.
- Freezer: For longer storage, slice the cheesecake and wrap individual slices tightly in plastic wrap, then foil. Freeze for up to 1 month. Thaw in the refrigerator before serving.
Frequently Asked Questions
What if I don’t have a kitchen torch for the topping?
While a kitchen torch is ideal for an even brûlée, you can carefully use your oven’s broiler. Place the sugared cheesecake under a preheated broiler for a minute or two, watching it constantly to prevent burning. Keep a close eye on it!
Why did my cheesecake crack?
Cracks often happen from overbaking, overmixing the batter, or rapid temperature changes. Make sure your ingredients are room temperature, don’t overmix, and allow the cheesecake to cool slowly.
Can I make this cheesecake ahead of time?
Absolutely! This Crème Brûlée Cheesecake is perfect for making ahead. Bake and chill the cheesecake (without the sugar topping) a day or two in advance. Add the sugar and brûlée it right before serving.
What kind of pan should I use?
A 9-inch springform pan is essential for easy removal and those beautiful, clean slices. Make sure it’s a good quality one that doesn’t leak!
I hope this Crème Brûlée Cheesecake brings as much joy and deliciousness to your kitchen as it does to mine. It’s truly a showstopping dessert that tastes even better than it looks! If you make it, I’d absolutely love to hear how it turned out and see your beautiful creations!
PrintCrème Brûlée Cheesecake
A delightful fusion of creamy cheesecake and the crisp, caramelized sugar topping of a classic crème brûlée.
- Prep Time: 25
- Cook Time: 60
- Total Time: 305
- Yield: 12 servings
- Category: Dessert
- Method: Baking
- Cuisine: American
- Diet: Vegetarian
Ingredients
- 170 g digestive biscuits
- 100 g butter melted
- 900 g cream cheese softened to room temperature
- 200 g superfine sugar (caster sugar)
- 160 g sour cream
- 1 ½ tsp vanilla extract
- Pinch of salt
- 4 large eggs room temperature lightly beaten
- 50 g granulated sugar
Instructions
- Preheat your oven to 160°C (325°F).
- Prepare the crust: Blend the digestive biscuits in a food processor until fine crumbs form, or bash them in a Ziploc bag with a rolling pin until finely crushed.
- Tip the biscuit crumbs into a bowl.
- Add the melted butter to the biscuit crumbs and mix well until combined.
- Pour the biscuit mixture into a 9-inch springform pan.
- Press the mixture firmly into the bottom and up the sides of the pan to form an even crust.
- Set the crust aside while you prepare the filling.
- Prepare the cheesecake filling: In a stand mixer or large bowl with an electric whisk, lightly whisk the softened cream cheese until it is creamy and smooth. Do not overbeat.
- Add the superfine sugar to the cream cheese mixture and mix again until combined.
- Add the sour cream, vanilla extract, and a pinch of salt to the mixture.
- Stir until all ingredients are well-combined, scraping down the sides of the bowl frequently.
- Set the mixer to low speed.
- Slowly add the lightly beaten egg mixture, a little at a time, to the cream cheese mixture.
- Mix just until the eggs are combined into the batter. Do not overmix.
- Pour the cheesecake mixture into the prepared springform pan with the crust.
- Place the springform pan on a baking sheet lined with tin foil.
- Bake in the preheated oven for 50-60 minutes, or longer as needed, until the edges are slightly puffed and lightly golden brown, and the center still has a slight jiggle when gently nudged.
- Remove the cheesecake from the oven.
- Allow the cheesecake to cool on top of the oven for 10 minutes.
- After 10 minutes, use a knife to gently loosen the crust from the inside edge of the springform pan to prevent cracking as it cools.
- Allow the cheesecake to cool completely at room temperature while still in the pan.
- Once cooled, transfer the cheesecake (still in the pan) to the fridge.
- Chill the cheesecake in the fridge overnight, or for at least 4 hours, until fully set.
- After chilling, remove the cheesecake from the fridge and carefully remove the ring from around the pan.
- Prepare the crème brûlée topping: Sprinkle the 50g of granulated sugar in an even layer over the top of the chilled cheesecake.
- Use a kitchen torch to caramelize the sugar on top until it forms a crisp, golden-brown crust.
- Allow the caramelized sugar to harden for a few minutes.
- Slice and serve your Crème Brûlée Cheesecake.
Notes
Ensure all dairy ingredients and eggs are at room temperature for a smooth batter.
Avoid overmixing the cheesecake batter, especially after adding the eggs, to prevent cracks.
Do not overbake your cheesecake; a slight jiggle in the center is perfect.
Chill the cheesecake overnight for the best texture and to prevent cracking during removal.


