
The Creamiest No-Bake Cheesecake Cups Recipe EVER!!
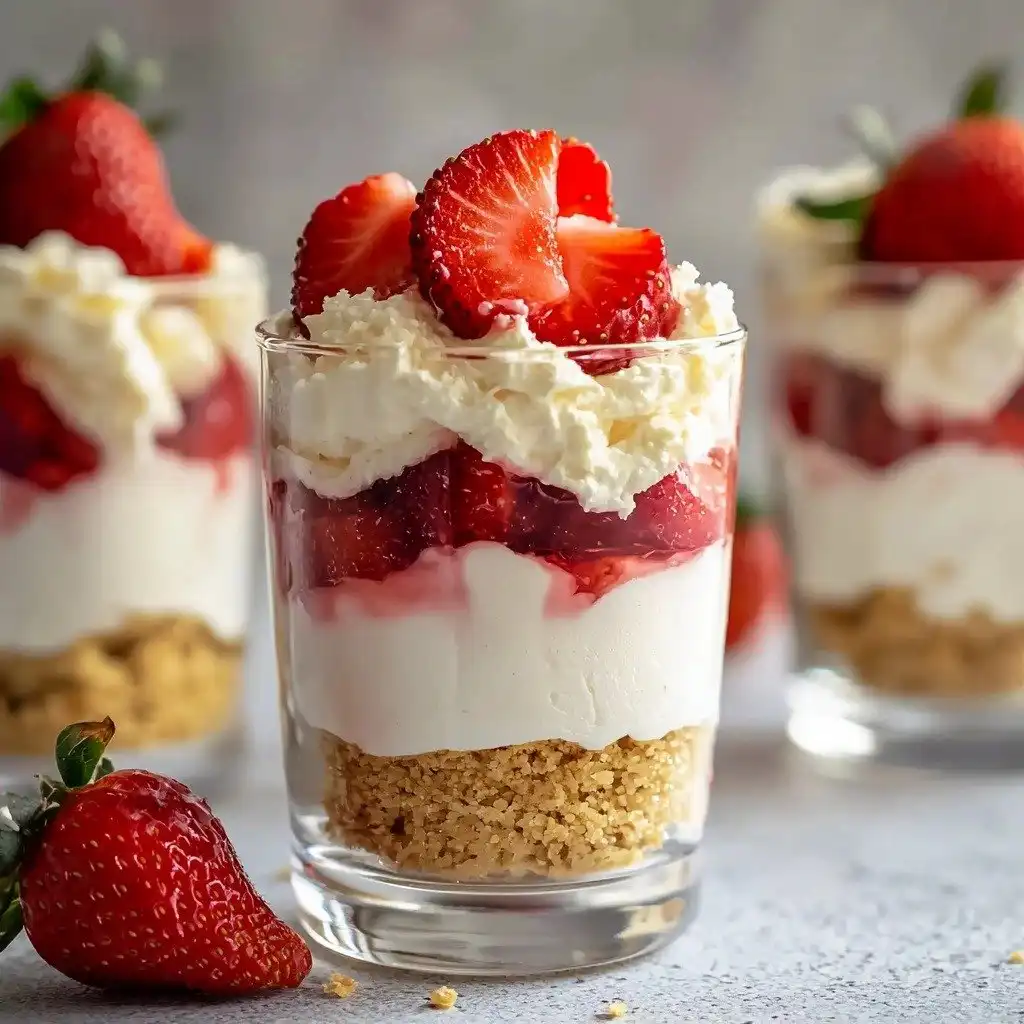
Why You’ll Love This The Creamiest No-Bake Cheesecake Cups Recipe EVER!!
- These cups are incredibly easy to make, no oven required! Perfect for beginners or hot days.
- The texture is unbelievably smooth, rich, and, yes, creamy—just like a baked cheesecake but even lighter.
- It’s super versatile! You can customize the toppings to fit any season or craving.
- They’re perfectly portioned, which makes serving a breeze and cleanup even easier.
Ingredients You’ll Need
- Graham Cracker Crumbs: These form the delicious, buttery crust. You can buy them pre-crushed or crush whole graham crackers yourself.
- Salted Butter: Melting the butter helps bind the crumbs together for a perfect crust. Salted butter adds a nice balance to the sweetness.
- Cream Cheese: This is the star of our show! Make sure it’s softened to room temperature so it mixes smoothly without any lumps.
- Granulated Sugar: For just the right amount of sweetness in our creamy filling.
- Pure Vanilla Extract: A little vanilla goes a long way in enhancing all those lovely creamy flavors. Use pure extract for the best taste!
- Heavy Whipping Cream: This is what gives our cheesecake its incredible light and airy, yet rich, texture. It needs to be very cold to whip up properly.
How to Make The Creamiest No-Bake Cheesecake Cups Recipe EVER!! Step by Step
First things first, let’s get that delicious crust ready! Grab a small bowl and toss in your graham cracker crumbs. Then, melt your butter and pour it right over the crumbs. Give it a good stir until every crumb is coated and it looks like wet sand. This is where the magic starts! Now, take your serving dishes – I love using cute little glasses or ramekins – and spoon about 2-3 tablespoons of that crumb mixture into the bottom of each. Press it down gently with the back of a spoon to form a nice, even base.
Next up, it’s cream-whipping time! Make sure your heavy cream is super cold. Pour it into a large bowl, or your stand mixer bowl if you have one. Then, beat it on high speed until you see lovely stiff peaks form. This usually takes about a minute, but keep an eye on it! Once it’s whipped, gently scrape it into a separate bowl and set it aside. Don’t worry if it looks a little soft; we’ll fold it in later.
Now for the creamy filling! In that same large bowl (no need to wash it!), combine your softened cream cheese, granulated sugar, and pure vanilla extract. Mix this until it’s completely smooth and wonderfully creamy. No lumps allowed! Finally, the fun part: gently fold the whipped cream into your cream cheese mixture. Take your time with this step; you want to keep that airy texture. Stir until everything is just combined and looks perfectly smooth and creamy. You can spoon this into a piping bag for a neat look, or just divide it evenly among your prepared cups. Pop them in the fridge, cover them, and chill for at least an hour. Trust me, the wait is worth it!
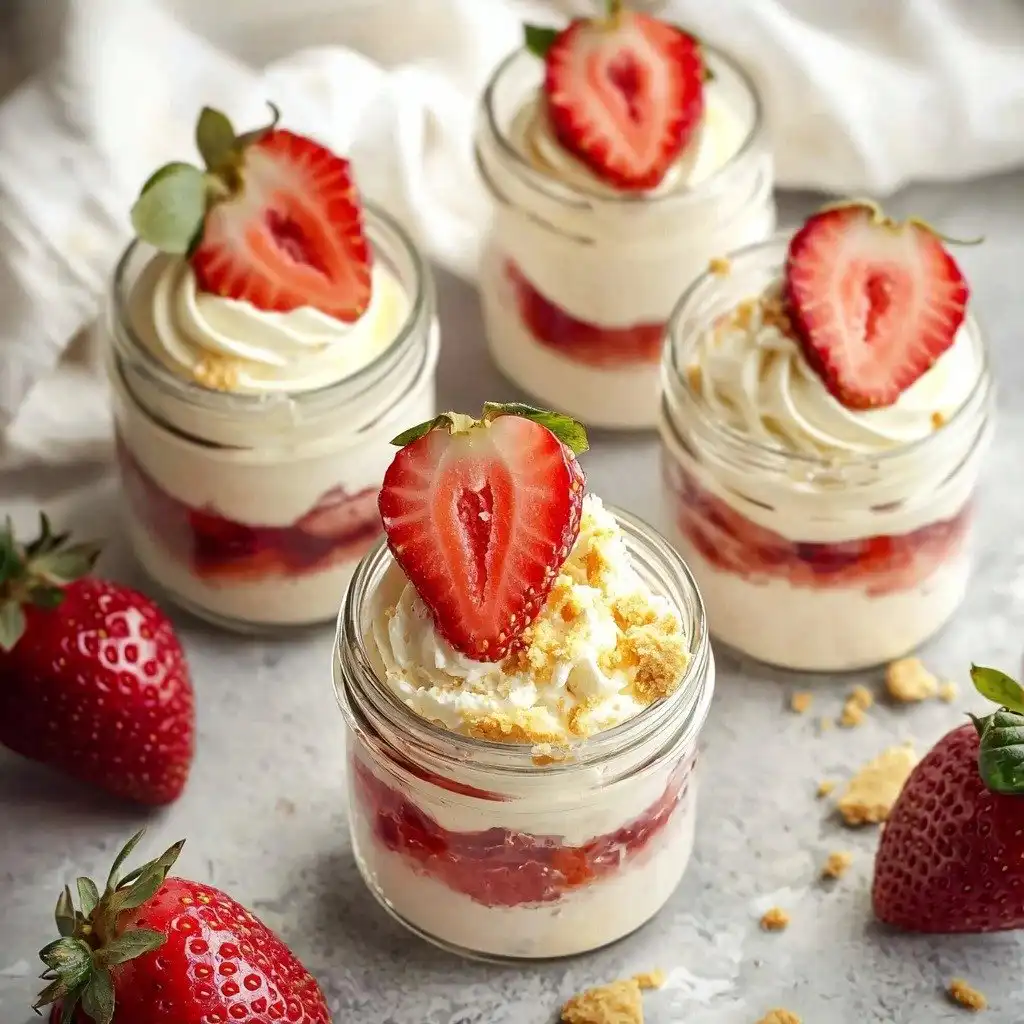
My Top Tips for Success
- I always make sure my cream cheese is at room temperature. This is key for a super smooth, lump-free filling.
- In my experience, using very cold heavy cream makes whipping it to stiff peaks so much easier and faster.
- Trust me on this one: don’t overmix the cream cheese mixture once you add the whipped cream. Gently fold it to keep that light, airy texture.
- Chilling for at least an hour is non-negotiable. It helps the cheesecake set beautifully and makes it taste even better!
Common Mistakes to Avoid
- Using cold cream cheese: This will result in a lumpy filling. Always ensure your cream cheese is softened to room temperature before mixing.
- Over-beating the cream cheese mixture: Once the whipped cream is folded in, stop mixing as soon as it’s combined. Over-mixing can deflate the whipped cream and make the cheesecake less airy.
- Not chilling long enough: The cheesecake needs time to set properly. If you serve it too soon, it might be too soft and not hold its shape.
- Not pressing the crust firmly: A loose crust will crumble apart. Make sure to press it down well into the cups.
How to Store The Creamiest No-Bake Cheesecake Cups Recipe EVER!!
- Refrigerator: Store covered in the refrigerator for up to 3-4 days.
- Freezer: You can freeze these cups, uncovered, until firm (about 2 hours), then wrap individually in plastic wrap and foil. Store for up to 1 month. Thaw in the refrigerator before serving.
Frequently Asked Questions
Can I use low-fat cream cheese?
While you can, I highly recommend using full-fat cream cheese for the best, creamiest texture and richest flavor. Low-fat versions might result in a less firm and less decadent cheesecake.
Do I have to use a stand mixer?
No, you don’t! You can absolutely use a handheld electric mixer. Just make sure to beat the heavy cream and then the cream cheese mixture until smooth.
What if my whipped cream doesn’t get stiff peaks?
Ensure your heavy cream is very cold, and your bowl and beaters are clean. Sometimes chilling the bowl for a few minutes beforehand helps too. Keep beating; it will get there!
Can I make these ahead of time?
Absolutely! These cheesecake cups are perfect for making ahead. You can prepare them a day in advance and keep them covered in the refrigerator until you’re ready to serve.
I genuinely hope you give
The Creamiest No-Bake Cheesecake Cups Recipe EVER!!
a try! It’s such a simple way to create something truly special and delicious. If you whip up a batch, I’d absolutely love to hear how they turned out for you! PrintThe Creamiest No-Bake Cheesecake Cups Recipe EVER!!
These individual no-bake cheesecake cups are incredibly easy to make, boasting a rich, creamy filling and a delightful graham cracker crust.
- Prep Time: 20
- Total Time: 80
- Yield: 6-8 servings
- Category: Dessert
- Method: No-Bake
- Cuisine: American
- Diet: Vegetarian
Ingredients
- 3/4 cup graham cracker crumbs
- 2 tbsp salted butter, melted
- 8 oz cream cheese, softened
- 1/2 cup granulated sugar
- 1 teaspoon pure vanilla extract
- 1 cup heavy whipping cream
- Optional toppings: raspberries, strawberries, whipped cream, broken cookies, graham cracker crumbs, etc.
Instructions
- In a small bowl, stir together the melted butter and graham cracker crumbs.
- Mix until the crumbs are evenly distributed and moistened.
- Put approximately 2-3 tablespoons of the mixture into the bottom of each glass or serving dish.
- Press the crumb mixture gently to form a compact crust.
- In a large bowl, pour in the heavy whipping cream.
- Beat the cream on high speed until stiff peaks form, about 1 minute.
- Scrape the whipped cream into a second bowl and set aside.
- In the large bowl, combine the softened cream cheese, granulated sugar, and pure vanilla extract.
- Mix until the cream cheese mixture is completely smooth and creamy.
- Gently fold the reserved whipped cream into the cream cheese mixture.
- Stir until the mixture is completely combined and creamy.
- Spoon the cheesecake mixture into a piping bag, if desired, or use a spoon.
- Pipe or spoon the mixture evenly into the prepared cups.
- Top with fresh fruit or other optional toppings, if using.
- Cover the cups and chill in the refrigerator for at least 1 hour before serving.
Notes
Ensure cream cheese is at room temperature for a smooth filling.
Use very cold heavy cream for best whipping results.
Fold whipped cream gently to maintain airiness.
Chill for at least one hour to allow the cheesecake to set properly.


