
There’s something truly magical about the smell of raspberries baking. For me, it instantly transports me back to summer mornings, picking berries with my grandma. This Raspberry Crisp recipe is more than just a dessert; it’s a hug in a bowl, perfect for any time you need a little comfort. It’s simple, sweet, and always a crowd-pleaser!
Why You’ll Love This Raspberry Crisp
- It’s incredibly easy to make, even if you’re new to baking.
- The sweet-tart raspberry filling perfectly balances the buttery, crumbly oat topping.
- That warm, bubbly fruit and crispy topping combination is pure heaven!
- It’s versatile enough for a cozy weeknight dessert or a special occasion.
Ingredients You’ll Need
- Raspberries: Fresh or frozen both work beautifully! No need to thaw frozen berries first.
- Sugar: Just enough to sweeten the tart raspberries without making it overly sweet.
- Flour: Helps thicken the fruit filling and binds the crisp topping.
- Cornstarch: This is our secret weapon for a perfectly set, not-too-runny, fruit filling.
- Old Fashioned Oats: These give our topping that wonderful chewy texture. Don’t use instant oats!
- Brown Sugar: Adds a lovely caramel note and moisture to the crisp topping.
- Chilled Butter: Keeping your butter cold is key for a truly crumbly, tender topping.
- Ground Cinnamon: A touch of warmth that beautifully complements the raspberries.
How to Make Raspberry Crisp Step by Step
First things first, let’s get your oven ready! Preheat it to 350°F. While it’s warming up, take your butter out of the fridge and cut it into small cubes. This makes it easier to work with later and keeps it nice and cold, which is crucial for a great crisp topping.
Now, for the delicious filling! Grab a medium bowl and gently combine your raspberries, sugar, 3 tablespoons of flour, and the cornstarch. Stir it carefully so you don’t mush the berries too much. The flour and cornstarch are going to work their magic to thicken all those yummy juices as it bakes. Once mixed, pour this fruity goodness into a greased 8×8 inch baking dish, spreading it out evenly.
Time for the star of the show: the crisp topping! In another bowl, mix together the oats, brown sugar, 1/2 cup of flour, and the cinnamon. Now, add those cold butter cubes you prepared earlier. This is where the magic happens! Use your fingertips, a pastry cutter, or even a fork to work the butter into the dry ingredients. You want it to look like coarse breadcrumbs with some pea-sized pieces of butter still visible. Don’t worry if it seems a little crumbly; that’s exactly what we’re going for!
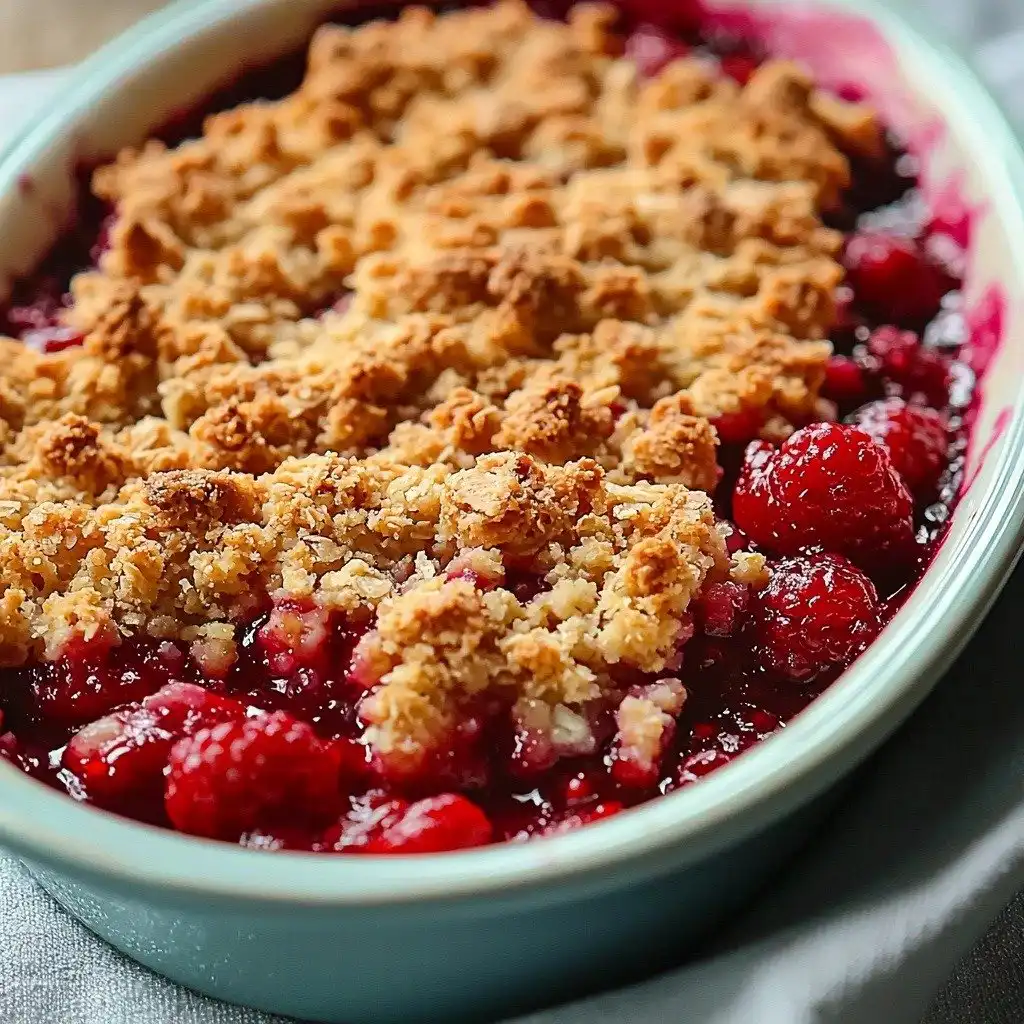
Once your topping is ready, sprinkle it evenly over the raspberry filling in your baking dish. Press it down just a little bit so it stays put, but don’t compact it too much. Pop it into your preheated oven and bake for about 30 minutes. You’ll know it’s done when the topping is golden brown and you see those beautiful berry juices bubbling up around the edges. Let it cool for about 10 minutes before serving. This helps the filling set up a bit, making it much easier to scoop!
My Top Tips for Success
- I always use chilled butter for the topping; it makes a huge difference in texture.
- In my experience, Old Fashioned oats give the best chewiness – avoid instant oats.
- Trust me on this one: let the crisp cool for at least 10 minutes before serving so the filling can set.
- Don’t overmix the raspberry filling; gentle stirring keeps the berries intact.
- If using frozen raspberries, there’s no need to thaw them first!
Common Mistakes to Avoid
- Overmixing the topping: This can melt the butter and lead to a tough, less crumbly topping. Work quickly and gently.
- Not greasing the dish: The filling can stick to the sides, making it hard to serve. Always grease your baking dish!
- Cutting into it too soon: The filling needs a few minutes to set after baking. Patience is key for clean scoops.
- Using instant oats: They can turn mushy during baking. Stick to Old Fashioned oats for that perfect texture.
How to Store Raspberry Crisp
- Room Temperature: Cover tightly with plastic wrap for up to 1 day.
- Refrigerator: Store covered in the fridge for up to 3-4 days.
- Freezer: Freeze individual portions or the entire crisp (unbaked or baked) for up to 3 months. Thaw in the fridge overnight and reheat.
Frequently Asked Questions
Can I use other berries?
Absolutely! This recipe works wonderfully with blueberries, blackberries, or a mixed berry blend. Adjust sugar slightly if your berries are very tart.
Do I need to thaw frozen raspberries?
No, you do not need to thaw frozen raspberries. You can add them directly to the filling mixture. The baking time might increase by a few minutes.
How do I know when the crisp is done?
The crisp is done when the topping is golden brown and the fruit filling is visibly bubbling around the edges. A slight jiggle in the center is okay.
Can I make this ahead of time?
Yes, you can assemble the crisp (filling and topping) and store it covered in the refrigerator for up to 24 hours before baking. Add a few extra minutes to the baking time if baking from cold.
What should I serve with raspberry crisp?
Warm raspberry crisp is divine with a scoop of vanilla ice cream, a dollop of whipped cream, or even a drizzle of custard sauce. It’s also great on its own!
I truly hope this Raspberry Crisp brings a smile to your face and a delicious aroma to your kitchen. It’s a simple pleasure that never disappoints. Give it a try, and let me know how much you loved it!
PrintRaspberry Crisp

A delightful and easy-to-make dessert featuring sweet-tart raspberries under a buttery, crumbly oat topping. Perfect for any occasion!
- Prep Time: 15
- Cook Time: 30
- Total Time: 45
- Yield: 8 servings
- Category: Dessert
- Method: Baking
- Cuisine: American
- Diet: Vegetarian
Ingredients
- For the filling:
- 4 cups raspberries (fresh or frozen)
- 1/2 cup sugar
- 3 tbsp flour
- 1 tsp cornstarch
- For the topping:
- 1 cup oats (Old Fashioned)
- 1/2 cup brown sugar
- 1/2 cup flour
- 1/3 cup butter (chilled and cubed)
- 1/2 tsp ground cinnamon
Instructions
- Preheat your oven to 350°F.
- Cut the chilled butter into small cubes and set aside.
- In a bowl, combine the raspberries, sugar, 3 tablespoons flour, and cornstarch.
- Stir gently until the berries are evenly coated.
- Transfer the raspberry mixture into a greased 8×8 inch baking dish.
- Spread the mixture into an even layer.
- In another bowl, combine the oats, brown sugar, 1/2 cup flour, and cinnamon.
- Add the cold cubed butter to the oat mixture.
- Use your fingertips, a pastry cutter, or a fork to work the butter into the mixture.
- Continue mixing until it resembles coarse breadcrumbs with some pea-sized pieces of butter remaining.
- Spread the oat topping evenly over the raspberry filling.
- Press the topping gently so it holds together but doesn't compact.
- Bake for 30 minutes.
- Bake until the topping is golden brown and the berry juices are bubbling slightly around the edges.
- Let the crisp cool for 10 minutes before serving.
Notes
Use chilled butter for the best crumbly topping texture.
Old Fashioned oats give the best chewiness; avoid instant oats.
Allow the crisp to cool for 10 minutes before serving to help the filling set.
Gentle stirring of the berries prevents them from breaking down too much.


