
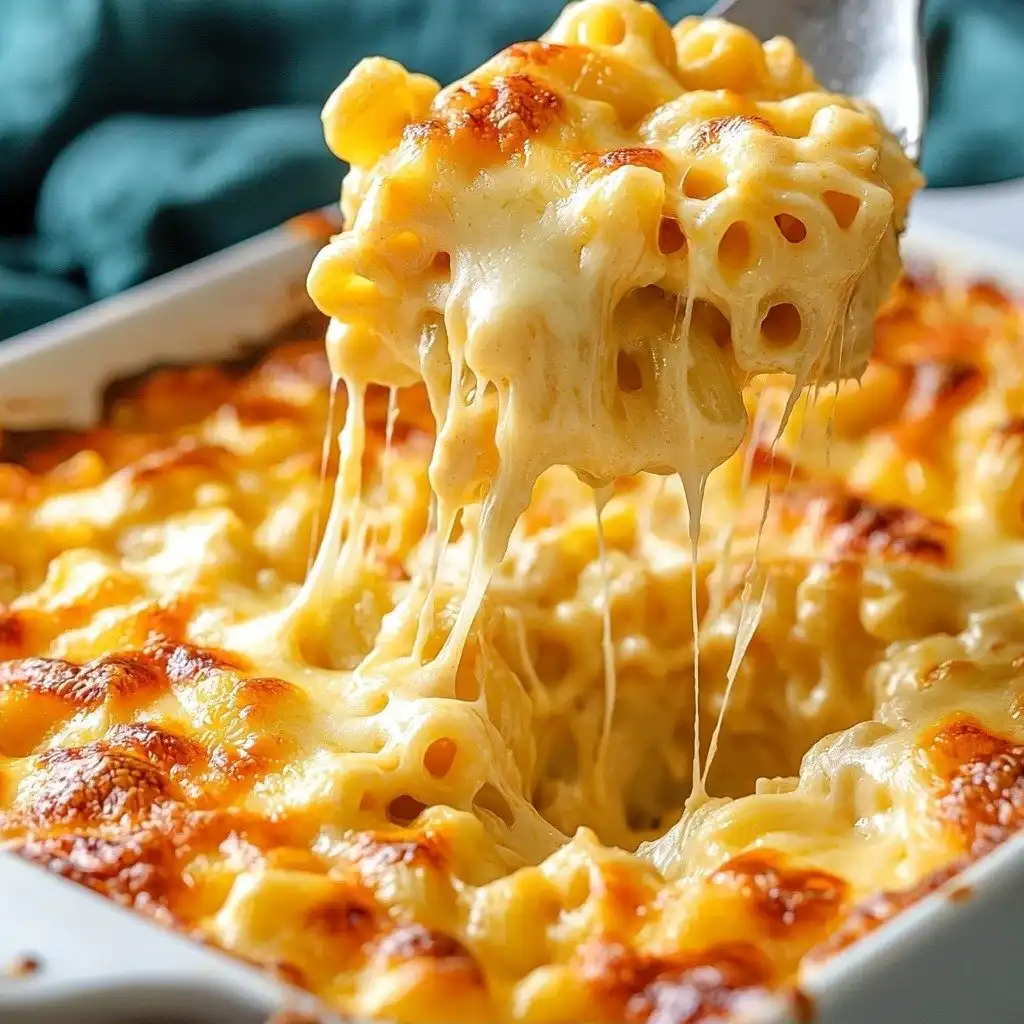
There’s just something about a really good mac and cheese that feels like a warm hug, isn’t there? For me, it brings back memories of big family dinners and cozy evenings. This isn’t just any mac and cheese; this is my go-to, tried-and-true recipe for Tini’s Mac and Cheese, and it’s become a beloved staple in my home. It’s got that perfect creamy texture, a rich cheesy flavor, and it’s surprisingly simple to pull together!
Why You’ll Love This Tini’s Mac and Cheese
- It’s incredibly creamy and cheesy, thanks to a blend of three delicious cheeses.
- The cavatappi pasta holds onto that luscious sauce perfectly in every bite.
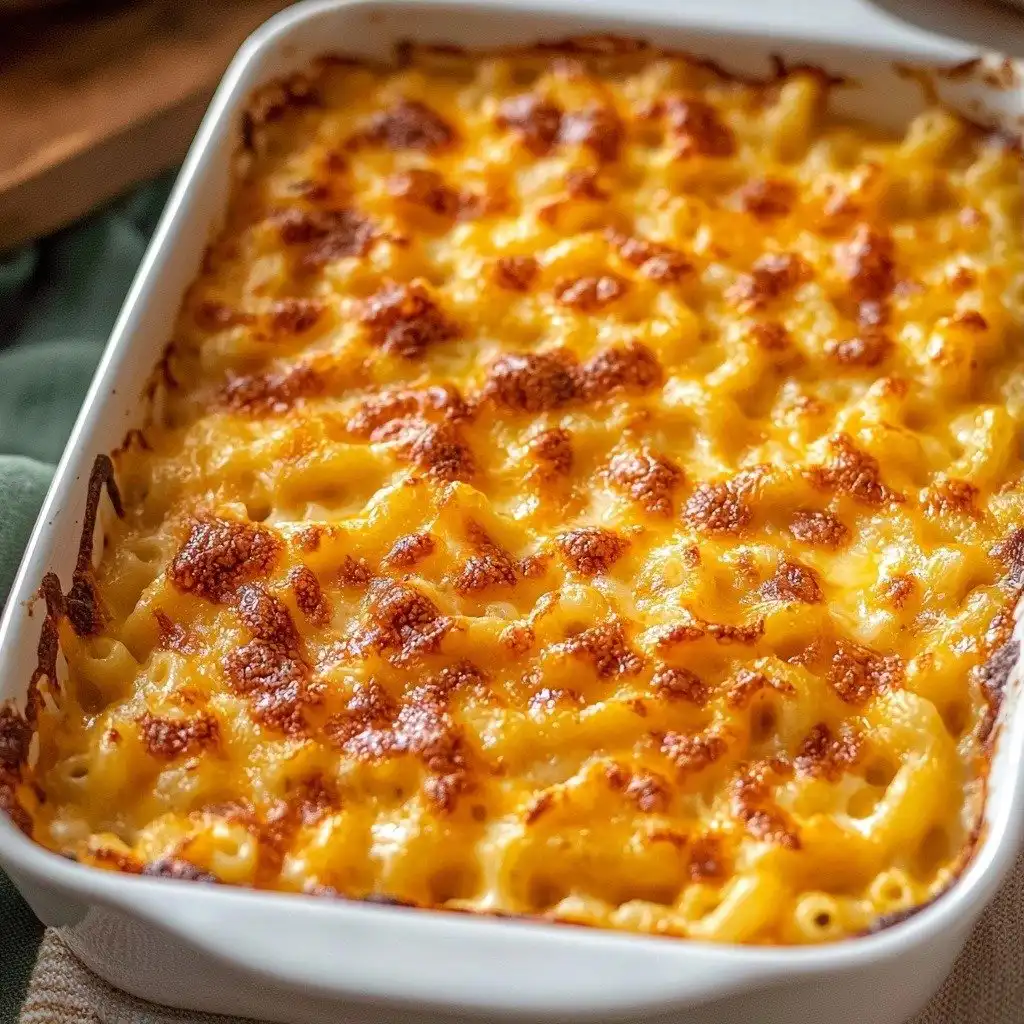
- It bakes up with a beautiful golden, bubbly crust that everyone will fight over.
- It’s the ultimate comfort food, perfect for family dinners or a potluck.
Ingredients You’ll Need
- Mozzarella Cheese: Grab a block from the deli for this. It’s usually firmer and easier to shred, giving you a better texture in your sauce than the pre-shredded kind.
- Colby Jack Cheese: This cheese adds a lovely mild, creamy flavor and melts beautifully.
- Sharp Cheddar: I prefer yellow sharp cheddar for that classic mac and cheese tang and color. It really makes the flavor pop!
- Cavatappi Pasta: Those corkscrew shapes are amazing for catching all the cheesy goodness. Feel free to use elbow macaroni if you prefer, but cavatappi is truly special here.
- Evaporated Milk & Heavy Cream: This combination creates an incredibly rich and smooth cheese sauce. Don’t substitute with regular milk; it won’t be as creamy.
- Dijon Mustard: Trust me on this one! It doesn’t make your mac and cheese taste like mustard, but it enhances the cheese flavor beautifully.
How to Make Tini’s Mac and Cheese Step by Step
First things first, preheat your oven to 350°F. While that’s warming up, grab your cheeses – the mozzarella, Colby Jack, and sharp cheddar. Shred them all into a big bowl. This is a bit of an arm workout, but it’s worth it! Once everything’s shredded, toss it all together, then set aside about half of it in a separate bowl for later. You’ll be using this for layering and that fantastic topping!
Next, get your cavatappi pasta cooking in some salted water. Follow the package directions for al dente, which means it should still have a little bite to it. While the pasta is doing its thing, you can quickly mix your seasonings: garlic powder, smoked paprika, coarse salt, and ground black pepper. Pop that in a small bowl and set it aside. Once your pasta is cooked, drain it and let it wait for its cheesy fate.
Now for the magic part – the cheese sauce! Melt your butter in a skillet. Once it’s bubbly, add half of your seasoning mix and stir it in. Then, whisk in the flour immediately. Keep whisking for a minute or two until it’s bubbling. This is your roux, the base of your thick, creamy sauce. Pour in the evaporated milk and whisk constantly. As it starts to thicken, add the heavy cream, the rest of your seasoning, and that secret ingredient, Dijon mustard. Keep whisking until it’s nice and thick.
This is where it gets really fun! Take half of your shredded cheese mixture and add it to the skillet, a handful at a time. Keep stirring until each addition is completely melted and the sauce is super thick and glossy. Now, add your cooked cavatappi pasta to this glorious cheese sauce and stir gently to coat every single noodle. Transfer half of this cheesy pasta to your 9×13-inch baking pan. Sprinkle a third of the remaining shredded cheese over it. Then, add the rest of the mac and cheese to the pan and finish it off with the remaining cheese. Bake it for 25 to 30 minutes, then broil for just 1 to 2 minutes to get that irresistible bubbly, golden brown top. Don’t forget to garnish with some fresh chopped parsley for a pop of color!
My Top Tips for Success
- I always recommend shredding your own cheese from blocks. It melts so much smoother and tastes better than pre-shredded.
- Don’t overcook your pasta! Al dente is key, as it will continue to cook a bit in the oven.
- In my experience, whisking constantly when making the roux and adding the milk is crucial for a smooth sauce with no lumps.
- Trust me on this one: the Dijon mustard is a game-changer. It really brings out the cheese flavor without making it taste like mustard.
- When broiling, keep a close eye on your mac and cheese. It can go from golden to burnt very quickly!
Common Mistakes to Avoid
- Not shredding your own cheese: Pre-shredded cheeses often contain anti-caking agents that can make your sauce gritty or less smooth.
- Overcooking the pasta: Mushy pasta leads to mushy mac and cheese. Cook it just until al dente.
- Skipping the roux step: The butter and flour mixture (the roux) is what thickens your sauce. Without it, your mac and cheese will be watery.
- Adding all the cheese at once to the sauce: Add it gradually, a handful at a time, stirring until each addition is melted. This helps prevent clumping and ensures a smooth sauce.
- Not seasoning properly: Don’t forget the salt for the pasta water and the seasoning blend for the sauce. Flavor layers are important!
How to Store Tini’s Mac and Cheese
- Refrigerate: Store leftover Tini’s Mac and Cheese in an airtight container in the refrigerator for up to 3-4 days.
- Reheat: To reheat, add a splash of milk or cream to individual servings and microwave or bake at 300°F until heated through.
- Freeze: You can freeze baked mac and cheese in an airtight, freezer-safe container for up to 2-3 months. Thaw overnight in the fridge before reheating.
Frequently Asked Questions
Can I use different types of pasta?
Absolutely! While I love cavatappi, you can definitely use other short, sturdy pasta shapes like elbow macaroni, shells, or penne. Just make sure to cook it al dente.
What if my cheese sauce is lumpy?
If your sauce has a few lumps, don’t worry! You can try whisking vigorously over low heat. For stubborn lumps, you can pass the sauce through a fine-mesh sieve before adding the cheese.
Can I make this ahead of time?
Yes, you can assemble the mac and cheese up to the point of baking, cover it, and refrigerate for up to 24 hours. Let it come to room temperature for about 30 minutes before baking, and you might need to add a few extra minutes to the baking time.
Why is my mac and cheese oily?
This can happen if you use too much fat in your roux or if you use cheeses that release a lot of oil when melted. Shredding your own cheese and sticking to the recipe amounts helps prevent this.
Can I make this spicier?
For a kick, you can add a pinch of cayenne pepper to the seasoning mix or include some diced jalapeños in the cheese sauce. A dash of hot sauce at the end is also delicious!
I genuinely hope you give this Tini’s Mac and Cheese a try in your kitchen. It’s truly a comforting classic that brings so much joy. If you make it, I’d love to hear how it turned out and if it brought a smile to your face!
PrintTini’s Mac and Cheese

A creamy, dreamy, baked mac and cheese featuring three cheeses and cavatappi pasta, perfect for any occasion.
- Prep Time: 20
- Cook Time: 45
- Total Time: 65
- Yield: 8 servings
- Category: Dinner
- Method: Baking
- Cuisine: American
- Diet: Vegetarian
Ingredients
- 1 pound mozzarella cheese
- 1 pound Colby Jack cheese
- 8 ounces sharp cheddar yellow preferred
- 1 pound cavatappi pasta
- 1 teaspoon garlic powder
- 1 teaspoon smoked paprika
- 1 teaspoon coarse salt
- ½ teaspoon ground black pepper
- 3 tablespoons salted butter
- 3 tablespoons all-purpose flour
- 1 (12 oz.) can evaporated milk
- 2 cups heavy cream
- 1 tablespoon Dijon mustard
- fresh chopped parsley for garnish
Instructions
- Preheat the oven to 350°F.
- Shred the mozzarella cheese, Colby Jack cheese, and sharp cheddar cheese into a large mixing bowl.
- Toss the cheeses together.
- Transfer half of the shredded cheese mixture to a separate bowl.
- Cook 1 pound cavatappi pasta in salted water according to package directions for al dente.
- Drain the cooked pasta and set aside.
- Combine 1 teaspoon garlic powder, 1 teaspoon smoked paprika, 1 teaspoon coarse salt, and ½ teaspoon ground black pepper in a small prep bowl.
- Set the seasoning mix aside.
- Melt 3 tablespoons salted butter in a skillet.
- Add half of the seasoning mix to the melted butter and stir.
- Immediately whisk and cook the butter/flour mixture for 1 to 2 minutes, until bubbling.
- Add the 1 (12 oz.) can evaporated milk and whisk constantly.
- Once the sauce begins to thicken and bubble in the middle of the pan, add 2 cups heavy cream.
- Add the remaining half of the seasoning mix to the sauce.
- Add 1 tablespoon Dijon mustard to the sauce.
- Whisk until the sauce is thickened.
- Add half of the shredded cheese mixture to the skillet, a handful at a time.
- Stir until the cheese is completely melted and the sauce is thick.
- Add the cooked pasta to the cheese sauce.
- Stir to coat the pasta.
- Transfer half of the pasta mixture to a 9×13-inch baking pan.
- Layer with a third of the remaining cheese.
- Add the rest of the mac and cheese on top.
- Finish with the rest of the cheese.
- Bake for 25 to 30 minutes.
- Broil for 1 to 2 minutes to give the mac and cheese a bubbly, golden brown top.
- Garnish with fresh chopped parsley.
Notes
Always shred your own cheese for the smoothest, creamiest sauce.
Cook pasta al dente as it will continue to cook in the oven.
Whisk constantly when making the roux to prevent lumps.
Keep a close eye on the mac and cheese while broiling to avoid burning.


