
Every Halloween, my kitchen turns into a little spooky bakery, and these Halloween Shortbread Cookies are always the star of the show! There’s just something so comforting about the smell of butter and vanilla mixing with a hint of chocolate and those fun, festive sprinkles. They’re simple enough for a weeknight treat, but special enough for a party. My family begs for them every year, and honestly, I love making them just as much as they love eating them!
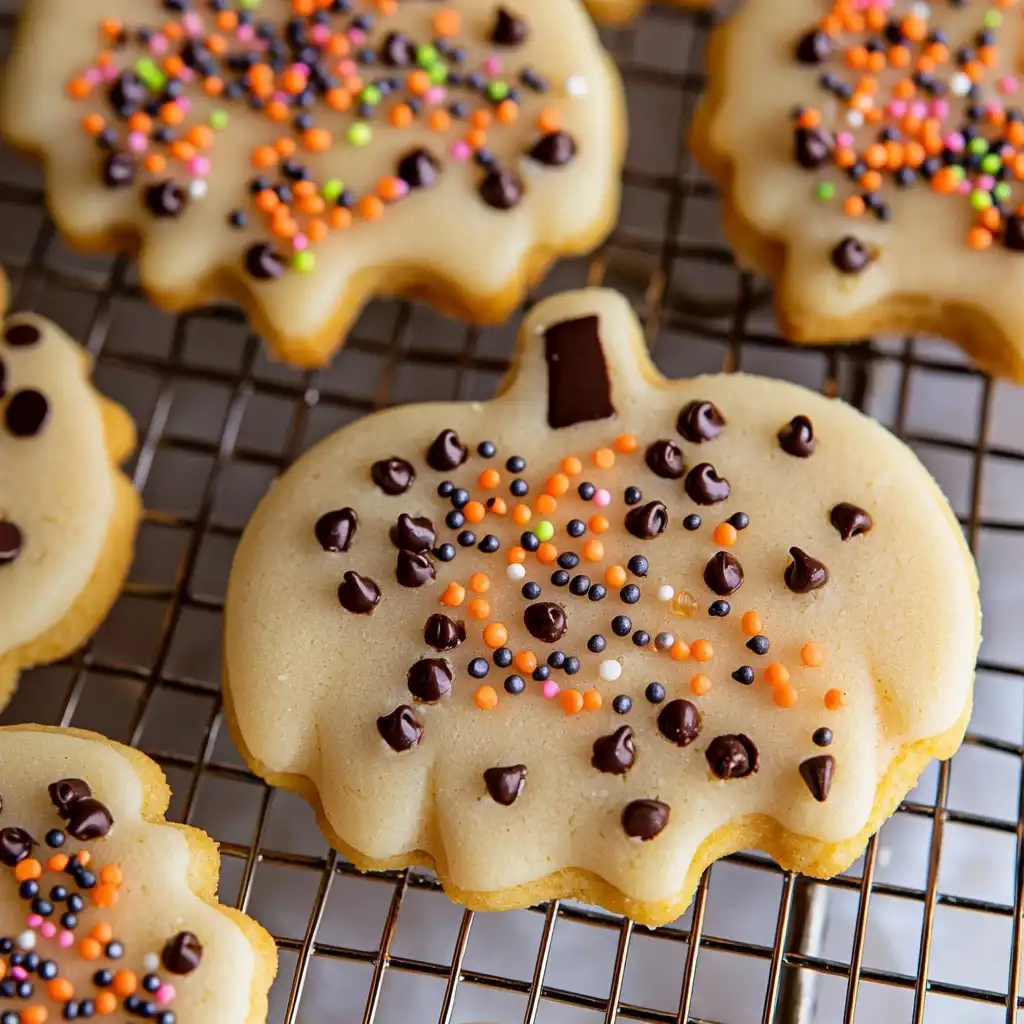
Why You’ll Love These Halloween Shortbread Cookies
- They’re incredibly buttery and tender, melting in your mouth with every bite.
- You can make them two ways: easy slice-and-bake or fun cut-out shapes!
- The subtle sweetness and hint of chocolate are perfectly balanced.
- They’re a super festive and delicious treat for any Halloween gathering!
Ingredients You’ll Need
- Unsalted Butter: Using unsalted butter gives you control over the salt content. Make sure it’s at room temperature so it creams easily with the sugar, creating a light and airy base for your cookies.
- Powdered Sugar: This fine sugar dissolves beautifully, giving the shortbread its signature tender texture. Granulated sugar would make them a bit crispier.
- Large Egg Yolk: The yolk adds richness, helps bind the dough, and contributes to that tender, melt-in-your-mouth quality. Make sure it’s at room temperature too!
- Vanilla Extract: Use good quality vanilla! It makes a huge difference in the overall flavor of these simple cookies.
- All-Purpose Flour: The structure of our shortbread. Don’t overmix once it’s added, or your cookies can become tough.
- Salt: A little salt balances the sweetness and enhances all the other flavors.
- Mini Semisweet Chocolate Chips: These add little pockets of chocolatey goodness. Using mini chips ensures they distribute well and don’t make the dough too difficult to work with.
- Halloween Sprinkles: The festive touch! These are mixed into the dough and can also be used as a decoration on top.
How to Make Halloween Shortbread Cookies Step by Step
First things first, let’s get that butter and sugar nice and fluffy! In a big mixing bowl, you’ll want to combine your room temperature unsalted butter and powdered sugar. Grab your electric mixer and beat them together on medium speed for about three whole minutes. You’re looking for a light, fluffy, almost pale mixture – this is where the magic starts for that tender shortbread texture!
Next, we’ll build on that creamy base. Beat in your vanilla extract – oh, the smell is just divine! Then, add your room temperature egg yolk and beat it in until everything is well combined. Now, it’s time for the dry ingredients. Turn your mixer down to low speed and add the all-purpose flour and salt. Mix just until you see no more streaks of flour. Don’t overdo it here, or your cookies might get tough. Finally, gently stir in those mini chocolate chips and most of your Halloween sprinkles by hand. Save about a tablespoon of sprinkles for later!
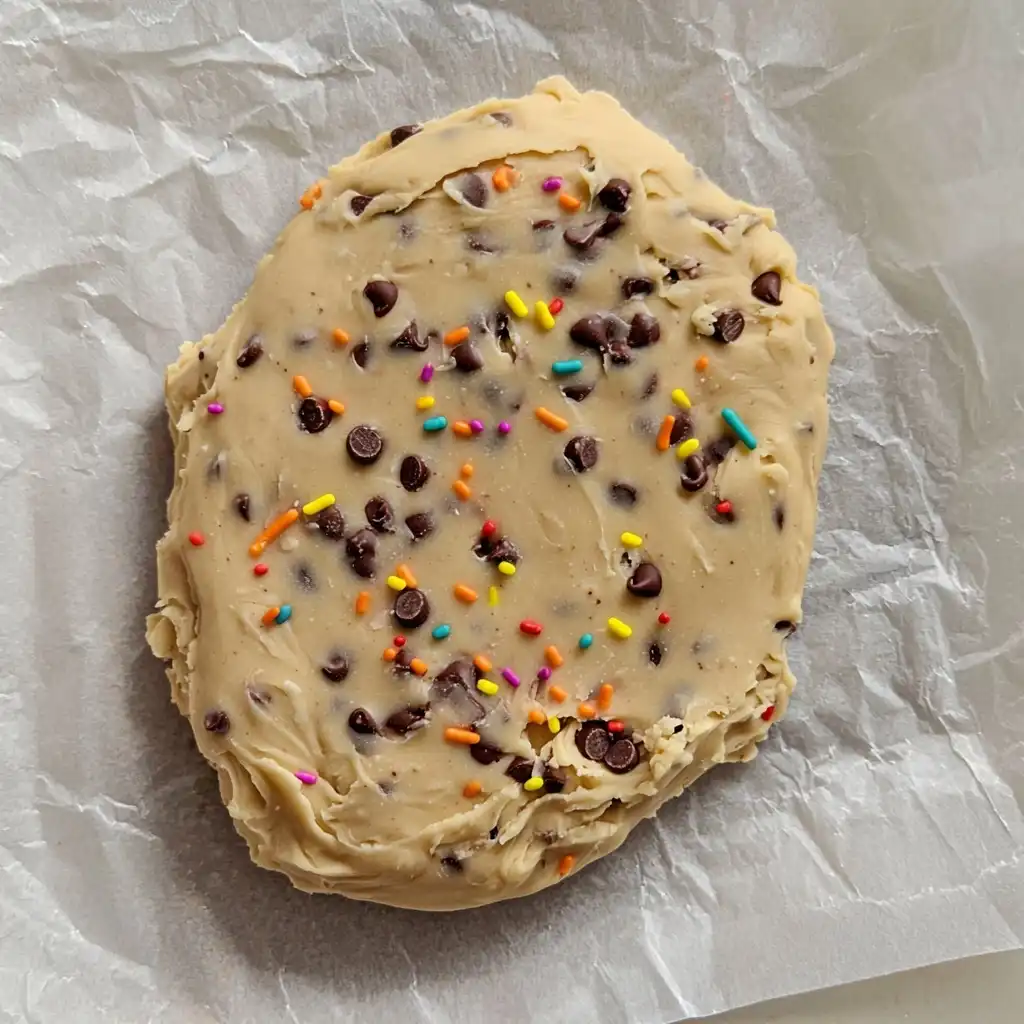
Now for the fun part – shaping! If you’re going for slice-and-bake cookies, form your dough into a 10-inch log, wrap it in plastic wrap, and chill it for about two hours until it’s nice and firm. Then, you’ll slice it into ¼-inch rounds and bake! If cut-out cookies are more your style, divide the dough in half. Roll each half out on lightly floured parchment paper to about ¼-inch thick. You can even sprinkle a few extra sprinkles on top and gently roll them in to set. Chill these flattened dough pieces for two hours. Once firm, you can easily cut out your spooky shapes with cookie cutters. Don’t forget to gather and re-roll any scraps once to get more cookies! Chill all your shaped cookies for a final 20 minutes before baking at 350°F for 10-12 minutes until the edges are just golden. Let them cool on the baking sheets for a bit before moving them to a rack.
My Top Tips for Success
- Room Temperature Ingredients: Always use room temperature butter and egg yolk. This helps them emulsify properly, creating a smoother dough and a better cookie texture.
- Don’t Overmix: Once you add the flour, mix only until just combined. Overmixing develops the gluten, leading to tough cookies instead of tender shortbread.
- Chill Time is Key: Trust me on this one – do NOT skip the chilling steps! It prevents spreading, makes the dough easier to handle, and results in perfectly shaped cookies.
- Parchment Paper Power: I always roll out my cut-out cookie dough between two sheets of parchment paper. It prevents sticking and makes transferring a breeze.
- Gentle Rerolls: If you’re making cut-outs, only re-roll dough scraps once. Each re-roll incorporates more flour and can make the cookies tough.
- Watch for Doneness: Shortbread doesn’t get deeply golden. Look for just a hint of gold around the edges. Overbaking will dry them out.
Common Mistakes to Avoid
- Using cold butter: This will result in a lumpy dough that’s hard to work with and won’t cream properly, leading to a less tender cookie. Always plan ahead and let your butter soften.
- Overmixing the dough: As mentioned, too much mixing after the flour is added develops gluten, making your shortbread tough and chewy instead of crumbly and tender. Mix until just combined.
- Skipping the chilling step: Chilling is crucial! Without it, your cookies will spread excessively in the oven, losing their shape. It also helps the flavors meld.
- Not flouring your surface (for cut-outs): If you’re rolling out dough for cut-outs, a lightly floured surface (or parchment paper with a dusting) prevents sticking and makes cutting much easier.
- Overbaking the cookies: Shortbread is meant to be pale with just golden edges. If you bake them until they’re deeply browned, they’ll be dry and hard.
How to Store Halloween Shortbread Cookies
- At Room Temperature: Store cooled cookies in an airtight container for up to 5-7 days.
- In the Freezer (Baked): Place cooled cookies in a single layer on a baking sheet to freeze solid, then transfer to an airtight freezer-safe container or bag for up to 3 months. Thaw at room temperature.
- In the Freezer (Dough): Wrap the dough log or flattened discs tightly in plastic wrap, then foil. Freeze for up to 3 months. Thaw in the refrigerator overnight before slicing or cutting and baking.
Frequently Asked Questions
Can I use regular granulated sugar instead of powdered sugar?
While you can, powdered sugar is recommended for its fine texture, which contributes to the characteristic melt-in-your-mouth tenderness of shortbread. Granulated sugar would make the cookies a bit crispier.
Why did my cookies spread too much?
The most common reasons are using butter that was too warm or not chilling the dough long enough. Always ensure your dough is firm before baking to prevent spreading.
Can I make these cookies ahead of time?
Absolutely! The dough can be made and chilled for up to 3-4 days in the refrigerator, or frozen for up to 3 months. You can also bake the cookies ahead and freeze them.
What kind of sprinkles work best?
Any Halloween-themed sprinkles work great! For mixing into the dough, smaller, sturdier sprinkles (like jimmies or nonpareils) tend to hold their color and shape better than delicate sugar shapes.
Can I add other flavorings?
Yes, you can! A pinch of almond extract or a little citrus zest (orange or lemon) would be lovely additions. Just be mindful not to add too much liquid that could alter the dough consistency.
I hope these Halloween Shortbread Cookies bring as much joy and deliciousness to your spooky season as they do to mine! They’re truly a simple pleasure, perfect for sharing with friends and family. If you give them a try, I’d absolutely love to hear how they turn out!
PrintHalloween Shortbread Cookies

Buttery, tender shortbread cookies packed with chocolate chips and festive Halloween sprinkles, perfect for a spooky treat.
- Prep Time: 25
- Cook Time: 12
- Total Time: 157
- Yield: 24 cookies
- Category: Dessert
- Method: Baking
- Cuisine: American
- Diet: Vegetarian
Ingredients
- 1 cup unsalted butter room temperature
- ⅔ cup powdered sugar
- 1 large egg yolk room temperature
- 1 teaspoon vanilla extract
- 2¼ cups all purpose flour
- ¼ teaspoon salt
- ½ cups mini semisweet chocolate chips plus more for melting (optional)
- ⅓ cup Halloween sprinkles* divided
Instructions
- In a large mixing bowl, cream the butter and sugar with an electric mixer on medium speed.
- Beat for about 3 minutes until fluffy.
- Beat in the vanilla extract.
- Beat in the egg yolk.
- Turn the mixer to low speed.
- Add the flour.
- Add the salt.
- Mix until just incorporated.
- Stir in the chocolate chips.
- Stir in all but 1 tablespoon of the sprinkles.
- Do not overmix.
- Choose your shaping method: slice and bake or cut out.
- To make slice and bake cookies: Form the dough into a 10-inch log.
- Roll the log in plastic wrap.
- Chill the log for about 2 hours or until firm.
- Line two baking sheets with parchment paper.
- Place the rounds on the prepared baking sheets about 1″ apart.
- Continue to the baking step.
- To make cut out cookies: Divide the dough in half.
- Roll each half out on sheets of parchment paper lightly dusted with flour.
- Roll out to about 1/4 inch thick.
- Sprinkle extra sprinkles over the dough (optional).
- Lightly roll a rolling pin over the dough a couple of times to set the sprinkles.
- Lift the dough with the parchment paper.
- Place each rolled dough half on a baking sheet.
- Cover with plastic wrap.
- Chill in the refrigerator for two hours.
- Once chilled, lift the parchment paper off the tray and place it on the counter.
- Run a long knife between the parchment paper and the cookie dough to release.
- Cut out the cookies with cookie cutters.
- Place the cut-out cookies on a baking tray lined with parchment paper.
- Gather and gently re-roll the dough scraps once.
- Cut out more cookies from the re-rolled dough.
- Add these cookies to the tray.
- Chill all cookies on the tray for 20 minutes.
- Preheat oven to 350 F.
- Bake for 10-12 minutes until the edges just begin to turn golden brown.
- Let cool on the baking sheets for 10 minutes.
- Transfer them to racks to cool completely.
- To decorate with melted chocolate: Melt some extra chocolate chips in the microwave in 10-second bursts.
- Stir in between each burst until chocolate has melted.
- Place melted chocolate in a sandwich zip lock bag.
- Snip off a small part of a corner of the bag.
- Use the bag to draw on the cookies.
Notes
Always use room temperature butter and egg yolk for a smooth, cohesive dough.
Do not overmix the dough once flour is added to ensure tender shortbread.
Chilling the dough is essential to prevent spreading and maintain cookie shape.
For cut-out cookies, lightly flour your parchment paper to prevent sticking.
Watch baking times closely; shortbread should be pale with just golden edges.


