Strawberry Cheesecake Bars
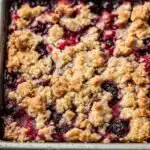
Buttery shortbread crust, creamy vanilla bean cheesecake, and a vibrant strawberry jam swirl make these bars an irresistible treat.
- Prep Time: 40
- Cook Time: 50
- Total Time: 650
- Yield: 16 servings
- Category: Dessert
- Method: Baking
- Cuisine: American
- Diet: Vegetarian
Ingredients
Scale
- 2 cups whole frozen strawberries
- 2 tablespoons granulated sugar
- 2 teaspoons fresh lemon juice
- 2 teaspoons cornstarch
- 2 teaspoons water
- 1 1/2 cups + 2 tablespoons all-purpose flour
- 2/3 cup powdered sugar
- 2/3 cup finely crushed Nilla wafers
- 1/4 teaspoon fine sea salt
- 3/4 cup unsalted butter room temperature
- 1/3 cup brown sugar packed
- 1 large egg room temperature
- 1 teaspoon vanilla bean paste or extract
- 7 ounces full-fat block cream cheese room temperature
- 1/3 cup granulated sugar
- 2 large eggs room temperature
- 1 teaspoon vanilla bean paste
- 1 cup + 1 tablespoon thick whole milk ricotta cheese room temperature
- 1 tablespoon cornstarch
Instructions
- Combine the strawberries, 2 tablespoons granulated sugar, and lemon juice in a small saucepan.
- Cook over medium heat, stirring and mashing occasionally, until the strawberries are fully broken down and the juices are bubbling.
- In a small bowl, stir together 2 teaspoons cornstarch and 2 teaspoons water to make a slurry.
- Add the cornstarch slurry to the jam.
- Continue cooking for 2 minutes, or until the jam has thickened.
- Transfer the jam to a bowl and let it cool completely.
- Preheat the oven to 350°F (180°C).
- Line an 8×8-inch baking pan with parchment paper, leaving an overhang on all sides.
- In a medium bowl, whisk together the all-purpose flour, powdered sugar, crushed Nilla wafers, and fine sea salt.
- In the bowl of a stand mixer, cream the unsalted butter and brown sugar for 3 minutes, until light and fluffy.
- Mix in 1 large egg and 1 teaspoon vanilla bean paste or extract until just combined.
- Add the dry ingredients to the butter mixture.
- Mix until a soft, slightly tacky dough forms.
- If the dough is too sticky, mix in additional flour 1 tablespoon at a time until manageable.
- Press half of the dough (about 320 g) evenly into the prepared 8×8-inch pan to form the crust.
- Reserve the remaining dough for the topping.
- Refrigerate both portions of dough (crust in pan and reserved dough) while you prepare the cheesecake filling.
- In the bowl of a stand mixer fitted with the paddle attachment, beat the cream cheese and 1/3 cup granulated sugar until smooth and lump-free.
- Scrape down the bowl.
- Add 2 large eggs one at a time, mixing just until incorporated.
- Scrape down the bowl between egg additions.
- Mix in 1 teaspoon vanilla bean paste.
- Add the ricotta cheese and mix until smooth.
- Scrape down the bowl.
- Mix in 1 tablespoon cornstarch until fully incorporated.
- Pour the cheesecake filling over the chilled shortbread crust in the pan.
- Spread the filling into an even layer.
- Dollop the completely cooled strawberry jam over the cheesecake filling.
- Gently spread the jam across the surface of the filling.
- Break the remaining reserved shortbread dough into small crumbles.
- Scatter the crumbles evenly over the top of the jam and cheesecake.
- Bake for 40–50 minutes, or until the center registers 155°F and the bars jiggle slightly as one when gently shaken.
- Let the bars cool completely in the pan on a wire rack, until the bottom of the pan no longer feels warm.
- Cover the pan and refrigerate for at least 6 hours, or overnight, before slicing.
- When ready to cut, dust the top of the bars with powdered sugar.
- Use a sharp knife warmed under hot water and wipe the blade clean between each cut.
Notes
Ensure all cold ingredients like cream cheese, butter, and eggs are at room temperature for a smooth consistency.
Cool the strawberry jam completely before adding it to the cheesecake filling to prevent bleeding.
Chill the bars for at least 6 hours or overnight for clean, firm slices.
Warming your knife under hot water and wiping it clean between cuts will give you neat, professional-looking slices.
Find it online: https://timelesscrumb.com/strawberry-cheesecake-bars/